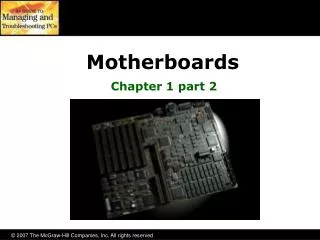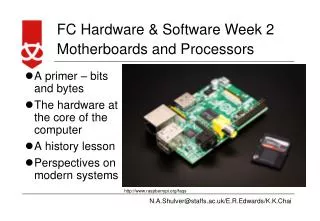
Motherboards
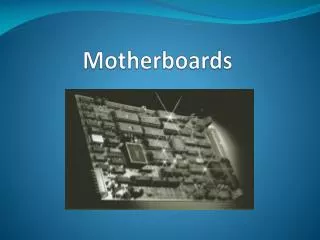
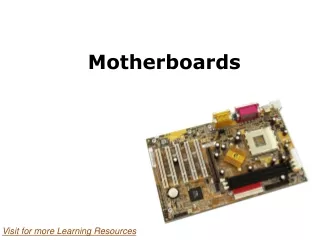
Motherboards. The foundation of the Personal Computer. Physical Construction. Fiberglass layers Copper foil – etched to make “traces” or connection “wires” Can be up to five layers “Plated through holes” to connect traces from one layer to another. Classification Characteristics.

Motherboards
E N D
Presentation Transcript
Motherboards The foundation of the Personal Computer
Physical Construction • Fiberglass layers • Copper foil – etched to make “traces” or connection “wires” • Can be up to five layers • “Plated through holes” to connect traces from one layer to another
Classification Characteristics • Layout – or form factor. Defines what type of case is required • Chipset – Defines the type of processor, memory and expansion bus. • Components – determine the functionality and the rest of the expandability of system
Form Factor • The particular way components are positioned on a motherboard • Three basic form factors: AT, ATX and BTX and a handful of variations • Cases are designed to work with just one form factor as are power supplies
AT Form Factor • Just one connector – for keyboard. Large (1/2”), five-pin connector • Processor socket at opposite end of board • P8 and P9 style power supply sockets • Later AT’s had pin connectors for serial and parallel ports – used “dongles” to get ports to back of case • Used ISA slots; limited System Resources
Baby AT • Smaller than AT, but same basic layout • For smaller cases
LPX and NLX • Slim-line or Low Profile motherboards for “desktop” or “pancake” systems • Use a “riser slot” to allow expansion cards to be parallel to motherboard
ATX form factor • About 1995 for introduction, 1998 for mainstream • Utilizes PCI slots • Better power control – read software can turn off system or components (hard disk drive and/or video). Called Soft Power. • Shift to PS/2-style keyboard and mouse ports • P1 style power connector
MicroATX • Smaller than ATX • Fits in standard ATX case or smaller microATX case (E-Machines, Compaq) • Fewer expansion slots; usually more built in connectors
Proprietary Motherboards • HP, Compaq, Sony, Gateway • Non-standard power supplies, power connectors and front panel connectors • Sends you to them for parts – read $$$
Chipset Varieties • Defines processor, RAM, expansion • Northbridge now gets its own heat sink • NB handles CPU and RAM • Southbridge handles hard disk drive, floppy drive, expansion slots, serial and parallel ports • Needs BIOS support, only some of which is in System ROM; remainder in drivers specific to chipset and OS • CD ships with motherboard in box • Intel uses Memory Controller Hub (MCH) and I/O Controller Hub (ICH)
Ode to Mike • No, you do NOT have to know chipsets by number… • He just got through saying that 100 sets are produced each year (that’s a bit optimistic) • And no, techs don’t love to talk about chipsets – rather talk about clients.
845 Chipset 15
Where for the Dollars? • Newer chipset makes the motherboard more expensive because it is more expansive • Older chipset might work just fine for the application(s) at hand • You can “read” the chipset by looking at what the motherboard supports (the specs)
Three Tasks • A card needs to be built specifically for the expansion slot – the right signals at the right place. Connectivity • Card needs some way to communicate with the CPU – in and out. Communication • Operating System needs some way to allow user to control the device/card. Drivers
Structure • Expansion bus(es) connect to the chipset And PCIe
Speed • CPU (and Northbridge) tied to System Crystal • Almost all chips/devices have clock wire for timing • This could lead to lots of devices at each specific speed (66, 100, 133, etc.) • Solution is to add an Expansion Crystal for consistent timing on the bus
Enter PCI • Intel gets credit for this one (1993) • Peripheral Component Interconnect • 32-bit, 33 MHz; “mezzanine” bus as it sits between FSB and rest of expansion bus (ISA) • Self-configuring (PnP), allows Ultra-DMA (bus mastering) • Uses sharable Interrupt Channels (INTA, INTB, C and D) • Supports I/O addresses above 3F8 to FFFF
Honorable Mention to AGP • Video demands keep pushing bus improvements • Accelerated Graphics Port • PCI slot with its own connection to Northbridge • This, and more, when we do Video chapter
PCI - X • PCI Extended • 64-bit slot for servers, Mac G5 • Four speeds: 66, 133, 266 and 533. 266 is double-pumped 133; 533 is quad-pumped. • Not going to see this on the desktop.
PCI Express • PCIe –xN. PCI express by “N” (some number of lanes wide). About 2004-5 • Serial connection (differential signals) • Not a shared bus like all before it; each connection direct to Northbridge chip
PCIe Speed • PCIe 1.0 at 2.5 Gbps; 2.0 at 5Gbps • 1,2,4,8 or 16 lanes • Total 16Gbps for x16 slot
Installing Expansion Cards • Need to know that the card works with OS and motherboard • Insert card properly – don’t break things and beware of ESD • Provide drivers – specific to card and OS • Verify proper operation
Will it work? • Will it work with your motherboard? • Can’t install PCIe-x16 video card in AGP slot • Can’t install ISA sound card in PCI-only m/b • Will it work with your OS? • This will be an issue for Windows 7 (?) • Always an issue with new OS • Is device on the Hardware Compatibility List (HCL) or Windows Marketplace?
Drivers • Expansion cards WILL have a floppy/CD with driver(s) in the box. • Read the directions to determine what’s first: device install or driver install • Video cards usually need old (card) drivers removed first; usually in Add/Remove Programs • Remove All-In-One printer controls from Add or Remove Programs too.
More Drivers • A lot of drivers are “unsigned” – usually means they did not pay Microsoft to test the driver. It’s not as scary as it looks. • If you have to force the Add Hardware Wizard you probably did something wrong • 64-bit Vista and 7 require driver signing • Usually have to have Administrator permissions to install card
Verify Operation • Don’t leave until you have verified operation of the expansion card. • Device Manager is a good place to check after install and driver install • Have the device do its something just to make sure all is well (and client is happy)
Physical Installation • Do you have an available slot? • Beware ESD • Beware the 5v on the motherboard – pull the plug during installation • Handle the card carefully – don’t get “wet” fingerprints on connector. • Insert, and remove, card at a slight angle • Install the attachment screw before you power up the system
Installation Order • Most video cards today require that you • uninstall current video drivers (revert back to generic Microsoft driver) • install new driver software • Remove old card and install new card • Finish (driver) installation • Always read installation instructions first
Preventative Maintenance • Don’t use pencil eraser to “clean” contacts, rather, use canned contact cleaner – but only if card has had a long shelf life. • Sometimes removing and reseating a card a time or two will bring the card back to life. • The attachment screw WILL line up with hole if you have installed card correctly
Trouble - Visable • Device Manager error indicators: • Yellow circle with black exclamation point usually means driver is damaged • Red “X” symbol means device is disabled and not working • Yellow question mark is found device but lacking correct driver(s).
Trouble – Not Visible • Windows should recognize new card on bootup and ask for driver(s). If it does not ask, you (or card) failed some step. • USB devices should be recognized on connection. • Drivers, drivers, drivers • Get an account at DriverGuide.com (old advice) – get a new card • Could be that device is turned off in CMOS
Upgrade/Replace Motherboard • Was a straight forward process with Win 98. It would complain, but after a few restarts and driver installs would be happy with a new motherboard. • XP to 7, by contrast, often locks up at new motherboard – you may need to reinstall OS and applications. Factor that into upgrade plans. And re-activate, too.
Get the right case • AT motherboards required AT case (and power supply). • Desktop cases require smaller board (NLX). • Mini-Tower is going to need microATX board.
Just do it • Label stuff as you go along. • Unplug all connectors (ribbon cables, power cables and front panel cables). • Remove all expansion cards. • Remove all the board screws. • CPU, heat sink and RAM best handled outside of the case. Remove once board is out, replace before board goes into case. • Watch out for ESD. • Replace in reverse order. 10
Front Panel LEDs • Not light bulbs – have a positive (color) wire and negative (white) wire. Backwards won’t harm board, just won’t light the LED. • System will work without LEDs, but is more pretty with them working. • Use the motherboard book or go to the web if in doubt.