Installing Windows XP Professional
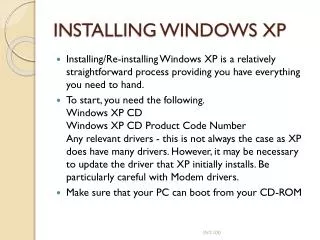
Installing Windows XP Professional. 70-270: MCSE Guide to Microsoft Windows XP Professional. Upgrading Versus Installing. Choose between: Upgrading A "clean" installation. Upgrading (Page 1). Possible if previous version of Windows already is installed

Installing Windows XP Professional
E N D
Presentation Transcript
Installing Windows XP Professional 70-270: MCSE Guide to Microsoft Windows XP Professional
Upgrading Versus Installing • Choose between: • Upgrading • A "clean" installation
Upgrading (Page 1) • Possible if previous version of Windows already is installed • Upgrading can an preserve settings … • Password files, desktop settings, general or network configurations, installed programs, etc. • System utilities and device drivers unique to the old O/S will be lost
Upgrading (Page 2) • Upgrades are possible from: • Windows 95 OSR2,Windows 98,Windows 98 SE, and Windows ME • Windows NT 4.0 Workstation (with Service Pack 6 or later) • Windows 2000 Professional (with any service packs) • Windows XP Home Edition • Windows 95 (retains less information since Microsoft no longer supports it)
Upgrading (Page 3) • To perform the upgrade: • Backup all data—also make certain you have all program installation disks (just in case) • Select the executable file winnt32.exe from the "\I386" folder on the installation CD (this is the installation application for most installs) • Only if the install application does not run automatically when the CD is inserted • Select "Upgrade (Recommended)" from the drop-down menu
Data File Backup Considerations • If backing up from Windows 95, Windows 98, Windows SE or Windows ME: • Do not backup files that were compressed using older version of Windows backup utility—Windows XP backup not compatible with earlier versions • One of two XP Professional utilities, run before the upgrade, help to retain many personal system settings and data files: • "Files and Settings Transfer Wizard" • "User State Migration"
Device Driver Considerations • Most drivers will be updated automatically during the installation • Nonstandard or obscure drivers may need to be replaced if possible • Or entire device may need to be removed or replaced with one on the HCL list (most commonly video drivers)
Clean Installation • Installs new version • No settings maintained • Good option for system with problems • Only option if no version of Windows from the previous compatibility list is installed
Windows XP Upgrade Advisor • An Internet utility that inspects a computer to determine if the hardware and software are compatible with Windows XP • www.microsoft.com/windowsxp/pro/howtobuy/upgrading/advisor.asp (over 50 MB) • After download, select "Upgrade Advisor" and follow the wizard-like prompts • A report listing any problems can be saved to a file for future reference • Can only be used on a system with an existing Windows O/S
Booting Multiple Operating Systems • Install more than one O/S on the same computer in separate partitions • Windows XP should be installed last • Older versions first in chronological order • If not, XP will not update the boot partition's files and none of the other O/S's can boot • The boot loader is the software that shows all currently available operating systems • Windows XP can be dual-booted with any Microsoft O/S, OS/2, Linux, etc.
Planning The Installation (Page 1) • Attended or unattended? • Which partition? • Computer must meet minimum hardware requirements • "Setup" program checks at start of installation and will terminate automatically if not • Automatically configures Windows XP for multiprocessor system (up to two) • If present on the system • Reinstall XP if additional processor added later
Planning The Installation (Page 2) • Decide upon upgrade or clean installation • Upgrade possible if: • Current O/S supported as one to which Windows XP Professional can upgrade • Goal is to retain as much configuration and setting information as possible • You are prepared to handle hardware and software incompatibilities that may arise
Planning The Installation (Page 3) • Clean installation necessary if: • Hard drive has been formatted, or new hard drive is installed • Installation is over an existing O/S not on the list of supported operating systems • A partitioned disk is being used to create multi-boot system with Windows XP installed last
Types Of Attended Installations • Choice between: • Network installation • CD installation (faster)
Installing over the Network • Launch setup routine (either winnt.exe or winnt32.exe) from network share • If launching setup from: • MS-DOS or Windows 3.x, run winnt.exe • Windows 95/98/NT/2000/XP/2000, run winnt32.exe • Create a share on either the server's CD-ROM or hard drive • The "\I386" folder on the installation CD contains the files
Activity 2-1: Network Installation Setup • http://course.labmentors.com • Objective: Prepare a Windows 2000 Server or Windows Server 2003 as a network installation point for Windows XP Professional • Follow instructions to share CD-ROM folder and set permissions
CD-ROM Installation Launched from Setup Boot Floppies (Page 1) • In some instances it may be necessary to start with setup boot disks (or floppies) before installing from local CD-ROM: • Must install storage drivers manually • System will not boot from the CD (it should) • No existing O/S • No network access
CD-ROM Installation Launched from Setup Boot Floppies (Page 2) • To begin the process: • Place XP Professional CD into HCL-compliant CD-ROM drive • Place first of setup boot disks into floppy drive • Reboot system • The installer will be prompted to enter each floppy in sequence • If necessary, create new setup floppies • The utility is available is available for download from www.microsoft.com/downloads (search the site using keywords "xp setup disks"
Using a Bootable CD • The Microsoft Windows XP Professional CD is self-booting • Bypasses setup floppies by booting from CD • Fastest and most common method • Will work with or without either: • An O/S installed on the machine • Network access
Setup Initializations • The two stages of installation process are: • Text Mode Setup • GUI Setup Method
Text Mode Setup • The first part of the install process • Necessary when not installing on a machine with a preexisting Windows O/S • A series of prompts ask for various setup options • After this text-only portion is complete, advances on to the GUI section
GUI Setup Method • The initialization "Setup Wizard" can skip the text-only section if several setup options are pre-selected (predefined) • Determined by accepting those settings from the previous Windows O/S • Installation begins by asking if this is an upgrade or a clean install
GUI Setup Method--Upgrade • If an upgrade: • Prompts to accept the license agreement • Copies required files to hard drive • Reboots system • Runs through text-only portion without prompts • Proceeds to GUI portion
GUI Setup Method—Clean Install (Page 1) • Prompts installer for the license agreement and product key • "Setup Options" page provides: • "Advanced Options" button • Source path (default is cdrom_drive:\I386) • System root folder where Windows XP will be installed (default folder is \windows) • Determine whether to copy all files from CD before rebooting • Whether to allow manual selection of the destination partition (select check box or first partition is selected by default)
GUI Setup Method—Clean Install (Page 2) • "Setup Options" page (con): • "Accessibility Options" button including the magnifier and narrator options • Primary language drop-down menu
GUI Setup Method—Clean Install (Page 3) • Asks if you want to upgrade drive with NTFS (the NT file system for increased security) • Asks if you want to download the most recent setup files from Microsoft Website (known as Dynamic Update): • New feature which enables Setup to download updates and patches for Windows XP before installation begins • Windows Update lets you install recent patches anytime after installation is complete
GUI Setup Method—Clean Install (Page 4) • Setup copies required files to hard drive • Reboots system • Runs through text-only portion without prompts for options that are predefined • Completes the majority of the installation in GUI mode
Partitioning The Hard Disk • Active partition • Houses the Windows XP boot files • To partition: • Use the MS-DOS command fdisk.exe before installation • Or disk can be partitioned during Windows XP setup • To remove partitions: • Use delpart.exe command
Why Partition the Hard Drive? • To create one partition for Windows XP and applications, and another for data files • To create a multi-boot (dual O/S) system • To create an MS-DOS partition for running diagnostic software/utilities that only run under DOS
Activity 2-4: Disk Partitioning • http://course.labmentors.com • Objective: Remove and create partitions using the FDISK command • Boot to DOS • Locate and use FDISK
Volume Licensing • All Windows XP installations must have a valid user license • Volume licensing is cost effective for multiple machines • Comes on a special version of Windows XP Professional installation CD • Includes special 25-digit product key (single user and volume user keys not interchangeable) • Can purchase from 5 to over 100,000 volume licenses
Windows XP Professional Setup • Step-by-step from floppies (if computer does not support bootable CD's) or from a bootable CD • Not difficult, installation procedure is fairly self-regulating and self-healing • If a problem is encountered, rebooting or starting over usually solves it • See chapter on "Troubleshooting Windows XP" if installation continues to fail
Activating Windows XP (Page 1) • Product has finite initial functional lifetime • Microsoft's effort to minimize piracy • Must be activated within 30 days after initial installation to continue functioning • Product activation: • System hardware is identified and matched with product license on Microsoft database • Anonymous but specific enough to ensure that the product key is not used to install Windows XP from that disk to another computer
Activating Windows XP (Page 2) • Advantages: • Ensures you have a fully licensed product • Drawbacks: • Hardware changes may invalidate activation (you can reactivate by contacting Microsoft) • Difficult if system lacks Internet access (you can activate by phone during the installation) • Can be completed during or after setup • Additional registration is optional
Activity 2-5: Manual Install of Windows XP • Objective: Install Windows XP without using any of the automated features (unattend file, RIS, imaging, etc.) • Follow instructions to perform installation • The LAN driver should be installed after the Win XP installation is complete • After Internet connectivity is established, activate Windows XP
Advanced Customized Installation Options • Windows XP supports both unattended and customized installation options • Attended installations may not be desirable if they are hundreds or even thousand of clients on which Windows XP must be installed • Cloned (ghosted) hard drives poor solution if each workstation has unique setup values • Unattended and customized installations require significant system and setup script preparation and pre-configuration
Unattended Installations (Page 1) • Similar to attended installations except an answer file (a script) provides responses • The answer file also may be used to install additional applications after Windows XP has been installed
Unattended Installations (Page 2) • A uniqueness database file (UDF) may be used in conjunction with the answer file • Overrides selected settings in the answer file for each individual computer • Useful from implementing changes for some clients without updating answer file
Running an Unattended Installation (Page 1) • If running winnt.exe at command prompt: • Include the /U (specifies it is an unattended installation) and /S options • Running winnt32.exe at command prompt: • Include the /UNATTEND and /S options • The location of "unattend.txt" file is specified with the /S option • The name of a UDF file may be specified with the /UDF option
Running an Unattended Installation (Page 2) • Command line example: winnt32.exe /unattend /s:C:\local\source\i386 /udf:%compName%,M:\Control\unique.udb • This all is on a single command line
The UNATTEND.TXT File • Text file that contains the default settings for an unattended installation • Modify manually (i.e. with Notepad) or with the "Setup Manager Wizard" • Full file parameter specifications at: • http://www.microsoft.com/technet/prodtechnol/Windows2000Pro/deploy/unattend/sp1ch01.mspx
Setup Manager Wizard • Used to create various installation scripts including "unattended.txt" • May be installed from: • The "Windows Support Tools Setup Wizard" found in \support\tools on the XP installation disk; run the command setup.exe • The deploy.cab file (a compressed WinZip file) in the \support\tools folder on XP installation disk; double-click file and extract setupmgr.exe • Run the setupmgr.exe to execute "Setup Manager Wizard"
UNATTEND.TXT (Page 1) ; Microsoft Windows Codename Whistler Personal, Professional, Server, Advanced Server and Datacenter ; (c) 1994 - 2000 Microsoft Corporation. All rights reserved. ; ; Sample Unattended Setup Answer File ; ; This file contains information about how to automate the installation ; or upgrade of Windows Codename Whistler so the ; Setup program runs without requiring user input. ;
UNATTEND.TXT (Page 2) [Unattended] Unattendmode = FullUnattended OemPreinstall = NO TargetPath = * Filesystem = LeaveAlone [UserData] FullName = "Your User Name" OrgName = "Your Organization Name" ComputerName = * ProductKey= "JJWKH-7M9R8-26VM4-FX8CC-GDPD8"
UNATTEND.TXT (Page 3) [GuiUnattended] ; Sets the Timezone to the Pacific Northwest ; Sets the Admin Password to NULL ; Turn AutoLogon ON and login once TimeZone = "004" AdminPassword = * AutoLogon = Yes AutoLogonCount = 1
UNATTEND.TXT (Page 4) [LicenseFilePrintData] ; For Server installs AutoMode = "PerServer" AutoUsers = "5" [GuiRunOnce] ; List the programs that you want to launch when the machine is logged into for the first time
UNATTEND.TXT (Page 5) [Display] BitsPerPel = 8 XResolution = 800 YResolution = 600 VRefresh = 70 [Networking] [Identification] JoinWorkgroup = Workgroup
Sample UDF (Page 1) [Unique IDs] UserID1 = UserData,GuiUnattended,Network UserID2 = UserData,GuiUnattended,Network
Sample UDF (Page 2) [UserID1:UserData] FullName = "Hans Delbrick" ComputerName = "Monster" [UserID1:GuiUnattended] TimeZone = " (GMT+01:00) Prague, Warsaw, Budepest" [UserID1:Network] JoinDomain = "LabTechs"