INSTALLING WINDOWS XP
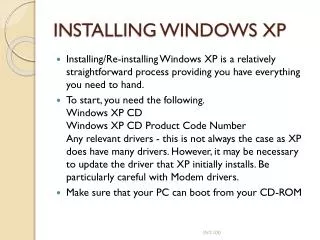
INSTALLING WINDOWS XP. Installing/Re-installing Windows XP is a relatively straightforward process providing you have everything you need to hand.

INSTALLING WINDOWS XP
E N D
Presentation Transcript
INSTALLING WINDOWS XP • Installing/Re-installing Windows XP is a relatively straightforward process providing you have everything you need to hand. • To start, you need the following.Windows XP CD Windows XP CD Product Code Number Any relevant drivers - this is not always the case as XP does have many drivers. However, it may be necessary to update the driver that XP initially installs. Be particularly careful with Modem drivers. • Make sure that your PC can boot from your CD-ROM INT-100
Step 1 • Boot up your pc. During the initial boot cycle insert the Windows XP CD into your CD-ROM • You will see on your screen 'Press any key to boot from CD‘ • At this stage press either Enter or any other key • Set up will now automatically inspect your computer's hardware configuration INT-100
Step 2 • After set up has checked your hardware a blue screen will appear with the words 'Windows set up' in the top left hand corner. • At this stage, should you have a RAID, SCSI or SATA drive, you will have the option of pressing F6 to install the third party drivers for this hardware. If you do not have any of this hardware installed on your pc there is no need to press F6. XP will now start loading files into memory. INT-100
Step 3 • After all the files have been loaded into memory the Welcome To Set Up Window appears • To begin installing XP Press Enter INT-100
Step 4 • The next screen to appear is the EULA (End user Licence Agreement) Press F8 to accept the licence or ESC if you don't want to accept the licence agreement and want to terminate the install. • After agreeing to the licence agreement set up searches your hard drive for any partitions INT-100
Step 5 • The next screen shows all the partitions on your hard drive. You may have just one or several depending upon whether you have created partitions prior to installing Windows XP • You can select the partition you want to install XP on. Once you have selected the partition press Enter INT-100
Step 6 • The next window will offer to format the partition for you. If the partition is already formatted the option will be 'leave file format as it is.' If it hasn't been previously formatted then you will have the option to either: • Format the partition using the NTFS file system (Quick) • Format the partition using the FAT file system (Quick) • Format the partition using the NTFS file system • Format the partition using the FAT files system • It is recommended that you use the NTFS file system so select 'Format the partition using the NTFS file system' INT-100
Step 7 • Set up will now begin to format your hard drive INT-100
Step 8 • Once the drive has been formatted windows set up will start copying files to memory INT-100
Step 9 • Once the copying has been completed windows initialises your configuration and then proceeds to reboot your machine • Your system will now reboot INT-100
Step 10 • On reboot you will again be presented with 'Press any key to boot from CD' On this occasion DO NOT press any key. Leave well alone. Windows will then automatically launch. If you press any key during this process you will start the set up procedure all over again. • You will now see the Windows XP Graphical interface as windows loads • Note If your copy of XP does not include Service Pack 2 the Logo will look slightly different to the one illustrated below in as much as it will display Windows XP Home or Professional. As soon as you upgrade to Service Pack 2 (SP2) the Home/Professional branding will be removed. INT-100
Step 11 • At the next screen Windows will begin copying files to your hard drive INT-100
Step 12 • As the files are installed on your hard drive you will be asked to select various options. The first to launch is the Regional and Language Options window. INT-100
Step 13 • Click the Customise button to select your Country standards, language, etc. Click OK when you are satisfied with your selections INT-100
Step 14 • After you have completed that return to the original Regional and language Options window and click the Details button • From here you can set the default keyboard language. Click OK when finished • Now click the Next button INT-100
Step 15 • The next window asks for your name and company. Fill this in with the relevant details • After completing the name and company dialogue boxes press Next INT-100
Step 16 • Now you are presented with the Product code number screen • Insert your product code numbers in the relevant boxes. Take your time here, as inserting the wrong number, will cause an error. • After inserting the product code number press Next INT-100
Step 17 • Your next screen is the Computer and Administrator password screen • XP usually inserts a computer name but you can change it if you want something different. • Next insert the Administrator password (you don't need to do this for XP Home Edition) and then confirm the password in the next dialogue box. • Click Next to continue INT-100
Step 18 • If you have a Dial Up Modem installed you will now be asked for the Country and area code information. Fill this in as necessary and press Next. Do Not worry if the Dial Up Modem screen doesn't appear during set-up. Personally I much prefer to set-up the Internet Connection after Windows XP has completed it's installation. INT-100
Step 19 • The Date and Time Setting windows now appears. • Select your Time Zone from the drop down time zone list and XP will make the other adjustments • Finally click the Next button INT-100
Step 20 • Windows now starts to install the Networking part of the operating system • Assuming you have a Networking Card installed the Networking Settings window will now pop up INT-100
Step 21 • The Typical Settings Option should already be selected so simply press the Next button INT-100
Step 22 • Unless you are on a Network or Domain you simply need to press the Next button If you are on a Network then click the Yes make this computer a member of the following domain and then click the Next button. You may need to ask your administrator for these details. • Windows will now continue copying files • After a while Windows will finalise the installation. The progress bar will show Completing Installation followed by Installing Start menu icons, registering Components, Saving Settings and, finally, Removing any temporary files used. INT-100
Step 23 • After finalisation Windows will again restart your pc • On reboot you will again be presented with 'Press any key to boot from CD' On this occasion DO NOT press any key. Leave well alone. Windows will then automatically launch. If you press any key during this process you will start the set up procedure all over again • You will now see the Windows Logo screen INT-100
Step 24 • Once Windows has loaded it will adjust your monitors resolution. Just click OK to continue • If you are happy with the resolution change press OK again INT-100
Step 25 • Windows now needs to apply the computer settings so you need to be a little patience here • The Welcome to Microsoft Windows screen now appears. By clicking the ‘?’ you can get help • Click the Next button to continue INT-100
Step 26 • If you are using a copy of Windows XP with Service Pack 2 already integrated the next screen will ask you to enable the Windows Firewall. INT-100
Step 27 • The next screen asks you to Activate your copy of Windows XP. You have 30 days in which to activate your copy of Windows so I always select the No option and then activate when I am satisfied everything is working correctly. INT-100
Step 28 • After the Activation screen Windows XP asks you How you will connect to the Internet. This and the following screen may only appear if you are using a DSL or Cable modem. Although personally I prefer to set-up the Internet Connection after Windows XP has finally been installed. INT-100
Step 29 • After making your connection selection Windows check for Internet Connectivity. INT-100
Step 30 • You are now asked Who will use this computer • Insert the Name(s) of the user(s) who will be using the computer and then press Next INT-100
Step 31 • After completing the ‘who will use this computer’ section a thank you screen will appear INT-100
Step 32 • After a while the Welcome Screen will appear • Finally the Windows XP desktop will appear in all its glory. INT-100