First Aid
First Aid. Dr. Abdul- Monim Batiha Assistant Professor Critical Care Nursing Philadelphia university . WHAT IS FIRST AID?.

First Aid
E N D
Presentation Transcript
First Aid Dr. Abdul-MonimBatiha Assistant Professor Critical Care Nursing Philadelphia university
WHAT IS FIRST AID? It is the immediate assistance or care given to a person who has been injured or suddenly became ill, from the moment of the accident until availability of specialized medical care. Note: First Aid is not restricted to physical but also involves psychological support as well.
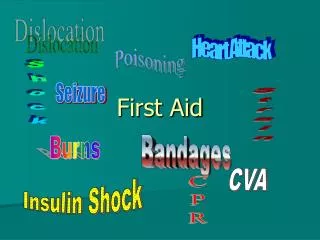
Who needs First Aid? • Cardiac and Respiratory Arrest • Electric Shock • Wounds • Bleeding • Burns • Fractures and Traumatic Injuries • Poisoning • Drowning • Snake bites
In calling for an ambulance make sure you give: • or address form which you are calling • The nature of emergency • The number of people involve • The precise location of the emergency • Don’t hang up until you certain that the person on the line has all the necessary information and you telephone number
Goals of first aid • To restore and maintained vital functions (ABC) • To prevent further injury or deterioration • To reassure the victim and make him or her as comfortable as possible
Goals of first aid • Assess victims for signs of life • Restore respiration • Restore heart action • Stop bleeding • Treat the shock
Transporting the victim • The victim should not be moved but should be treated where he lies. • In certain circumstances injured person must be moved to prevent further injury from fire , an expulsion…etc.
Various dressings, wire splints, tape, Band-Aids, tourniquets, skin pencils, and other first aid supplies are included in these boxes. Each box is secured with a wire or plastic seal that can be easily broken.
The seals are used to identify whether the kit has been opened. A broken seal indicates that the first aid box must be inventoried( complete list of first aid) and restocked. The standard first aid box has three compartments. Each compartment should have a plastic bag that is complete with the basic first aid supplies. Take one of these bags with you on your way to the casualty. Failure to take a bag to the scene( location at which an event or action happens )may result in you having to go back for supplies.
The box does not contain needles, syringes, or medications; but does contain the proper supplies needed to render first aid until medical assistance arrives. First aid boxes are for emergency use only! Report all broken seals to medical personnel as soon as possible. It is important that you know the contents and locations of these boxes.
Dressings • A dressing is a protective covering for a wound and is used to control bleeding and prevent contamination of the wound. A compress is a sterile pad that is placed directly on the wound. A bandage is material used to hold a compress in place. When applying a dressing, ensure that it remains as sterile as possible. The part of the dressing that is placed against the wound must never touch your fingers, clothing, or any un-sterile object. If you drop, a dressing across the casualty's skin or it slips after it is in place, the dressing should not be used.
Battle Dressings • Battle dressings are used most often aboard ship and in the field. Each dressing is complete (no other materials are needed) with four tabs which help in applying and securing the dressing. They have "other side next to wound" marked on the outer side. This will help you in (Fig. 5-2) placing the sterile side against the wound. Unless contraindicated, to assist in controlling the bleeding, tie the knot of the dressing over the wound.
Compresses • Emergencies may occur when it is not possible to obtain a sterile compress. During these situations, use the cleanest cloth available, a freshly laundered (washed) handkerchief (square of cloth or absorbent paper), towel, or shirt. Unfold the material carefully so that you do not touch the part that will be placed against the wound. The compress should be large enough to cover the entire wound and extend at least 1 inch beyond its edges.
If a compress is not large enough, the edges of the wound will become contaminated. Materials that will stick to a wound or may be difficult to remove should never be used directly on a wound. Absorbent cotton, adhesive tape, and paper napkins are examples of materials that should never come in contact with a wound.
Bandages • Bandages are strips or rolls of gauze or other materials that are used for wrapping or binding any part of the body and to hold compresses in place. It is not necessary to take time to ensure that the bandage resembles the textbook pictures. However, it is important that the dressing controls the bleeding, prevents further contamination, and protects the wound from further injury. Some of the most commonly used bandages are the roller bandage and the triangular bandage.
The roller bandage consists of a long strip of material (usually gauze, or elastic) that is rolled and is available in several widths and lengths. Most are sterile, so pieces may be used as a compress on wounds. A strip of roller bandage can be used to make a four-tailed bandage by splitting the cloth from each end, leaving as large a center as needed. This type of bandage is used to hold a compress (Fig. 5-4B) on the chin, or (Fig. 5-4C) the nose.
Triangular Bandages • Triangular bandages (Fig. 5-5) are usually made of muslin (thin cotton cloth). They are useful because they can be folded in a variety of ways to fit almost any part of the body. Padding can be added to areas that may become uncomfortable.
The triangular bandage can be folded to make a cravat bandage, which is useful in controlling bleeding from wounds of the scalp or forehead. To make a cravat bandage, bring the point of the triangular bandage
The uses of the roller, triangular, and cravat bandage. Roller Bandage for the Hand and Wrist
The three primary objectives are (ABC) for first aid • ) (1) to maintain an open airway, • (2) maintain breathing, and • (3) to maintain circulation. During this process you will also: • control bleeding, and • reduce or prevent shock.
You must respond rapidly, stay calm, and think before you act. Do not waste time looking for ready-made materials, do the best you can with what is at hand. Request professional medical assistance as soon as possible.
Initial Assessment • When responding to a casualty (victim), take a few seconds to quickly inspect the area. Remain calm as you take charge of the situation, and act quickly but efficiently. Decide as soon as possible what has to be done and which one of the injuries needs attention first.
During your initial assessment, consider the following: • 1. Safety - Determine if the area is safe. If the situation is such that you or the casualty is in danger, you must consider this threat against the possible damage caused by early movement. If you decide to move the casualty, do it quickly and gently to a safe area where proper first aid can be given. You cannot help the casualty if you become one yourself.
2. Mechanism of injury - Determine the extent of the illness or injury and how it happened. If the casualty is unconscious, look for clues. If the casualty is lying at the bottom of a ladder (steps), suspect that he or she fell and may have internal injuries.
3. Medical information devices - Examine the casualty for a MEDIC ALERT (Fig. 1-1) necklace, bracelet, or identification card. This medical tag, provides medical conditions, medications being taken, and allergies about the casualty. The VIAL OF LIFE, a small, prescription-type bottle, also contains medical information concerning the casualty. This bottle is normally located in the refrigerator.
4. Number of casualties - Look beyond the first casualty, you may find others. One casualty may be alert, while another, more serious or unconscious, is unnoticed. In a situation with more than one casualty limit your assessment to looking for an open airway, breathing, bleeding, and circulation, the life-threatening conditions.
5. Bystanders - Ask bystanders to help you find out what happened. Though not trained in first aid, bystanders can help by calling for professional medical assistance, providing emotional support to the casualty, and keeping onlookers from getting in the way.
6. Introduce yourself - Inform the casualty and bystanders who you are and that you know first aid. Prior to rendering first aid, obtain the casualties consent by asking is it "OK' to help them. Consent is implied if the casualty is unconscious or cannot reply.
General Rules • 1. Keep the casualty lying down, head level with the body, until you determine the extent and seriousness of the illness or injury. You must immediately recognize if the casualty has one of the following conditions that represent an exception to the above.
a. Vomiting or bleeding around the mouth - If the casualty is vomiting or bleeding around the mouth, place them on their side, or back with head turned to the side. Special care must be taken for a casualty with a suspected neck or back injury.
b. Difficulty breathing - If the casualty has a chest injury or difficulty breathing place them in a sitting or semi-sitting position.
c. Shock - To reduce or prevent shock, place the casualty on his or her back, with their legs elevated 6 to 12 inches. If you suspect head or neck injuries or are unsure of the casualty's condition, keep them lying flat and wait for professional medical assistance.
2. During your examination, move the casualty no more than is necessary. Loosen restrictive clothing, at the neck, waist, and where it binds. Carefully remove only enough clothing to get a clear idea of the extent of the injuries. When necessary, cut clothing along its seams (line of stitching).
Ensure the casualty does not become chilled, and keep them as comfortable as possible. Inform the casualty of what you are doing and why. Respect the casualty's modesty, but do not jeopardize( put at risk) quality care. Shoes may have to be cut off to avoid causing pain or further injury.
3. Reassure the casualty that his or her injuries are understood and that professional medical assistance will arrive as soon as possible. The casualty can tolerate pain and discomfort better if they are confident in your abilities.
4. Do not touch open wounds or burns with your fingers or un-sterile objects unless it is absolutely necessary. Place a barrier between you and the casualty's blood or body fluids, using plastic wrap, gloves, or a clean, folded cloth. Wash your hands with soap and warm water immediately after providing care, even if you wore gloves or used another barrier.
5. Do not give the casualty anything to eat or drink because it may cause vomiting, and because of the possible need for surgery. If the casualty complains of thirst, wet his or her lips with a wet towel.
6. Splint all suspected, broken or dislocated bones in the position in which they are found. Do not attempt to straighten broken or dislocated bones because of the high risk of causing further injury. Do not move the casualty if you do not have to.
7. When transporting, carry the casualty feet first. This enables the back carrier to observe the casualty for any complications. • 8. Keep the casualty comfortable and warm enough to maintain normal body temperature.
Infectious Diseases • You will probably render first aid to someone you know - family member. For this reason you will probably know your risk of contracting an infectious disease. Adopt practices that discourage the spread of blood-borne diseases (Hepatitis and HIV) and air-borne diseases such as influenza when performing first aid