Download
1 / 18
180 likes | 290 Vues
Toaster Speed Conversion Kit. Kit 826-1950 includes: New Sprocket New Upper Bracket New Stickers New Ground Wires. Remove cover. Remove compression knobs. Remove side panel. The bracket and the sprocket shown by arrows are changed with this kit.

E N D
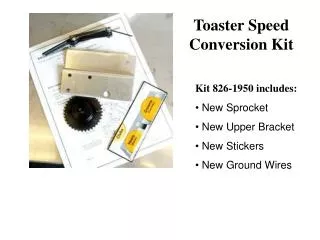
Toaster Speed Conversion Kit • Kit 826-1950 includes: • New Sprocket • New Upper Bracket • New Stickers • New Ground Wires
Remove cover. • Remove compression knobs. • Remove side panel.
The bracket and the sprocket shown by arrows are changed with this kit.
Ensure bolt securing large drive gear is positioned so it is accessible. • Remove power from unit.
Depress idler and lift chain from sprockets. • If too tight, remove upper idler bracket to remove chain.
Loosen bolt securing drive sprocket and use a straight-arm wheel puller to remove the sprocket.
Remove upper idler bracket, remove sprocket from bracket and install on new bracket. • The new drive sprocket, shown here on top of the older drive sprocket, is smaller and slows the toaster slightly. Install it in the same plane as the spring-loaded idler.
Install the new ground wires and route from the ground position near the idler bracket to the higher ground position (shown above).
Route the chain as shown and loop onto the upper idler before positioning the upper idler bracket on its mounting studs.
… and press it into place on the housing protecting the element ends.
Replace diagonal brace and attach wiring with a wire tie, ensuring it stays out of the drive train.
Replace the side and apply the new bun-compression sticker and replace the knobs.
Attach the unit to power. • Ensure proper operation. • File all paperwork, being careful to include the serial numbers of the toasters modified and the store address.