Download

1 / 25
250 likes | 354 Vues
Learn the correct proportions for drawing male figures, focusing on legs, torso, arms, and facial features. Understand the balance and movement in figure drawing to create dynamic and realistic artwork.

E N D
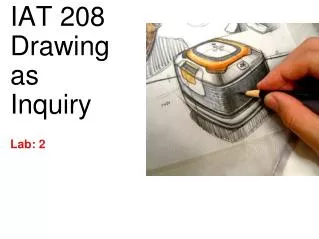
IAT 208 week 10 Figure Proportions
human proportions • Proportions for Adults: Though men are generally taller than women, they are shown as the same height here for comparison. For both sexes, almost half the height is made up of the legs, with the tips of the hands falling to the mid-thigh region. • As well, the waist is lower in males than in females. • Another difference is that men are generally bulkier and have wider frames than do women. (Willenbrink)
Male proportions • Man Standing: • As you draw the human figure, remember that almost half the height of the body is the legs. • Establish the middle line first, then mark the top of the inseam. • Pay attention to the head size, which takes up a little more than 1/8th of the overall height. • A common mistake in figure drawing is to make the head too large and the legs too short. (Willenbrink)
Proportions: Man Standing • 1. Establish the General Proportions • Start with lines to indicate the placement and proportions, because the weight of the body in this example rests over the man’s right leg, include a vertical line that goes from the head to the right foot. • Add top, bottom and middle horizontal lines. Then sketch a line halfway between the middle and top lines, then sketch another line between the last line drawn and the top line. (Willenbrink) 1 5 4 3 2
proportions • 2. Sketch the Head and Legs • Most humans are about 7.5 heads high. The distance from the top line to the next lower line is one-eighth of the overall height. • Make a line slightly lower and sketch an egg shape for the head, which should work out to about 7.5 units of the overall height. • You can use dividers if you want to check your proportions. Sketch in the legs, placing the top of the inseam just below the middle line. (Willenbrink)
proportions • 3. Add the Torso and Waist • Sketch the basic shape of the torso along with the waistline. (Willenbrink)
4. Add the Arms • Add the arms, with the wrists falling at about the middle line and the fingertips reaching mid-thigh. Sketch a line for the placement of the eyes. • Sketch in the feet along the baseline. (Willenbrink)
proportions • 5. Sketch in the Details • Sketch in the details, including facial features and clothes. (Willenbrink)
gesture A Gesture drawing is a work of art defined by quick execution. The focus is on exaggeration and rhythm which give the sketch animation and life https://www.youtube.com/watch?v=QXSyagaarU4&feature=youtu.be
gesture • Keep your lines simple. Observe your subject. Determine your light source and indicate values with stroke pressure. Use heavy pressure and dark values and light pressure and highlights. (Willenbrink)
gesture vs. contour • gesture the focus is on the rapid strokes which build the form, and not the continuous line. • contour drawing the focus is not on the speed of the drawing but the way your pencil slowly defines the outer edges following the direction and pace of your eye. I
contour Remember contour lines are slow studies of your model... you must imagine that your pencil is touching your model exactly the same way that the eye is touching the model...then you simply imagine that your eye is pulling the pencil across the paper.
Movement and balance • Another way to make drawings more realistic is to draw the figures in action. • Since humans hardly ever sit still or stand, your figure drawings should by dynamic in nature. • You can begin by using sketch lines to layout the dominant action of the figure. (Powell)
Balance • Try employing an imaginary center line of balance which acts to balance the figure in its position. • If you don’t do this, the figure could look as though it is falling over. • The trick to achieve balance is to place approximately the same amount of weight on either side of this center line. (Powell, People: Learn to Draw Step by Step)
Action Line • Another method is to draw a line that represents the spine of the figure in its action pose; you can develop the pose from this line of action. • Using both the center line of balance and the line of action help establish effective action figure drawings.. (Powell, People: Learn to Draw Step by Step)
large and small action lines • http://lifedrawingposes.com/figure-drawing-lessons/lesson-1-figure-drawing-class/
practice • http://lifedrawingposes.com/exercises-and-resources/gesture-drawing-video/
Blocking and laying out • Here are some methods for measuring proportion other than the pencil method we explored in an earlier lecture. • 1. Creating an ‘Envelope’ around your subject can simplify the original placement of the picture, solving many problems associated with difficult poses. This is similar to the sculptor who chisels away at a large block of stone. • With this method, you measure the outermost points of the subject and then mark it on your paper. You then connect the dots with straight lines. (Thomas, The Art of Portrait Drawing)
blocking draw the main gesture of the figure. if you don't know where to start, try to see where the spine will be define the space where the figure fits on the page(look at the figure and imagine a line drawn from each outer edge) start adding the mass of the larger body parts http://gestureoflife.blogspot.ca/2011/02/cross-hatching-and-cross-contours.html
blocking continue adding parts. you may use super simplified boxy shapes. the point is to define space. you can make it more graceful later look for important structural parts, such as the rib cage an indication of where the hips are, while you refine the outer edge
Blocking: add depth looking for shadows will help you refine the figure and make it look 3D continue making hatch marks to refine the shadow areas. look for the super dark areas and the middle tones so you can make a distinction between the two. the more variety you see in the shadows, the more convincing your drawing will be http://www.youtube.com/watch?v=CDJa9Mn-psQ
Tips: hands • Hands and feet are very expressive parts of the body and are also an artistic challenge. • To familiarize yourself with hand proportions, begin by drawing three curved lines equidistant from each other. • The tips of the fingers fall at the first line, the second knuckle at the middle line, and the first knuckle at the last one. • The palm, coincidentally, is approximately the same length as the middle finger. (Powell, People: Learn to Draw Step by Step)
Tips: feet • For drawing the feet, you must block in the shape in two parts: the main part of the foot and the toes. • Once you have drawn a good outline, add minimal shading so that the feet are not ‘too loud’. (Powell, People: Learn to Draw Step by Step)
Shading: planes of the body • The human skeleton can be likened to the wooden frame that supports the house, it supports and affects the figure of the entire form!
Quiz review: Bring pencil, ruler, eraser, pen. • Different styles of drawing and purposes: • Contour – pure, blind, semi-blind, cross • Gesture • Structural sketching / blocking in • Value sketching (shading) • Negative space • How to gauge proportion / measure angles • One, two point, three point perspective (covered next week) • Atmospheric perspective (next week) • Basic shapes: circle, sphere, square, cube, ellipse, cylinder, etc. drawing and shading. • Mark making (hatches, cross hatches, etc. • Proportions head & body. • composition