
Reverse Telnet
E N D
Presentation Transcript
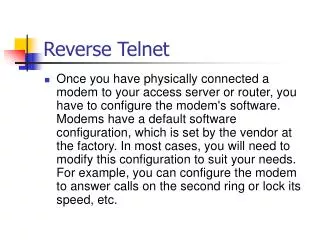
Reverse Telnet • Once you have physically connected a modem to your access server or router, you have to configure the modem's software. Modems have a default software configuration, which is set by the vendor at the factory. In most cases, you will need to modify this configuration to suit your needs. For example, you can configure the modem to answer calls on the second ring or lock its speed, etc.
Reverse Telnet • Some modems can be configured by using a panel on the unit; However, most modems don't have configuration panels. Instead, you must access the modem's software via another device such as an access server.
Reverse Telnet • When using a Cisco access server, you have the option to manually configure the modem or automatically configure the modem using a script. Manual configurations are accomplished using a technique called reverse telnet. • Access servers support both incoming and outgoing asynchronous line connections.
Reverse Telnet • Incoming connections are forward connections. Outgoing connections are reverse connections. A remote terminal user who dials into the access server through an asynchronous line makes a forward connection. A user who connects through an access server to an attached modem makes a reverse connection. This reverse connection, called reverse telnet, can be used to configure modems.
Reverse Telnet • You can make reverse telnet connections to various types of attached devices, such as modems, routers, and terminals. • As its name implies, reverse telnet sessions are established using the Telnet protocol. Telnet daemons typically listen on TCP port 23 for connection requests.
Reverse Telnet • If you want to communicate with and configure a modem attached to a router, Telnet to the router's IP address (but not to the default TCP port, 23); instead, Telnet to a different TCP port (a line number assigned to the interface that the modem connects to).
Reverse Telnet • When a modem connects to a router interface, the router maps that interface to a line number (port number). The line number is used when reverse telnetting.
Reverse Telnet • When using reverse Telnet, you can use the telnet command to connect to any IP address configured on the router, as long as the interface associated with that IP address is up. Typically, you configure the access server with a loopback IP address. Since a loopback interface is a logical interface, it is not susceptible to physical failures.
Line Types and Numbering • Cisco devices have the following four types of lines: • CON (Console line) - Typically used to login to the router for configuration purposes; this line is also referred to as CTY. • AUX (Auxiliary line) - EIA/TIA-232 DTE port used as a backup asynchronous port (TTY); you can connect a modem to the AUX port.
Line Types and Numbering • TTY (Asynchronous line) - Same as asynchronous interface; available on access server models (Cisco 2509, 2510, 2511, 2512, AS5100, etc); used typically for remote dial-in sessions that use such protocols as SLIP and PPP. A serial interface configured as asynchronous is a TTY connection.
Line Types and Numbering • VTY (Virtual terminal line) - Used for incoming Telnet, local-area transport (LAT), X.25 packet assembler/disassembler (PAD), and protocol-translation connections into synchronous ports (e.g., Ethernet and serial interfaces) on the router. • Different router models number the line types in different ways.
Line Types and Numbering • The Cisco line-numbering rules, where n represents the first physical line after the console line, and m refers to the number of the vty line. For example, the VTY 4 line corresponds to line 14 on a router with eight TTY ports. Because line 0 is for the console, lines 1 to 8 are the TTY lines, line 9 is for the auxiliary port, and lines 10 to 14 are for VTY 0 to 4.
Line Types and Numbering • TTY lines correspond to asynchronous interfaces on a one-to-one basis, and VTY lines are virtual lines that are dynamically assigned to the synchronous interfaces. VTY lines accept incoming Telnet sessions. You can enter the interface line tty ? command to view the maximum number of TTY lines supported by the router.
Line Types and Numbering • Reverse Telnet connections to an individual line can be used to communicate and configure an attached device. To connect to an individual line, the remote host or terminal must specify a particular TCP port on the access server. For reverse Telnet, that port is 2000 plus the line number. For example:
Line Types and Numbering • telnet 131.108.30.40 2001. • This command indicates a Telnet connection to line 1 (2000 + 1). If you want to reverse Telnet to a modem on line 14, you would use TCP port 2014. • 2000 - 2999 are reserved for reverse Telnet sessions to individual lines. Additional ranges have been reserved for rotary groups and other services, such as raw TCP and XRemote.
Line Types and Numbering • Since line numbering varies among Cisco router models, you may want to rely on the show line command to display all types of lines and the status of each line.
Line Types and Numbering • The show line-number command displays more detailed information on the specified line, including some useful data such as baud rate, modem state (idle or ready), and modem hardware state (CTS, DSR, DTR, and RTS for hardware flow control and session control).
Configuring Reverse Telnet • In order for reverse Telnet to work, you must configure the access server's line with the transport inputprotocolandmodem inout commands. You could issue the following commands to allow reverse Telnet via line 10:RTA#configure terminalRTA(config)#line 10RTA(config-line)#transport input allRTA(config-line)#modem inout
Configuring Reverse Telnet • Use the transport inputprotocolcommand to specify which protocol to allow for incoming connections. Since reverse Telnet is a kind of incoming connection, you must allow at least the Telnet protocol. • In the example, transport input all allows all of the following protocols to be used for the connection: LAT, MOP, NASI, PAD, rlogin, Telnet, and v120.
Configuring Reverse Telnet • If you don't specify Telnet or "all," you will receive the message "Connection Refused" when you try to establish a reverse Telnet connection. The modem inout command is required to permit both incoming and outgoing connections on a given line.
Configuring Reverse Telnet • The escape command sequence is a very important command to remember. To leave a reverse Telnet session, press ctrl-shift-6, and then the letter x. This sequence, ctrl-shift-6, x, will suspend any Telnet session, and return you to the router console. Note also that a reverse Telnet session can be established from a remote host (such as a Windows PC), as well as the access server itself.
Asynchronous Interfaces and Line Configurations • Access servers have terminal lines (TTYs), which differentiate them from other routers. Modems are typically connected to these terminal lines.
Asynchronous Interfaces and Line Configurations • Access servers have terminal lines (TTYs), which differentiate them from other routers. Modems are typically connected to these terminal lines.The Cisco IOS assigns a logical interface to each physical terminal line, or group of terminal lines. As shown in Figure , these logical interfaces are labeled interface asynchronousinterface-number (for individual lines) and interface group-asyncgroup-number(for grouped interfaces).
Asynchronous Interfaces and Line Configurations • Asynchronous interfaces correspond to physical terminal (TTY) lines. This means that, for a connection using TTY 8, configuration commands can be applied to the logical interface (interface async 8) and to the physical line (line 8).
Asynchronous Interfaces and Line Configurations • Commands entered in the asynchronous interface mode allow you to configure protocol-specific parameters for asynchronous interfaces. Commands entered in line configuration mode permit you to configure the physical aspects of the line's port.
Asynchronous Interfaces and Line Configurations • The interface commands can be thought of as logical configuration; the line commands configure physical characteristics of the configuration. For example, you configure the basic modem-related parameters on an access server using the line command, but you configure protocol encapsulation and authentication with the interface async command.
Asynchronous Interfaces and Line Configurations • Asynchronous interfaces can be grouped as one logical interface (interface group-asyncgroup-number) to simplify configuration. To create a group, issue the interface group-async command in global configuration mode: • RTA(config)#interface group-async 1.
Asynchronous Interfaces and Line Configurations • Using the group-range command, specify which individual interfaces are members of the group, as shown: • RTA(config)#interface group-async 1RTA(config-if)#group-range 1 7.
Asynchronous Interfaces and Line Configurations • This configuration assigns asynchronous interfaces 1 through 7 under a single master interface (interface Group-Async 1). This one-to-many structure allows you to configure all associated member interfaces by entering one command on the group interface, rather than entering this command on each interface.
Basic Terminal Line Configuration • You must configure an access server's terminal line to asynchronously communicate with a modem. • The following paragraphs examine an example line configuration in detail:
Basic Terminal Line Configuration • RTA(config)#line 2RTA(config-line)#loginRTA(config-line)#password letmein. • The login command enables password checking at login on line 2, while the password command sets the password to letmein. • RTA(config-line)#speed 115200RTA(config-line)#flowcontrol hardwareRTA(config-line)#stopbits 1
Basic Terminal Line Configuration • The speed command is used to set the speed of transmission (both transmit and receive) between the modem and the attached access server. Depending on the router hardware, TTY line speeds can be set from between 50 and 115200 bits per second (bps). The default speed setting is 9600 bps.
Basic Terminal Line Configuration • Typically, you should set this value to the maximum supported speed between both devices. Note also that you must lock the speed of your modem to match the router's line configuration. • The flowcontrol command sets the type of flow control to be used on the line. Options are software, hardware, and none (default). In this example, the router is configured for hardware flow control (RTS/CTS flow control).
Basic Terminal Line Configuration • The stopbits command configures the number of stop bits to be used (1, 1.5, or 2). The default setting is 2. The modem and the router must use the same number of stop bits. Reducing the number of stop bits from 2 to 1 will improve throughput by reducing asynchronous framing overhead.
Basic Terminal Line Configuration • RTA(config-line)#transport input allRTA(config-line)#modem inout • The transport input all command allows all protocols inbound on a specific line, while the modem inout command allows both incoming and outgoing calls.
Basic Terminal Line Configuration • Note that both of these commands can be used with more restrictive keywords. For example: • RTA(config-line)#transport input telnetRTA(config-line)#modem dialin • The transport input telnet command only allows the telnet protocol to connect to a specific line, while the modem dialin command restricts the line to incoming calls only.
Basic Terminal Line Configuration • It is essential that the TTY line be configured before configuring/initializing the modem. Otherwise, you cannot reverse Telnet to the modem. Moreover, if you change the line speed after the modem has been initialized, the modem will no longer communicate with the router until it is again told at what speed to talk to the router.
Basic Auxiliary Port Configurations • The AUX port is typically configured as an asynchronous serial interface on routers without built-in terminal lines.
Basic Auxiliary Port Configurations • Depending on the hardware, an AUX port may not perform as well as a built-in TTY. As shown in the figure, most AUX ports are limited to 38400 bps, although AUX ports on 2600 and 3600 series routers support speeds up to 115200 bps. Moreover, AUX ports do not support such features as DMA buffering and IP fast switching.
Basic Auxiliary Port Configurations • To configure the AUX port as an asynchronous interface, configure it with line commands, as you would any TTY. Use the line aux 0 command in global configuration mode, as shown: • RTA(config)#line aux 0RTA(config-line)#loginRTA(config-line)#password letmein
Basic Auxiliary Port Configurations • RTA(config-line)#speed 115200RTA(config-line)#flowcontrol hardwareRTA(config-line)#stopbits 1RTA(config-line)#transport input allRTA(config-line)#modem inout
Basic Auxiliary Port Configurations • You may want to issue the show line command to determine what line number is assigned to your router's AUX port. Depending on your router's hardware, this could be line 1, line 17, or line 65, or some other number. Once you have identified the line number, you will know which corresponding asynchronous interface to configure (interface async 1, interface async 17, interface async 65, etc.).
Basic Auxiliary Port Configurations • You can configure an AUX port by its line number as well. For example, on a 2511, where the AUX port is assigned line 17, you can configure the port's physical parameters issuing either line aux 0 or line 17 in global config mode.
Connecting a Modem to the Console Port • Advantages of connecting a modem on the console port: • Passwords can be recovered remotely. You may still need someone on-site with the router to toggle the power, but aside from that, it's identical to being there with the router.
Connecting a Modem to the Console Port • It is a convenient method of attaching a second modem to a router without async ports. This is beneficial if you need to access the router for configuration or management while leaving the AUX port free for dial-on-demand routing (DDR).
Connecting a Modem to the Console Port • Some routers (for example, Cisco 1600s) do not have AUX ports. If you want to connect a modem to the router and leave the serial port(s) free for other connections, the console is the only option.
Connecting a Modem to the Console Port • Disadvantages of connecting a modem on the console port: • The console port does not support EIA/TIA-232 modem control (Data Set Ready/Data Carrier Detect (DSR/DCD), data terminal ready (DTR)). Therefore, when the EXEC session terminates (logout), the modem connection will not drop automatically; the user will need to manually disconnect the session.
Connecting a Modem to the Console Port • More seriously, if the modem connection should drop, the EXEC session will not automatically reset. This can present a security hole, in that a subsequent call into that modem will be able to access the console without entering a password. The hole can be made smaller by setting a tight exec-timeout on the line. However, if security is important, it is recommended to use a modem that can provide a password prompt.
Connecting a Modem to the Console Port • Unlike other async lines, the console port does not support hardware Clear to Send/Ready to Send (CTS/RTS) flow control. It is recommended to use no flow control. If data overruns are encountered, however, software (XON/XOFF) flow control may be enabled. • The console ports on most systems only support speeds of up to 9600 bps.
Connecting a Modem to the Console Port • The console port lacks reverse telnet capability. If the modem loses its stored initialization string, the only remedy is to physically disconnect the modem from the router and attach it to another device (such as an AUX port or a PC) to reinitialize. If a modem on an AUX port loses its initialization string, you can use reverse telnet remotely to correct the problem.