Download
1 / 13
130 likes | 279 Vues
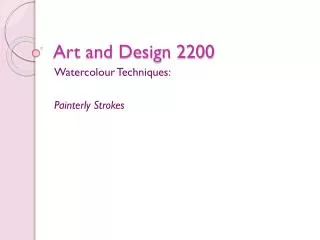
Art and Design 2200. Watercolour Techniques: Painterly Strokes. Bands of Colour. Fully load or "charge" your watercolor brush with paint and starting at an edge of your paper, start painting a winding line of paint across the page.

E N D
Art and Design 2200 WatercolourTechniques: Painterly Strokes
Bands of Colour • Fully load or "charge" your watercolor brush with paint and starting at an edge of your paper, start painting a winding line of paint across the page. • Keep the width of the brush stroke as consistent as you can. You can recharge your brush as needed and pick up where you left off. • While the last stroke is still wet, rinse out your brush and grab the next color. • Start pulling another linear stroke next to last one painted. Follow parallel with the previous stroke as it snakes across your page. • Do not let the washes touch. Leave white paper between each stroke. • This is the time to be daring...try to get as close as you can to the previous stroke. How thin can that white stripe get?
Think and Thin • Make sure your brush is full but not sopping wet. Work the tip on a clean area of your palette until it comes to a satisfactory point. • Starting at the edge of your paper gently pull a fine line with the tip. Start to apply pressure to the brush to thicken the stroke. • Then lessen the pressure until the line thins out again. Continue this thick'n'thin stroke across the page.
Wrist Flick • Load your brush with paint and angle the tip of the brush towards you. This is the starting position for the Wrist Flick. • Pivoting from your wrist push the brush tip up and away in a "flicking" motion. This is the ending position of the brush stroke. • The last part of the stroke flicks out in a feathery point. Practice several times in each color you have. • Vary the thickness of the strokes as you try to imitate grasses, branches, or even feathers.
Painterly Strokes • Start by laying the full brush on the paper and lifting away cleanly. That is the shape of your brush fully charged. • Try more short dabbing strokes across your paper. • Rinse your brush and change colors. • Experiment with some longer sweeping strokes. Keep your brush strokes uniform in width as you start to overlap strokes to develop shapes. • Play with different groupings of brush strokes across your paper. • Rinse your brush and change colors. Continue laying down similar brush strokes trying different angles of attack. • Allow your wet brush strokes to intermingle as you progress.
The Stab • Load your brush with color and take a gentle "stab" at the paper. Watch your brush and notice the fanning pattern of the hairs as you push it into the paper. • Continue poking around on your paper, adding a twist or spin to your stroke by rolling your brush in your fingers as you paint. • Experiment with angles of attack to find the best spreading point for the brush you are using. • Consciously try to shape the hairs as you press a stroke into the paper. Give it a little wiggle while the brush hairs rest on the paper to make them align.
Cutting Edges • “Cutting an edge" is a sign painter's term for pulling a clean line of paint with your brush. A clean line being a line that is smooth and flowing with no irregularities. • Consider each shape before you start to paint. What is the minimum amount of brush strokes needed to create the edge of the shape? • If your brush is too full to get a proper point, touch it on a sponge, tissue, or towel to remove excess paint before you start.