Download
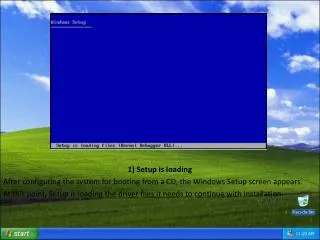
1 / 69
690 likes | 736 Vues
Learn about Oracle OneCommand utility for Exadata machine setup & configuration, execute various scripts & commands. Get detailed steps for Exadata Deployment Assistant. Follow pre-tasks for Exadata Database Installation X2-2.

E N D
Exadata Setup & Installation X2-2 quarter rack image version : 11.2.3.3.0 Oracle Database : 11.2.0.4 ver.1.2 Infrastructure & Governance
1. Oracle OneCommand Utility 소개 • • Oracle OneCommand 는 Exadata machine를 구성하기 위해 사용되는 유틸리티로 설치과 • 환경구성을 위해 사용되는 각종 Script과 명령어 들의 집합이라고 이해하면 된다. • • 실제 구성작업에 사용되는 Onecommand 의 실행방법은 아래와 같다. • 1번 DB node 에 root 로 로그인 • cd /opt/oracle.SupportTools/onecommand • Release 버전별 수행되는 명령어가 조금씩 상이하다. • ■ For Oracle Database 11g Release 2 (11.2.0.2) • ./deploy112.sh -l • ■ For Oracle Database 11g Release 2 (11.2.0.3) Patch 16921136까지 • ./deploy11203.sh –l • ■ For Oracle Database 11g Release 2 (11.2.0.3) Patch 17256841부터 ~ 현재 • ./install.sh –l • 참고 : Exadata 와 관련된 Guide 문서 (Exadata Database Machine Owner's Guide, Exadata Storage Server Software User's Guide 등) 는 Onecommand 를 다운받아 압축을 해제후 config 폴더안에 E13877_01.zip 라는 문서번호로 압축되어 있다. • http://dosc.oracle.com Document Library 를 통해 Download 못함
- Exadata의 Base Document(MOS ID 888828.1) * 최신버전의 Onecommand 보다 한단계 아래버전 사용 권장(Bug 등)!!
2. Exadata Deployment Assistant Exadata Deployment Assistant 는 Exadata Rack Configuration file을 generate 하기 위한 Tool 이며 Deplymenent Assistant 를 통해 입력된 정보는 Onecommand 와 함께 자동화되어 Configuration file을 생성해 낸다. 이 또한 Onecommand 의 패치 버전별로 수행되는 방법이 상이하다. ■ 기존방식 Onecommand Patch 16921136까지 (Excel) Excel sheet 를 이용하여 직접 Oracle Exadata Database Machine Configurator 를 작성하여 파일 생성 ■ 최근 방식 Onecommand Patch 17256841부터 ~ 현재 (Java-Based) ./config.sh or config.cmd 참고 : Deploynet Assistant 는 Windows용 Onecommand 를 Down 받아 사용하는 것이 편리하다.
12. Revie and Edit SCAN, Client, VIP and optional Backup networks
- generate 된 File List (Windows에서 작업한 경우 파일을 FTP로 전송)
- gtplus-gt-InstallationTemplate.html Tip : 해당파일의 하단을 참고하여 /etc/hosts 파일에 Network 정보 입력 (Copy&Paste)
Exadata Database Installation X2-2 quarter rack image version : 11.2.3.3.0 Oracle Database : 11.2.0.4 Infrastructure & Governance
■ 사전작업 : Reclaiming Disk Space - OS선택후 다른 OS에서 사용하고 있는 미사용영역 free 작업 진행 (또한 exadata image upgrade or re-image 후 필요한 작업이다) - 구성확인 /opt/oracle.SupportTools/reclaimdisks.sh -check Linux RAID 1 Before Solaris RAID 1
■ 사전작업 :Reclaiming Disk Space - 작업후 RAID 5 로 변경됨 /opt/oracle.SupportTools/reclaimdisks.sh -free -reclaim Linux RAID 5 After
■ 사전 작업 : Reclaiming Disk Space ☞ Rebooting 후 Console에서 진행사항 확인 ☞ 소요시간 : 1시간 30분
■ 사전 작업 : Applyconfig.sh 적용 (reclaim 작업을 선행하여야 실행 가능) • - 초기 Default IP 등으로 작업하였을 경우, 실제 사이트의 Network 정보로 Update 하기위 • 한 경우 등사용한다. • cd /opt/oracle.SupportTools/firstconf • # ./applyconfig.sh -preconf /opt/oracle.SupportTools/onecommand/gtplus-gt-preconf_rack_0.csv -dbm-node-ips quarter • applyconfig.sh 를 실행하면 DB node 와 Cell node 에 Network 환경적용을 수행하고 모든 서버를 REBOOT 시킨다.
■ 작업전 /opt/oracle.SupportTools/onecommand/linux-x64/WorkDir 위치에 설치이미지 FTP Upload (Image version 에 맞추어 특정 버전을 요구하므로 반드시 README.txt 을 숙지하도록 한다) 1. Oracle Database 11g Release 2 (11.2.0.4) Patch Set 3 p13390677_112040_PLATFORM_1of7.zip p13390677_112040_PLATFORM_2of7.zip p13390677_112040_PLATFORM_3of7.zip 2. 패치 17904156: QUARTERLY DATABASE PATCH FOR EXADATA (JAN2014 - 11.2.0.4.3) p17904156_112040_Linux-x86-64.zip 3. OPatch release 11.2.0.3.5 or later p6880880_112000_Linux-x86-64.zip 4. 패치 18035057: THIS IS ONECOMMAND TRACKING BUG FOR JANUARY BP/PSU p18035057_112331_Linux-x86-64.zip
■ 작업전 Onecommand 내의 README.txt 를 반드시 읽어보고 작업하도 록 한다. ☞ 각 단계를 진행하기 전에 각 단계가 끝날 떄 마다 출력을 검토하면서, 한번에 한 단계식 실행할 것을 권장 !! 해당 단계가 실패한 이유를 알아내기 위해 로그파일을 검토하는 것이 중요. - 성공 or 실패의 경우 /onecommand/linux-64/log 에서 Step 별로 로그 확인가능 - error 발생의 경우 /opt/oracle.SupportTools/onecommand/linux-x64/WorkDir/Diag-140311_172552.zip 생성
■ 작업전 Onecommand 내의 README.txt 를 반드시 읽어보고 작업하도록 한다. cd /opt/oracle.SupportTools/onecommand/linux-x64
Step 1. Validate Configuration File (undo 불가) ☞ 노드검증을 통해 Network 구성확인 및 설치 미디어확인, 파라미터와 deployment 파일을 확인
Step 2. Setup Required Files ☞ 설치 미디어 압축해제 (/opt/oracle.SupportTools/onecommand/Software)
Step 3. Create Users ☞ 오라클 계정과 그룹생성
Step 4. Setup Cell Connectivity ☞ cellip.ora , cellinit.ora 파일 생성
Step 5. Verify Infiniband and Calibrate Cells ☞ CellCLI calibrate 명령으로 셀 디스크를 확인 (셀 디스크의 성능 특성을 테스트함)
Step 6. Create Cell Disks ☞ Cell Disk 생성
Step 7. Create Grid Disks ☞ Grid Disk 생성
Step 8. Install Cluster Software ☞ Grid Infrastructure 의 Silent 설치
Step 9. Initialize Cluster Software ☞ post-installation 을 위한 root.sh 를 수행, OCR/VOTING Disk 생성 후 클러스터 실행
Step 10. Install Database Software ☞ Database Software 의 Silent 설치
Step 11. Relink Database with RDS ☞ Interconnect 를 위한 RDS 프로토롤 구성
Step 12. Create ASM Diskgroups ☞ asmca 를 실행하여 ASM 디스크 그룹을 생성 (DATA, RECO 등)
Step 13. Create Databases ☞ dbca 실행으로 Database 생성
Step 14. Apply Security Fixes (undo 불가) ☞ 보안픽스를 적용 (MGMT_VIEW,DIP 같은 계정을 DROP 등 ) 후 CRS 재기동
Step 15. Create Installation Summary ☞ Install Report 파일 생성