Download
1 / 17
170 likes | 190 Vues
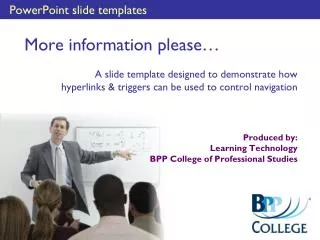
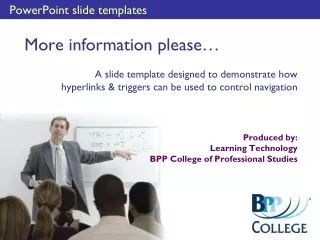
A slide template demonstrating how hyperlinks & triggers can be used for navigation control in PowerPoint. Created by Learning Technology at BPP College of Professional Studies.

E N D
PowerPoint slide templates More information please… A slide template designed to demonstrate how hyperlinks & triggers can be used to control navigation Produced by:Learning TechnologyBPP College of Professional Studies
Before we start … Which version of PowerPoint? These slides have been created in PowerPoint 2003, and have not been tested for compatibility with earlier versions of the software. PowerPoint skills We’ll assume that you are familiar with Custom Animation settings, Slide Transition and AutoShapes:
The basic idea In a standard presentation, you click through the slides in order 1, 2, 3, 4 … With hyperlinks, a presenter can have much greater control over the route through a presentation. The result is a non-linear presentation – a bit like a website – which the presenter can navigate according to the needs of the audience. So, stop thinking linearly, and start thinking flexibly! Let’s look at an example … 2 3 1 4 5 6 7
Example 1 4 This is slide number: Click this button to go to Slide 5: Or click here to go to Slide 6 Slide 5 You can click on these as many times as you like …
Example 1 5 Welcome to slide number: Click this button to go to Slide 4: Or click here to go to Slide 6 Slide 4 You can click on these as many times as you like …
Example 1 6 Hooray, this is slide number: Click this button to go to Slide 5: Or click here to go back to Slide 4 Ready to move on? Then click on the green arrow Slide 5 You can click on these as many times as you like …
How did they do that? To create navigation options like this, you’ll need to do two things: 1. Decide what object on the slide to hyperlink This can be an Autoshape, or text, or an image. We used all 3 examples on the previous slide (like this ) or text (like this) or an image (like this • Define the “target” page for each hyperlink. Slide 4
Stopping slides progressing on a click When we use hyperlinks, we must stop slides progressing automatically whenever the mouse is clicked. So, please note this final technical point … A final technical note PowerPoint automatically moves to the next slide or animation when the mouse is clicked. To stop this happening when you want to click buttons, uncheck the box called On mouse click on the Slide Transition menu. This will allow you to click away merrily without progressing to the next slide until you are good and ready. Of course, you’ll need a way to move on when you want, so make a “Next slide” button with a simple hyperlink, just like this little orange chap below … Next slide >>
The basic idea The ruling in Smith vs Dermott has influenced the rulings in 3 subsequent cases: • Laurel vs Hardy (1979) • Morecambe vs Wise (1983) • Reeves vs Mortimer (2001) The court found in favour of Laurel and found Hardy negligent for failing to maintain a safe piano moving business. Hyperlinks allow you (or the class) to control navigation This template allows us to retain a high-level list on the screen (in this example the 3 cases) while presenting more detail as required and in whatever order we choose. Let’s see how these slides are constructed … This is a non-working mock up! This box shows which topic is selectedThese can be clicked for more information The further information can contain text and/or pictures
Example slide 1 Hurrah, you have clearly mastered Basic Mouse Skills … Click Button A again if you’re the inquisitive type Well done on clicking Button A! You’ll see that the button has turned blue and this text has appeared. Try clicking Button B now … Button A Button B Let’s start with a simple example with just 2 buttons. Click on the two buttons in turn to see how this slide works. Remember that the cursor looks like this when you’re over a link. You can click on these as many times as you like. When you’re done, click “Next slide” below. Button A Button B Next slide >>
How did they do that? To create that last slide, we used 3 distinct components (each of which was a group of items). We used: 1. The yellow buttons and the outline of the content boxThis was made to appear at the start of the slide and never changed. 2. The blue version of Button A (to show it was chosen) and the related textThese are made to Appear when the yellow version of Button A is clicked *.These are made to Disappear when the yellow version of Button B is clicked *. 3. The blue version of Button B (to show it was chosen) and the related textThese are made to Disappear when the yellow version of Button A is clicked *.These are made to Appear when the yellow version of Button B is clicked *. * We can link the timings of these animations to the buttons being clicked by using Triggers commands within PowerPoint …
Triggers Once you’ve added an Appear or Disappear custom animation effect to an item on a slide, edit the timing options by choosing Triggers and selecting Start effect on click of and choose the relevant object (in this case a button) from the dropdown list:
Final Custom Animation settings Here are the final animation settings from Example Slide 1. Remember that a red star indicates disappear and a green star indicates appear. So, when button A is clicked, Group 11 (that’s blue button B and text) disappears, and Group 8 (blue button A and text) appears. And when button B is clicked, Group 8 (blue button A and text) disappears and Group 11 (blue button B and text) appears. Finally, set both of these groups to disappear at the outset to make sure they don’t appear until the appropriate button is clicked.
Simple 3 option slide This simple slide includes 3 build elements and shows a different way to identify which option has been selected - an orange highlight box rather than a different colour button. Apples Bananas Oranges Next slide >>
Quiz The idea of a Quiz is that a tutor can ask students to name items in a list. As long as the tutor knows which order these items appear in the correct answer, the tutor can display the answers one at a time as the students participate. In this example, click on the numbers below to reveal the answers in whichever order you like: Quiz Name the 5 most popular boys’ names in the UK in 2006 1. 2. 3. 4. 5. Jack Thomas Joshua Oliver Harry Next slide >>
Glossary This slide illustrates the idea of a Glossary in which we can “look up” some key terms on the page. A pop-up appears to define the key term that is clicked. This pop-up can be closed by clicking on the in the top right corner of the pop-up. The terms included in the glossary are indicated using underlining, just like a web link. OK, click on the key term in the sentence below and you’ll see what I mean … There has been much debate about the role of Government in public health issues. The level of fluoride in public drinking water is regulated under the Utilities Act 1981. The UK is also subject to … Utilities Act 1981 Blah blah blah blah blah blah blah blah blah blah blah blah blah blah blah blah blah blah blah blah blah blah blah blah blah blah blah blah blah blah Next slide >>
That’s all folks We hope you found these slides useful, and that they have given you some ideas about how to use PowerPoint creatively. Triggers are relatively easy to use and give tutors the opportunity to control the content shown on a slide and the order in which that content is displayed. Feel free to open and edit these slides to explore which settings were used to create the effects you’ve just seen. More creative ideas and technical support for presentations can be found in the Professional PowerPoint section of the intranet. If you have any suggestions, we’d love to hear from you. Brought to you by the Learning Technology Team at BPP College learningtechnology@bpp.com