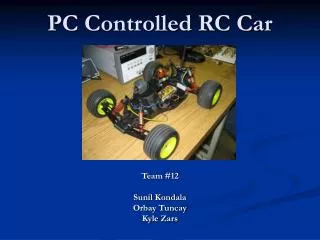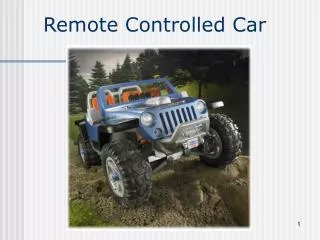
Computer Engineering Remote Controlled Car Project ACSE 2006
Computer Engineering Remote Controlled Car Project ACSE 2006. Graham Smyth Jerry Dolata. Computer Engineering Units. Grades 10 - 12 Five Hands-0n Units. 1 . Hardware 2. Networking 3. Integrated Circuits 4. Programming 5. Interfaces. Software. Turing. parallelput ( number)

Computer Engineering Remote Controlled Car Project ACSE 2006
E N D
Presentation Transcript
Computer Engineering Remote Controlled Car ProjectACSE 2006 Graham Smyth Jerry Dolata
Computer Engineering Units Grades 10 - 12 Five Hands-0n Units 1. Hardware 2. Networking 3. Integrated Circuits 4. Programming 5. Interfaces
Software Turing • parallelput ( number) • put parallelget • mousewhere ( x, y, click) • play (“CDEFG”) • drawline ( x1, y1, x2, y2, red) • Provincially Licensed
Parallelport Pin Configuration(printer port) Input I0 – I3 Output D0 – D7 13 12 11 10 9 8 7 6 5 4 3 2 1 25 24 23 22 21 20 19 18 17 16 15 14 Grounds 18 - 25 Input I4 View from back of Computer
Breadboard Connections Connected High Fives Divider Low Fives Connected
Removing Shipping Holders 1. Remove Screw 2. Remove Screw
Removing Battery Covers 2. Remove Screw 1. Remove Screw 3. Insert 4 AA 4. Insert 1 9V
Opening Case Carefully Remove 10 Small Screws
Removing Joysticks Remove Joysticks Separate Case
4 Pair From Joystick 2. Green 1. Green/White 5. Orange/White 4. Orange 3. Blue Carefully Wrap 5 Wires to Board
Closing Case Antenna Inserted Wrap to Secure Cable Removing Battery Covers Use 2 Screws in Opposite Corners to Close Case
4 Pair Wire to Transistors Orange to Right Pin Green to Right Pin White/Green to Right Pin Blue to Ground Orange/White to Right Pin
Adding Resistors Each Resistor to Middle Pin Each Resistor Jumps Divider
Adding Grounds Left Pin to Ground
From D Sub-connector Blue Ground From D sub From D sub
From D Sub-connector to BB Pin 5 White/Green Pin 4 Green Pin 3 Orange/White Pin 2 Orange Pin 18 Ground
Software 1 • When 8 is pressed the car should go forward • When 5 is pressed the car should stop • When 0 is entered the program should exit
Software 1: Answer var key : string (1) loop getch(key) if key = “8” then parallelput(1) elsif key = “5” then parallelput (0) end if exit when key = “0” end loop
Software 2 Add to the previous program commands that will instruct the car to go: • Forward/left when 7 is pressed • Forward when 8 is pressed • Forward/right when 9 is pressed • Stop when 5 is pressed • Reverse/left when 1 is pressed • Reverse when 2 is pressed • Reverse/right when 3 is pressed • Exit program when 0 is pressed
Software 2: Answer loop getch(key) if key = “7” then parallelput(5) elsif key = “8” then parallelput (1) elsif key = “9” then parallelput (9) etc
Software 3 • Write a program so the car will auto parallel park • Add computer controlled turn signals • Add reverse lights • Add light sensors so the car will follow a light source
Addresses grahamsmyth@ciaccess.com www.classictechnology.ca www.holtsoft.com