Indications
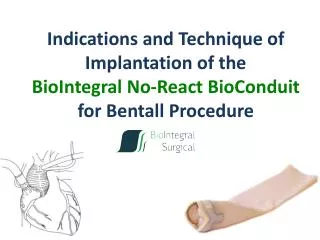
Indications and Technique of Implantation of the BioIntegral No-React BioConduit for Bentall Procedure. Indications. Endocarditis combined with aneurysm of the ascending aorta Marphan syndrome combined with AR and dilatation of the aorta at any age Infected graft conduit

Indications
E N D
Presentation Transcript
Indications and Technique of Implantation of the BioIntegralNo-React BioConduitfor Bentall Procedure
Indications • Endocarditis combined with aneurysm of the ascending aorta • Marphan syndrome combined with AR and dilatation of the aorta at any age • Infected graft conduit • Older patients when there is a need to minimize bleeding • Young patients to replace Ross Procedure
Indications Why No-React BioConduit for young patients? Why to replace Ross Procedure? • No-React valves and conduit found to resist infection, calcification, and remodeling in long-term clinical follow-up • Pulmonic autograft in Ross Procedure is now known to dilate significantly because of remodeling that starts after 3 years, while No-React BioConduit resists dilatation beyond 10 years at any age
Technique of Implantation Patient on CPB Distal cross-clamp Resect the aneurysm (above the coronary Ostia) & de-calcify if necessary Figure 1
Technique of Implantation Implanting the annulus of the NR-BioConduit The suture line of the BioConduit must face the non-coronary cusp The pericardial annulus of the BioConduit can be sutured with interrupted suture to the aortic annulus (2.0 polyester suture) Or continuous 3.0 or 4.0 monofilament suture. Advisable to start with 3 commissural site sutures and then run in between – see video Figure 2
Technique of Implantation Suturing the Coronary Button Introduce a right angle clamp and apply outside pressure in the inter-commissural space Perforate the pericardium with a knife over the right angle guidance Figure 3
Technique of Implantation Suturing the Coronary Button 3. Complete the round perforation with an aortic punch or scissors as shown in the figure Figure 4
Technique of Implantation Suturing the Coronary Button Suture the coronary left and right Ostia to the perforated respective orifice using a continuous 5-0 monofilament suture Figure 5
Technique of Implantation Distal Anastomosis Transect the conduit in the appropriate length (see video) Suture the distal part of the conduit to the distal aorta near the clamp using 3.0 or 4.0 monofilament (remember use 2-3mm close bites to assure 100% hemostasis) Figure 6
Technique of Implantation Distal Anastomosis Let the conduit fill with blood and close the anastomosis WARNING: any anastomotic bleeding when the patient is off bypass must be secured with 5-0 or 6-0 proline, no oozing permissible, and do not use any aldehyde glue Figure 7
Technique of Implantation De-clamping Before you remove the aortic clamp, you can de-air the aorta with a needle Remove the clamp, and you are ready to go off bypass Figure 8
Technique of Implantation De-clamping If the diameter of the aorta is larger than the conduit, anastamosis is completed as far is possible and the remaining defect is closed with a No-React pericardial patch (pericardium trimmed from distal end of conduit) Figure 9