Configuring RAID with mdadm
Configuring RAID with mdadm. Raid ?. Redundant Array of Inexpenisve Disks JBOD Raid 0,1,2,3,5,6 Combinations 10,0+1, etc . Raid0 . Striping Non-redundant Focus on speed Multiple disk balance the load 1 disk broken = All data gone. Raid 1 . Mirroring

Configuring RAID with mdadm
E N D
Presentation Transcript
Raid ? Redundant Array of Inexpenisve Disks JBOD Raid 0,1,2,3,5,6 Combinations 10,0+1, etc ...
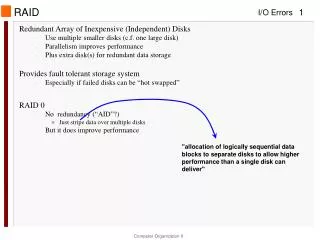
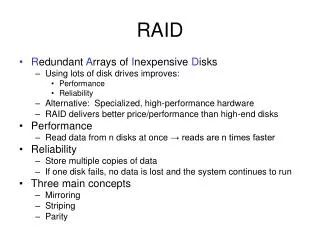
Raid0 Striping Non-redundant Focus on speed Multiple disk balance the load 1 disk broken = All data gone
Raid 1 Mirroring Data is replicated to 2 or more disks 1:1 ratio realtime backup Slow Minimum of 2 disks
Raid5 Striped set with distributed parity or interleave parity requiring 3 or more disks Size = n disks – 1 Data is not destroyed if one disk is lost Due to parity recalculation the spare can be rebuilt
Raid 6 Striped set with dual distributed parity Becomes more important Can recover diskfailures up to 2 drives Important while rebuilding large drives
Raid-combinations Raid 1+0 = Mirror of striped sets (Raid10) Raid 0+1 = Striping of mirrors
Comments RAID is NOT backup !!! Keep rsync or cold backups ! Hot spare Software Raid vs Hardware Raid Detailed information on next url : http://nl.wikipedia.org/wiki/Redundant_Array_of_Independent_Disks
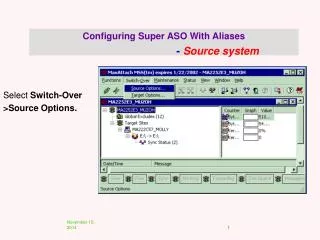
Installation Follow normal installation steps until you get to the partitioning wizard There you choose manual partitioning
Repeat partitioning Repeat slides 6 through 12 to complete the partitioning scheme The result should be as the following slide
Finish MD configuration Repeat slides 16 through 20 until you get the result on the next slide You will notice when you’re finished with designating MD devices, when you have selected all pairs Then select “Finish”
Finish installation Continue finishing your installation if it were a normal one Refer to semester 1 documentation if necessary
MDADM Once rebooted on your new system, install mdadm raid tools Apt-get update && apt-get install mdadm Mdadm - -detail /dev/md? Cat /proc/mdstat dmesg