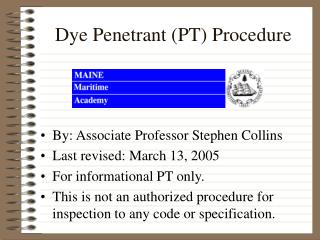
Dye Penetrant (PT) Procedure
Dye Penetrant (PT) Procedure. By: Associate Professor Stephen Collins Last revised: March 13, 2005 For informational PT only. This is not an authorized procedure for inspection to any code or specification. Safety. You must have documented MSDS training on PT materials before using them.

Dye Penetrant (PT) Procedure
E N D
Presentation Transcript
Dye Penetrant (PT) Procedure • By: Associate Professor Stephen Collins • Last revised: March 13, 2005 • For informational PT only. • This is not an authorized procedure for inspection to any code or specification.
Safety • You must have documented MSDS training on PT materials before using them. • Wear safety glasses and gloves (illustrations here do not show gloves, but you must wear them when handling PT materials)
1. Degrease the surface to be inspected. • Skip this step if no grease or oil is present. • Coat the area to be inspected with Cleaner • Let grease dissolve, wipe dry with clean cloth • Allow Cleaner to evaporate 2 1
2. Clean the surface by sanding or wire brushing. • Skip this step if surface is clean and smooth. • Grinding leaves deep scratches, making it difficult to clean. Follow up with sanding.
3. Apply the penetrant • holding the spray can back about 12” from the surface using a sweeping motion. • Use only enough penetrant to cover the inspection area.
4. Let stand for 10 minutes • to allow penetrant to enter flaws open to the surface.
5.Wipe the surface • with a clean dry rag to remove penetrant
6. Clean the surface • using a rag premoistened with cleaner/solvent. • Do not flush the surface with cleaner/solvent • Repeat until all traces of penetrant are removed, rag comes up clean.
7. Let stand for 10 minutes • to allow cleaner to evaporate
8. Apply the developer • Shake the can vigorously, make it rattle • holding can back about 12” from surface, using a sweeping motion. • Several light coats will dry more quickly. Do not allow to sag or puddle.
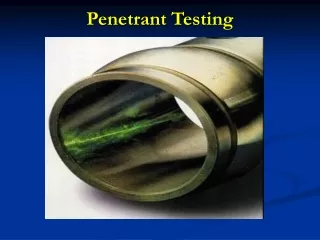
9. Let stand for 10 minutes • observing indications as they develop to aid in identification. • Interpret and evaluate any flaws by comparison to a suitable standard.
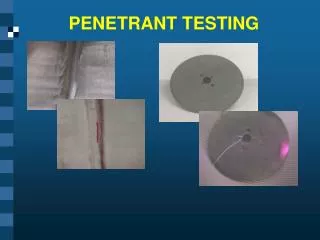
Examples of PT • Excavations of defects in castings
References • Magnaflux Corporation (2005) Spotcheck Dye Penetrant Operating Instructions. Retrieved March 13, 2005 from http://www.magnaflux.com/files/library/operating/Spotcheck~reg_Kit_Operating_Instructions.pdf • NDT Resource Center (n.a.) Introduction to Dye Penetrant Testing. Retrieved March 13, 2005 from http://www.ndt-ed.org/EducationResources/CommunityCollege/PenetrantTest/Introduction/history.htm
Links • http://technology.open.ac.uk/materials/mem/mem-dye.html The Open University, Faculty of Technology Dye Penetrant Testing. • http://www.nde.lanl.gov/default.htm Los Alamos National Laboratory, Engineering Sciences & Applications (ESA) Division • http://www.ndt.net/index.html NDT Net, the e-Journal of Nondestructive testing