Download
1 / 22
220 likes | 365 Vues
Resource for building up your school garden. Disclaimer: Much of this power-point Resource is from useful books and websites I’ve found. I have cited the sources, but the material is not for re-distribution, but FOR EDUCATIONAL PURPOSES ONLY. Glass house or outside?.

E N D
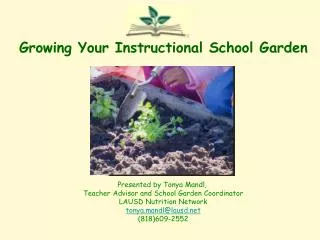
Resource for building up your school garden Disclaimer: Much of this power-point Resource is from useful books and websites I’ve found. I have cited the sources, but the material is not for re-distribution, but FOR EDUCATIONAL PURPOSES ONLY.
Glass house or outside? NB: this guide is intended for Dunedin climates – please check gardening books for your region Generally if a vegetable is Frost-sensitive, it should be planted after the frosts have ended, or in a glasshouse/cloche. I like to start my potatoes sprouting inside the house, and start seeds for summer inside the glasshouse, which I’ll then plant out after the frosts have ended. KEY Frost Sensitive * Glasshouse only (GH) Leafy vegetables: some lettuces* (some are frost-hardy though), Basil* (GH) Fruit/Flower/Seed vegetables: Chilli* (GH), Pepper* (GH), Corn*, Cucumber* (GH), Amaranth* (GH), Runner Bean*, Tomato* (GH), Zucchini* Root vegetables: Potato* Yam*
SEEDS OR SEEDLINGS? It is always much cheaper to grow plants from seed instead of in store-bought punnets. However, there are some plants that you may want just one, not 100, in which case it makes sense to just buy one from a gardening centre. Buying seeds means you have a lot more options of exciting varieties. Invest in a catalogue from Kings Seeds www.kingsseeds.co.nz or others www.italianseedspronto.co.nz, www.egmontseedsshop.co.nz and Koanga Institute www.koanga.org.nz Seed-raising mix is worth every cent, as it provides the best mix of nutrients for growing seeds, and your seedlings won’t be competing against weeds.
SEEDS OR SEEDLINGS? (cont.) • ASPARAGUS: Much cheaper to sow seed than buy crowns at $2 each. A $5 packet of seed produces 20-30 plants. Just wait an extra year for your first crop • BEANS, PEAS – Waste of time to buy in punnets, seeds germinate very easily and reliably. A packet of 100 bean seeds costs about $4, compared to 50c each in a punnet • BRASSICAS – punnets are convenient, who needs more than half a dozen mature cabbages at any one time? Alternatively, sow a couple of seeds every two weeks to ensure that they won’t all ripen at once. • HERBS – Easier in punnets if you just want one plant. Basil grows easily from seed and is good when put into tomato pots. • SWEETCORN – Easy to raise from seed, and cheaper. Doesn’t like being transplanted anyway. • TOMATOES – If you want to grow lots of varieties (or an heirloom mix) use seed. If you just want one plant, just buy it in a punnet – make sure you don’t buy it too early in the season, be patient. • CURCUBITS – Zucchini, pumpkins etc. – very easy to sow from seed. Don’t be tempted to sow too many or you’ll be eating zucchini every day in summer. 4 zucchini plants is ample for a family of 6.
Plant in seed-trays or direct? Some plants grow better if you start them off in seed trays, others prefer to be planted directly where they are to grow. Seed trays: Leafy Vegetables, Fruit/flower/seed vegetables. Big seeds – peas, beans, pumpkins, zucchini, squash, cucumber Other – lettuce, brassicas, trees, peppers and chillis, tomatoes, herbs, Direct: Root Crops Root crops - potatoes, carrots, parsnips, swedes, turnips, yams, kumara, beetroot, rhubarb, garlic, onion, radish) Plus – corn (doesn’t like to be transplanted) When planting directly in the soil, you need to leave enough space between the seeds. E.g. Carrots, at least 5 cm apart. See guidelines for individual vegetables. TIP: if you plant radishes among the carrots, the radishes will be ready first, and will leave the carrots with lots of space. Can also thin the vegetables (take out all the extras which sprout) to leave space for a few, but this wastes seed.
Compost basics There are many types of compost bins, and a lot of conflicting advice about creating good compost. Here are the key ingredients which make up compost. Theory of Compost: In Nature, leaves fall off trees and are decomposed naturally by earthworms and micro-organisms. They provide a mulch and the soil becomes healthy. When we compost, we are doing this same process of decomposing matter, but speeding it up so that it doesn’t take 50 years or more. Step 1: Find a place. Before you begin making compost, you need to find a good spot and set up one or more compost bins. There are a few different options, such as a two or three bin system made from wooden planks (or if you can find some old pallets, nail 4 of them together in a square for a quick compost bin), a store bought black plastic bin, etc. or you can just make a compost heap and cover it with carpet, grass clippings etc. The most important thing is that it needs to let air in at all times, and to be easy to turn every couple of days when you’ve first set it up. It’s easiest if you find two spots next to each other, so that you can turn the heap into the other spot. The size of the compost should be at least 1 metre squared, 1.5m squared is perfect – allows it to get nice and hot inside, which kills any weed seeds. Step 2: Create the heap. Compost bins don’t work if you keep adding to them, they all need to de-compose at the same speed. If you just want a place to throw your food scraps, consider a worm farm rather. Compost needs4 key ingredients: Green material (rich in Nitrogen), Brown material (rich in Carbon), an activator (to get things decomposing), and air (to prevent it becoming rotten). See the next page. To build up a compost heap, mix approximately equal measures of green and brown material, interspersed with the activator. Putting sticks in the heap makes it harder to turn but provides more air. (TIP: Compost should be attracting the aerobic (air-loving) micro-organisms. If the compost doesn’t get enough oxygen, it attracts the an-aerobic (non-air-loving) micro-organisms which smell bad and don’t make good compost). - Layer the green, the brown, and the sticks, wetting the heap after each layer with a nearby hose. Step 3: turn till done. Turn completely 3 days after making the compost heap. Use a fork, putting the drier outside edges into the middle, and the middle bits onto the edge. Turn again every 3 days for the first 2 – 3 weeks. Then, turn less often until ‘cooked’, making sure it isn’t smelling rotten in the middle which signifies lack of air. After a few weeks you will notice millions of small baby earthworms, which shows how healthy and organic your compost is. Use after about 2 months. (NB Can turn less often in winter, cooks quicker in summer, will be ready sooner)
4 basic ingredients – Green, Brown, Activator, and Air Green – fresh grass clippings, garden weeds without seeds, Fruit and vegetable scraps, seaweed, kitchen scraps, tea leaves and bags, coffee grounds, animal manure (grass eaters only) Brown - Browns are those that you could burn if left to dry out, they also help air flow and drainage of moisture. Always start with a double layer of coarse browns for aeration and always build it directly on the ground. Includes: torn up newspaper/cardboard, unbleached and unglossy paper, egg cartons, tree prunings, dry leaves, bark, untreated sawdust, wood ash, twigs and sticks, straw (without seeds), cotton and wool rags (must be 100% natural), hair. Activator – Horse manure, chicken manure, sheep pellets – don’t overdo this, just a generous sprinkle after every couple of layers of green and brown will do the trick. Air – put a layer of sticks at the bottom of your compost. Put more in the middle as you layer the browns and greens up. Don't include: meat or fish, dairy products, fats, oils, anything toxic (e.g. sprayed weeds), anything artificial like plastic or acrylic, invasive weeds like couch grass and convolvulus, weed seeds, dog and cat poo, coal ashes. *Remember to WATER each layer as you create the heap.
COMPOSTING LINKS: http://www.compost-info-guide.com/ http://www.wellington.govt.nz/services/rubbrecyc/pdfs/compostguide.pdf http://journeytoforever.org/farm_library/howardAT/ATtoc.html http://www.youtube.com/watch?v=mmPv2P7pk2k
WORM FARMS Starting a worm farm is easy- best to start in the warmer months. Site the container near your kitchen on the east or west side of your house (not in full sun or full shade). •Get a large open container with drainage like an old bath, kitchen sink (no plugs in) or rubbish bin with 10mm holes drilled in the bottom. Raise it on a base so you can collect the rich liquid manure that will come out into a tray or bucket. •Add a 2-3 cm layer of gravel or sand for drainage on the bottom. •A 2-3 cm layer of damp shredded newspaper, old compost or pile of leaves as a starting base (bedding)for your worms. •Place a good handful of compost (tiger) worms* amongst the bedding. (Your old compost heap should have these under it. They are striped and also known as tiger worms. (The pink worms you find in your garden are not the ones you need). Ask a friend who gardens or has a worm farm- or buy them from a nursery. •Cover with a piece of old carpet, sacking or circle of wood with holes to cover the container so it stays dark and moist. Caring for your worm farm: Wait one week for your worms to settle in then you can feed them building up to 1-2kg of food scraps each week. Place them in one segment at a time rotating each week. They especially love coffee grounds, raw food scraps, After 7 weeks the first place you feed them should be like soil- if not feed them a little less. Do not feed them citrus, dairy or meat products. If you live in a cold area, for winter only, wrap the container in some insulation material e.g. old carpet, sacking. (Optimum temperature 15-25oC but can deal with smaller amounts of scraps at lower temperatures). If it starts to smell sour add a sprinkle of lime or dolomite. You can harvest some wonderful rich worm compost by feeding them in one quarter of the container for two weeks then the other three quarters will be empty of worms and you can gently scoop it out. Always add some more bedding in the empty space left. GOOD LUCK! Soon you’ll have thousands of little white baby worms which will grow into busy active workers making heaps of compost for you and only wanting food scraps for their efforts! After a few months you can give a handful of worms as gifts to your friends! (They will also need a copy of this)
Collecting Plants Herbarium/ collection records Plant press Permits http://www.doc.govt.nz/about-doc/concessions-and-permits/research-collection-and-wildlife-permits/
Plant based dye • Collect plants • Use a mordant (ashwater, vinegar, lemon juice) • Use different containers • Cold, hot solar application
Native Dye Plants • Vitex lucens(puriri) dark is used for dye • Phyllocladustrichomanoides (Tankekaha) • The bark from this coniferous tree is beaten in a trough of water, heated with stones to make a red-brown or a black dye. • Scphoramicrophylla(kowhai) a yellow dye can be extracted from the petals
References • www.eske-style.co.nz/maori_plant_use.asp • http://www.doc.govt.nz/about-doc/concessions-and-permits/research-collection-and-wildlife-permits/ • Flint, I. 2008. Eco Colour, botanical dyes for beautiful textiles. Murdoch Books Pty Limited Australia.
USEFUL BOOKS, and REFERENCE LIST Thanks to…. • NZ Gardener – Special Edition no.7 ‘Homegrown fresh Veges’ – Lynda Hallinan. • ‘Kids’ Book of Plants’ – Diana Noonan and Keith Olsen, 1997. • Otepoti Urban Organics – Bart Acre – website.