Building a Website
Building a Website. Jeremy Nighohossian 14 September 2012. Notes on this Presentation. I have tried to consistently use colors to emphasize when I’m writing code, and what type of code it is. html code in text. html code block. Css code block. Include code block. Getting Started.

Building a Website
E N D
Presentation Transcript
Building a Website Jeremy Nighohossian 14 September 2012
Notes on this Presentation • I have tried to consistently use colors to emphasize when I’m writing code, and what type of code it is. • html code in text html code block Css code block Include code block
Getting Started Creating and Connecting to your Site
Setting Up your Website • What is a Website? • A website is basically a set of files that link to each other • Generally, they are share a common layout and style • Setting Up your Website • The Economics Homepage has instructions on setting up your web account. • I would encourage you to use some variant of your name as the address: first initial, last name for example.
Connecting to Your Website • Directly editing website through software program • ftp • sftp • Directly editing your website by mapping a drive • Keeping a copy of your website on your personal computer, and then synchronizing using software
Software • Text Editor • Microsoft Expression Web • Computer Labs • Software.tamu.edu • Dreamspark • Adobe Dreamweaver • WinSCP • VPN software – for off-campus access
Setting Up Expression Web • Once your website has been created by the Department, you can connect with Expression Web • Go to Site-->New Site… • Choose Import Site Wizard • Choose SFTP connection type • Type sftp://econweb.tamu.edu in Location: • Click Next
Setting Up Expression Web • Type in Credentials (Note: your web credentials aren’t necessarily the same as your econmail credentials) • Uncheck Add to current site • Choose (or create) a folder on your personal computer where you will store your website locally. • Click Next
Setting Up Expression Web Actual Web Site Folder you Created • Highlight the public_html folder and then click the left blue arrow • This will put all of the web files on your computer
Synching your Website • You can open your site later by going to Site->Open Site… • Once you’ve edited your website locally, you can go to the Publishing Tab, click the link, and return to the screen shown in the previous slide. • From there you can update the remote version of your site by using the right blue arrow.
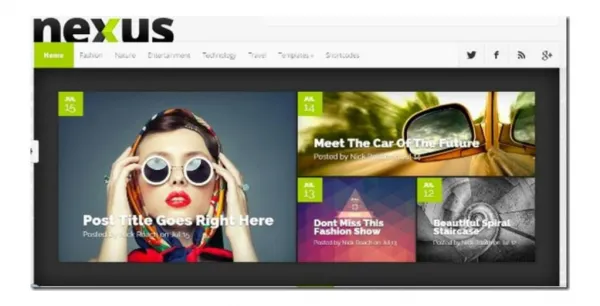
Texas A&M Templates • Texas A&M provides templates at http://marcomm.tamu.edu/web/templates • Of the four, you’d almost certainly want to choose the first one. • Download the zip file and extract it into the public_html folder of your website
Expression Web Templates • Expression Web also provides web templates • Open Expression Web and choose Site->New Site… then choose Templates • Choose the Template that you prefer • Choose the folder you set up earlier for your website
Other Options • Google Search • Other Webhosts (Blogs, etc.) • Other Students
Getting Started • Whatever template you chose, move all of the files from the template into the public_html folder on your local machine. • You can now change the files on your local machine, and come back to this interface to move files to the web version. • There are icons that denote whether the files are out of sync or not.
Editing Your Website How to Design
How Websites Work • Made up of code – HTML • Tags are basic building blocks • Images <img> • Links <a> • Paragraphs <p> • Tables <table> • Web Browsers convert the code into the graphical interface you see • You don’t have to start by learning code; I recommend you start with a program that writes the code for you. If you then go to the code for customization, you’ll learn it yourself.
The Split Screen HTML Code Preview
Website Organization Header – It includes page title and style information (discussed later) Body – contains everything viewer will see Divs help you divide (organize) the body of your website. See how I have mine divided into a header, a navigation bar, and primary content.
HTML Basics – Tags • Tags are used for each element of a page: images, tables, paragraphs, etc. • They have the format <tag>Content</tag> • Within the tag, you can set attributes such as formatting, id, class, etc. <tag id=“tag1” style=“color: red”>Content</tag> • Most tags need the closing tag as well (</tag>), but some can be closed without it such as <img/> • There are many attributes shared by multiple tag types, but each tag has its own set of attributes.
HTML Basics - Text • No tags are required for text, but <p> serves as a paragraph tag. • It also allows you to change the format (color, margins, etc.) of the paragraphs. • Within a paragraph you can selectively edit some text using a <span> tag. • You can also insert a line break with <br/> • Additionally, you may want to use heading tags <h1>, <h2>, etc.
HTML Basics – Text Example • Let’s say you have the following code: Research Working Papers In this paper I try to distinguish the difference between the book 1984 and the year 1984. <html> <body> <h1>Research</h1> <h2>Working Papers</h2> <p>In this paper I try to distinguish the difference between the book <span style=‘font-style: italic’>1984 </span> and the year 1984.</p> </body> </html>
HTML Basics – Layout • divs are the main tool to organize your website into different sections. They are very customizable for size, position, and appearance. • Position – You can change the position of a div by setting the left and top attributes, but location will depend on how you set the position attribute. • Static – positioned however it shows up in code (not changeable) • Fixed – positioned relative to browser window. • Relative – positioned relative to its static position • Absolute – (complicated)
HTML Basics - Layout div1 • Let’s say you have the following code: body div2 <html> <body> <div id=‘div1’> <div id=‘div2’ style=‘left: 5; top: 10’> </div> </div> </body> </html> Position: relative Position: fixed Position: static
HTML Basics - Lists • Lists can be both ordered (numbered) and unordered (such as this slide) • Ordered tag <ol> • Unordered tag <ul> • Each list item should be contained by <li></li> • You can make embedded lists, too, by creating a second list within a list item tag. <html> <body> <ul> <li>Item 1</li> <li>Item 2</li> <li>Item3</li> </ul> </body> </html>
HTML Basics - Links This is the text the user will see. • Links take the form <a href=‘http://www.google.com’>Google</a> • E-mail addressesare types of links <a href=‘mailto:wiggins@tamu.edu’>DB</a> • Some people don’t like using the e-mail link because of spam.
HTML Basics - Tables • Tables are relatively complicated. • <table> • Rows <tr> • Cells <td> <html> <body> <table> <tr><td>1</td><td>2</td></tr> <tr><td>3</td><td>4</td></tr> </table> </body> </html>
HTML Basics - Images • All images on your website must be accessible through the internet. • You cannot link to images on your personal computer and have others see it. • Image Tags take the form • The alt attribute is the text displayed if the image can’t be found. • In the src attribute, I’ve use an absolute address, you can also use relative addresses. • If you have an image folder in your website it would be src=‘images/tgronberg.jpg’ <imgsrc=‘http://econweb.tamu.edu/common/images/people/tgronberg.jpg’ alt=‘gberg’/>
HTML Basics - Styles • Formatting the contents of your webpage requires using the tags’ style attribute. • With it you have many options: background color, font color, font size, margins, position, size, etc. • Individual style properties must be divided by semicolons (;) • As an example, we’ll take the table from before.
HTML Basics - Styles • Let’s take the bottom left cell: <td>3</td> • <td style=“background-color: yellow;”>3</td> • style=“font-weight: bold;” • style=“width: 20%;” • style=“padding: 10px;” • style=“color: red;”
CSS Basics • CSS allows you to standardize the formatting of your website • Each tag type can be customized • You can use the same software to edit CSS files • This is can be implemented in two ways: • a style section in the <head> section of your html file • a separate .css file (which you’ll have to link to in all of your html files) by placing the following in the <head> section of your html file.
CSS Basics - Tags • Formatting all instances of a particular tag • For example, if you want all tables to have a gray background and white text table { background-color: gray; color: white; }
CSS Basics - Classes <html><body> <table class=‘datatable’>… </table> <table class=‘exampletable’>… </table> </body></html> • If you want to format one set of tables one way, and another set another way, you’ll want to use classes. .datatable { background-color: gray; color: white; } .exampletable { background-color: orange; color: blue; }
CSS Basics - IDs • Additionally, you can use CSS to format web elements by their id, for individual customization. <html><body> <table id=‘table1’>… </table> </body></html> #table1{ background-color: gray; color: white; }
CSS Basics - Actions • Some elements have actions associated with them. • For example, if you want the cell of a table to change colors, when you mouse over it. td:hover { background-color: blue; color: orange; }
CSS Implementation - Internal • This is how to add styles within an HTML document • Notice I have both tag styles (body, h1, th) and class styles (sub, expl, xmpl). • This method is best suited when you’ll have different style sets on each page. • If you’ll have consistent style definitions across your whole site, you should use the external method.
CSS Implementation - External • You’ll need to link your html file to your CSS file by putting the following line (substituting the file names) in the <head> section of your html file. • You can then edit your CSS file individually and watch the magic happen. • Note: Your CSS file should look exactly like what comes between the <style>…</style> tags in this image. <link href=“styles/main.css” rel=“stylesheet” type=“text/css” />
HTML Advanced - Includes • Includes help standardize your website • By using an include, changing a single file can change the look of multiple pages on your site • Common uses of includes or in the header, footer, and sidebars. • To make an include, you just write out the HTML code, save it in an .inc file, and link to it on your web page wherever you want that code to appear. <!--#include virtual=“header.inc”--> <h1>Jeremy’s Web Page</h1>
Other Information • If you see something interesting on someone else’s website that you want to know how they did, you can always right-click with your mouse, and view the source code. • Throughout the presentation, in code, I’ve used both quotations and apostrophes. They’re interchangeable. • You can comment out sections of your code by typing <!--…--> where … denotes what you want to comment out. • When you want to make something look a certain way you can • Use trial and error • Web search
Beware • One extremely negative aspect of Expression Web is that when you try to set fonts, it will create individual styles for those changes. • For example, if you wanted to make a single word larger, Expression Web would create auto-style1, set the font size, and apply it to the word. • If you then do the same thing to another word, it will create auto-style2. • This can become very messy. If you want to apply the same formatting repeatedly, make sure you apply the already-made style.