Probability
Probability. by Chris Brown under Prof. Susan Rodger Duke University July 2012. Probability.

Probability
E N D
Presentation Transcript
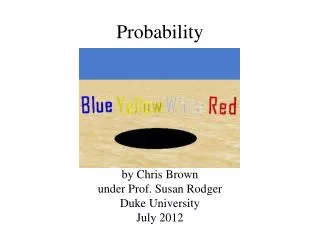
Probability by Chris Brown under Prof. Susan Rodger Duke University July 2012
Probability • In this world, we will create a probability game where students will have to give the probability of choosing a certain colored ball from a hole in the ground. They are provided with the total number of balls and the number of balls for each color and will be asked to calculate the probabilities of choosing random balls out of the group. This world will help students learn about probabilities and fractions.
Standards NC Standard Course of Study Mathematics Grade 6- Goal 4: The learner will understand and determine probabilities.
Set Up • For this world, I chose the Sand template after opening Alice. Once you have done that, click on the “Add Objects” button to add all of the things we will need into this world.
Set Up • The first object we want to add is a circle, to represent a hole in the ground where we will place our balls. Scroll over to the “Shapes” folder in your local gallery and import the “Circle” class.
Set Up • Now, while we are in the Shapes folder, we want to add 12 spheres to represent the colored balls that the program will choose randomly. SphereHighPoly makes the spheres look rounder, so I used those. You will see 12 sphereHighPoly objects added to the object tree in the top right corner. I changed their names to ball1 to ball12 just for clarity by right clicking on the name and selecting rename. - Note: After adding each one, you will need to move it or Alice will place all 12 spheres on top of each other.
Set Up • To change the color of a ball, make sure its name is highlighted in the object tree and select the properties tab under the ball’s details. Click next to the color property to change the color of the ball and you should see the ball change colors.
Set Up • Change the colors of the balls so that there are 4 blue balls, 3 red balls, 3 yellow balls, and 2 white balls.
Set Up • Now, resize the balls using the icons on the right side of the screen so that they are smaller and move them so that they are all “inside” of the hole, or just below the circle in this case. Here’s a picture from the bottom, but your world should look like the picture on the next slide.
Set Up • Change the color of the circle to black so that it actually looks like a hole by going to circle’s properties and changing the color to black.
Set Up • Next, we want to add 3D text objects, one for each possible color of the balls, to update while the game is being played with the number of balls of that color left. Scroll to the end of the Local Gallery and import four 3D text objects, setting the text of each one to “Red”, “White”, “Blue”, and “Yellow”. Also, go into the properties of each of these new text objects and change their color to their respective string values. I renamed the 3D text objects red, white, blue, and yellow to make a distinction between them in the Object Tree. • See the next page for the final setup of the 3D text objects.
Set Up • Now we want to save the start camera position because we will be moving the camera. To do this, you will click on “more controls >>” on the right and then click on . In the object tree, you will see a new folder called Dummy Objects and you are going to want to rename the dummy object in that folder to start.
Set Up • Now we want to add a new camera view to animate when the balls are taken out of the hole. Use the arrows below the camera view to move the camera to get a close up of the hole by itself, and drop another dummy object at the camera. In the same folder, rename this camera view object choose.
Set Up • Now we have all of the objects that we will need set up in this world and can start programming! Click on the Done button to continue to world.my first method.
Lists • The first thing that we need to do is make a list of all the ball objects that we added into the world. Make sure world is selected in the Object Tree, and select “create new variable” under world’s properties.
Lists • When the menu pops up, name the variable listOfObjects. Make sure that you select Object as the variable type and check the box next to “make a List”. Add 12 new items (item 0 – 11) and choose each ball to be an item in the list. Click OK when you are finished and you should see this list under world’s properties.
Lists • Now we want to create three more lists: one that contains the string of color names (colorNames), one that contains the actual colors (colorList),and finally one that contains the number of balls at each color left (colorNums). Note that the indices of all three of these lists must correspond to the same color (0 = red, 1 = white, 2 = blue, 3 = yellow).
Lists • When you’re done, you should see four list variables under world’s properties.
world.my first method • Now we’re ready to start adding code to world.my first method. The first thing that you want to do is drag a Loop into the “Do Nothing” section of the method and set the value to however many times you want to quiz the user to calculate the probability.
world.my first methd • Create a new number variable called total that will keep track of the total number of balls left in the hole. Each time a ball is taken the total will decrease by 1. Initially set the value of total to 12.
Changing 3D Text • The first thing that we want to do is change our 3D text so that it displays the number of balls left at each color. Drag a Do together into the loop we just added to change all of the 3D text values at the same time.
Changing 3D Text • Now, to change the text of a 3D text object, you will go to its properties and drag the “text” variable into the Do together. Set the value to default string for now, because we will change this next.
Changing 3D Text • Click on world in the object tree and go to world’s functions. Under the string tab, you should see a “what as a string” function. Drag that over the value of the default string that you set the 3D text red to. You can also choose any object for now because this will be replaced. I chose “circle” in this example.
Changing 3D Text • Now go to world’s properties to the lists that we created earlier. Drag the list colorNums over the arbitrary object that you picked earlier. When asked for the index, go to “ith item from list” “0”, to choose the number at position 0 in the list which represents the number of red balls.
Changing 3D Text • Then, you are going to want to set the other 3D text values to their corresponding value in the colorNums list inside of the Do together as shown above.
Random Number • Now we want to create a random number variable to ask the user the probability of selecting random balls from the hole. Click on “create new variable” in the right corner of the method editor and call this new number variable colorIndex. Make sure the Type is “Number”.
Random Number • Drag the colorIndex variable from the top of the method into the loop but below the Do together, and set the value to any integer for now.
Random Number • Under world’s functions random tab, drag random number over the value that you just chose for colorIndex.
Random Number • Click on the purple “more…” in the random number function and set the minimum value to 0, the maximum value to 4, and integerOnly to be true.
world.my first method • Now, in world.my first method, create a new String variable called currentColor. This variable will keep track of the string of the current random color so we can ask the user to calculate the probability.
world.my first method • We want to set the value of currentColor to the value of the list colorNamesat our random colorIndex. First, drag the currentColor variable to the bottom of the loop and set the value to default string for now. Then drag the colorNameslist over the default string and go to “ith item from list” “expressions” “colorIndex” for the index. You can see a picture on the next page.
Quiz • At this time, we are ready to quiz the user on the probability of choosing a certain ball. The first thing we want to do is create a new string variable called answer in world.my first method, to save the answer that the user will give.
Quiz • Next, we want to set the value of answer so that it will save the answer that the user types in. Drag answer to the bottom of the loop and set the value to the default string for now.
Quiz • Then, go to world functions under the ask user tab and drag “ask user for a string” over the default string that we set answer to. When prompted for a question, select “other” and type in, “What is the probability that you will choose a ” and we’ll complete this question later.
Quiz • In world functions under the string tab, there is an “a joined with b” function. Drag that over the string we just typed earlier in for the question and for b, go to “expressions” currentColor.
Quiz • Repeat the last step and drag “a joined with b” over the entire question string. This time for b, choose other and type in “ ball? Do not simplify. (a/b)”, to give the user more information about the input of their answer.
Quiz • Next, we want to check if the answer that the user gave is actually correct. We can do this by dragging up an If/Else statement from the bottom of the method editor and dropping it in the bottom of the loop. Set the condition to be true for now.
Quiz • Drag the answer variable over the true in the If/Else statement and select “answer ==” default string.
Quiz • Drag in an “a joined with b” function from world’s functions over the default string, and then drag another “a joined with b” function over the previous two.
Quiz • For the center default string, simply change that to “/” to represent the bar of the fraction. The denominator will be the last default string, so go to world functions and drag the “what as a string” function over the last default string and choose “expressions” total.
Quiz • One thing to note is that in Alice, integers are represented as i.0. Instead of having the user type in a.0/b.0, we just want their answer to be in the form a/b. To do this, we will need to use the world’s “int as a” function. • Note: As of March 2012, there is a bug in Alice that hides this function for some reason, but it is a very tiny purple speck at the bottom of the advanced math section of world functions. Drag that over total and select “more…” “a” “expressions” total. The next few slides will show this clearly. This bug should be fixed in the next version.
Quiz • Drag this function over total that we placed in the “what as a string” function earlier. To set the value, choose “more” “a” “expressions” total.
Quiz • In the default string representing the numerator, you will also need to drag the world functions “what as a string” over the default string, and then the “int as a” function over that. This time, however, choose any value for a and we will change this later. I chose 1 below. • Note that there are 4 tabs before the “1” for 3 functions, that means your statement is correct with the “int as a” function bug.
Quiz • Under world’s properties, drag the colorNums list over the value that you chose earlier and select “ith item from list” “expressions” colorIndex to get the number of balls of the specific color left. The correct answer should be (# of balls for the current color/total number of balls).
Quiz • Now we are done checking to see if the answer is correct, but we need to decide what to do if the answer is right or wrong. If the answer is wrong, we want the circle to say, “Sorry, that’s incorrect…”. Click on circle in the object tree and go to circle’s methods. Drag “circle say” into the Do Nothing of the Else portion of the If/Else statement at the bottom and choose “other” to type in a string. If the answer is right, have the circle say “That’s correct!”.
Quiz • If the user gets the answer right, the first thing we want to do is make sure that the number of balls of that color isn’t 0. In the If portion, drag in another If/Else statement and select true for now.