Building Real-Time Operating Systems: Lab Experiment
250 likes | 281 Vues
Learn how to build and program a real-time OS using μC/OS-II with step-by-step instructions and exercises. Includes porting programs, inter-process communication, and debugging techniques. Perfect for computer science students.

Building Real-Time Operating Systems: Lab Experiment
E N D
Presentation Transcript
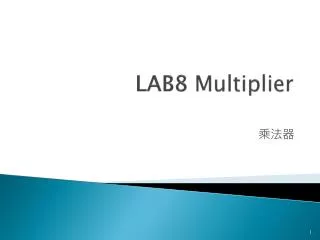
Lab8 REAL TIME OS-Experiment Speaker: Yung-Chih Chen Advisor: Prof. Chun-Yao Wang November 17, 2003 Department of Computer Science National Tsing Hua University
Outline • Lab – µC/OS-II • Building µC/OS-II • Building Program with µC/OS-II • Porting Program to µC/OS-II • Using Inter-Process Communication (IPC) • Exercise & Discussion
Building μC/OS-II (1/3) 1.Open μC/OS-II project file in ./Lab8/Codes/SW/ucos2/ with Code Warrior 2.Edit OS_CFG.h to customize μC/OS-II 3.In DebugRel target settings dialog ,turn to Language Settings > ARM C Compiler > Preprocessor. Add INTEGRATOR to List of #DEFINEs to generate specific code for Integrator
Building μC/OS-II (2/3) 4.Add or modify 2 directories to the Access Path so header files could be found. In target settings dialog, select Target > Access Paths. Add or modify ${AFS_ROOT}/AFSv1_4/Source/uHAL/h/ and ${AFS_ROOT}/AFSv1_4/Source/uHAL/Boards/INTEGRATOR/ 5.Repeat sub-step 3~4 for target “Release and Debug”
Building μC/OS-II (3/3) 6.Press the Make button, μC/OS-II library should be built successfully. A static library ucos2.a is created. Check the file in your working directory
Building Program with μC/OS-II (1/5) 1.In Code Warrior, create a new project named “eg1” of type “ARM Executable Image”. We assume the project is located at ./Lab8/Codes/SW/eg1/ 2.Add eg1.c to the project 3.Add μC/OS-II as a sub-project. This enables automatic rebuilt of sub-project whenever necessary. This approach is more flexible than add the pre-compiled ucos2.a library file 4.Add ARM uHAL library as a sub-project. The project file is located in ${AFS_ROOT}\Source\uHAL\Build\Integrator.b\uHALlibrary.mcp
Build targets for μC/OS-II Build targets for uHAL Building Program with μC/OS-II (2/5) 5. Now, specify which target to build and link. In project window, click the Target tab to display the Targets view for the project. Then, click the plus sign next to a build target containing the subproject to expand the hierarchy. Each build target in the subproject is listed in the hierarchy Build target hierarchy view
targets to link with main project targets to build Building Program with μC/OS-II (3/5) 6.Click on the Target icon next to the subproject build targets you want to build along with the main project. The CodeWarrior IDE displays an arrow and target icon for selected build targets 7.Click in the Link Column next to the subproject build targets. Select the target you want to link with the main project Select target to build and link with
Building Program with μC/OS-II (4/5) 8.Define SEMIHOSTED for programs to run in semihosted mode. In semihosted mode, an extra space of 1K bytes is needed for stack
Building Program with μC/OS-II (5/5) 9.Build the main project. An executable file that contains both user application and operating system will be created 10.Press Run button, you can see programs running on μC/OS-II in AXD console window
1 2 3 4 5 6 7 8 9 10 11 12 13 14 15 16 17 18 19 20 #include <stdio.h> int main(void) { char name[64]; int age; printf("please enter your name: "); scanf("%s", name); do { printf("please enter your age: "); scanf("%d", &age); }while(age < 0); printf("Hello, %s. Nice to meet you!\nYour age is %d.\n", name, age); return(0); } Porting Program to μC/OS-II (1/6) 1.Open the project “eg2” at ./Lab8/Codes/SW/eg2/ with CodeWorrior 2.The original code of eg2.c is listed. This program asks user for name and age, then it prints greeting message
1 2 3 #include "includes.h" /* uC/OS-II interface */ #include <stdio.h> Porting Program to μC/OS-II (2/6) 3. To port the program to μC/OS-II, include “includes.h” in eg2.c. The header file is an interface for μC/OS-II 4.Change the function name from main() to Task1(). In addition, change return type from int to void because a task never returns. Remove the return statements, too. 1 void Task1(void *pdata) 2 { 3 … 4 … 5 return(0); <= remove this! 6 }
Porting Program to μC/OS-II (3/6) 5.A task must receive an argument of type (void*), so change argument list from void to void *pdata. The purpose of this pointer is to pass initialization value to task. 6.A task is an infinite loop, so wrap the codes with a for loop. Remember, all task should call at least one kernel service in its code body. Otherwise, the multitasking mechanism of μC/OS-II will not work. You can call OSTimeDly() service to pause for a while after each round of processing, allowing lower priority task to execute. 1 void Task1(void *pata) 2 { 3 for(;;) 4 { 5 // user code 6 … 7 … 8 OSTimeDly(100); 9 } 10 }
Porting Program to μC/OS-II (4/6) 7.Insert a new main function at the bottom of eg2.c. In the main function, create an instance for Task1. int main(int argc, char *argv[]) { /* do target (uHAL based ARM system) initialization */ ARMTargetInit(); /* needed by uC/OS */ OSInit(); /* create the tasks in uC/OS */ OSTaskCreate(Task1, (void *)0, (void*)&Stack1[STACKSIZE - 1], 3); /* Start the (uHAL based ARM system) system running */ ARMTargetStart(); /* start the game */ OSStart(); /* never reached */ return(0); }
Porting Program to μC/OS-II (5/6) 8.Insert the following code near the top of eg2.c to create a stack for Task1. Each task must have its own stack. The actual stack size needed depends on processor type, depth of interrupt allowed and the work your task is running…etc. System crashes on stack overflow. So, it’s better to allocate a bigger stack first than try to decrease the value. /* allocate memory for tasks' stacks */ #ifdef SEMIHOSTED #defineSTACKSIZE(64+SEMIHOSTED_STACK_NEEDS) #else #defineSTACKSIZE64 #endif OS_STK Stack1[STACKSIZE];
Porting Program to μC/OS-II (6/6) 9.Build the project and press Debug to run. The task runs repeatedly asking name and age.
Using Inter-Process Communication (IPC)(1/5) This program does the very same thing as eg2 does. However, eg3 use one task for input and another task for output. Data is passed between tasks using Mailbox. 1.Open project “eg3” in ./Lab8/Code/SW/eg3/ with CodeWorrior 2.Because multiple value are to be passed, declare a structure to hold the values 3.We will trace uC/OS-II IPC machenism, so link Debug target of uC/OS-II
Using Inter-Process Communication (IPC) (2/5) 4.Build project and start AXD for Debug 5.Set a break point near line 75 in Task1, where Task1 posts mail to the mailbox. 6.Use “Step In (F8)” to trace into the OSMboxPost(). The cursur should jump to OSMboxPost() function in “os_mbox.c”. 7.Next, use “Step (F10)” to trace how message is delivered from Task1 to Task2. 8.When you reach “OSSched()” function, use “Step in” again to trace into the scheduler.
Using Inter-Process Communication (IPC) (4/5) 9.When you reach “OS_TASK_SW()” function, use “Step in” again. 10. Finally, you reach Task2 near line 88. where Task2 pending on the mailbox.
Outline • Lab – µC/OS-II • Building µC/OS-II • Building Program with µC/OS-II • Porting Program to µC/OS-II • Using Inter-Process Communication (IPC) • Exercise & Discussion
Exercise (1/2) Write an ID checking engine and a front–end interface. The checking rule is in the reference section. Requirements:The engine and front-end must be implemented in different task. The front-end interface can accept up to 64 entries of ID in each round. The program runs continuously round by round. User input: The amount of ID to be checked. The ID numbers Program output: The ID number Check result
Exercise (2/2) Example: (start of round) How many IDs to check: 2 Enter ID #1: A123456789 Enter ID #2: B987654321 === check result === A123456789 valid B987654321 invalid (end of round)
Discussion 1.What are the advantages of using RTOS in SoC design? And what are the disadvantages? 2.Write down your suggestions about this lab