Download

1 / 12
120 likes | 242 Vues
In today's workshop, we'll delve deeper into Photoshop, focusing on creating design comps from wireframes. Learn the significance of layers, adding shapes, and inserting images to enhance your designs. We’ll clarify the differences between wireframes and comps, explore the importance of these tools for professional writers, and how to effectively organize layers for optimal workflow. You’ll also gain insights into the various software options for creating PSD files and understand the best practices for working with typefaces and design guides.

E N D
Photoshop, PSDs, and Design Comps WRA210 9.25
Today’s Agenda • Learn some more Photoshop • Fill Layers • Adding Shapes • Adding Images • Transform • Workshop - make comps from wireframes
Discuss • Difference between Wireframes and Comps • What do they do? • Who are they for? • Why do we do them? • Why are they crucial? • Why are they the work of Professional Writers?
Tools for Design Comps • Any app that will save a layered PSD file • Use .PSD files - "photoshop document" • open-source, can be opened with lots of apps • industry standard - everyone will be able to use it • Software that will create layered PSD files • Photoshop - in labs, $169 at Computer Store • Gimp - free, cross-platform • Pixelmator - Mac, $15
Working with Typefaces • My mistake: Google Web Fonts • LEARN: understand the limitations of your host • LEARN: why you have to buy space for WRA 410 • Only use fonts in the safe 16 • Revist the typecardsfrom last time. • Redo with web-safe fonts, if necessary • Save and re-upload to your site • Update links on course page
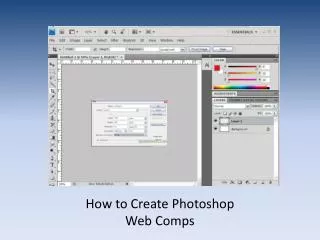
Making a Design Comp • Using out wireframes, color, and type guides • Check out an example comp, notice:guides • layer organization (names, folders) • Use a grid to help you: • alignment • proximity • browser resolution
Quick Demo of Comp-Related Tools • Using a grid and guides • Using shapes to build structure • Inserting images • Naming and organizing layers
More About Photoshop for Comps • Shape Tool - drawing shapes, containers • Free Transform Tool - resize, rotate objects • Placing Images - add images into a design • Rulers & Guides - make alignment easier • Layer Organization - keep documents clean
Module 6 – finish it • Color and type guides (done!) • Full design comps • Workshop today • Drafts due Monday
Looking ahead: design doc packet • First major, graded project • Due on 10/4 • Main work should be done; left to do: • Revise based on peer review (Monday) • Give your docs polish, make them look good • Module 7 (reflection) • Make sure to review the rubric • Check out new "rubric" section on course site
For Next Time • Complete Module 6 (color and type docs, drafts of full comps) • Bring your design docs (people need to view them) • Come prepared to talk about your designs • Read: About Prototyping and Paper Prototyping (if you haven't already)