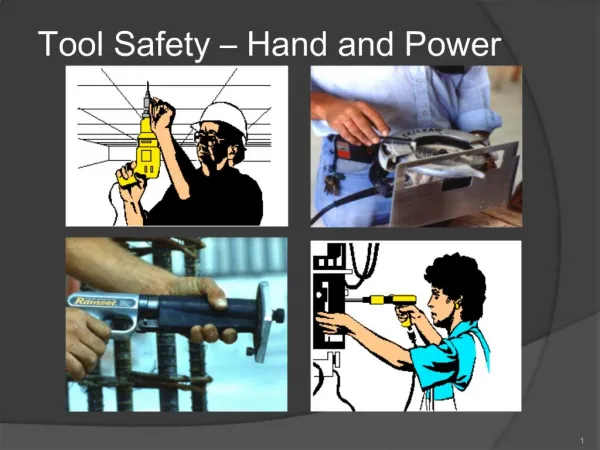
Stationary Power Tool Safety
260 likes | 580 Vues
Stationary Power Tool Safety. Table Saw. Remove all rings, watches, and jewelry. Make all adjustments with the power off. Wear safety glasses. Use a push stick on narrow stock. While ripping, stand to the side, never behind the saw. Remove the rip fence when crosscutting. Table Saw (II).

Stationary Power Tool Safety
E N D
Presentation Transcript
Table Saw • Remove all rings, watches, and jewelry. • Make all adjustments with the power off. • Wear safety glasses. • Use a push stick on narrow stock. • While ripping, stand to the side, never behind the saw. • Remove the rip fence when crosscutting.
Table Saw (II) • Shut off the power when finished with an operation. • When ripping, the stock that you want is always between the blade and the fence. • Never saw freehand. • Make sure guards are properly in place. • The blade should be adjusted so the teeth clear the thickness of material by a ¼”.
Table Saw (III) • A helper should be used when ripping long stock. • A dado head is used to cut grooves or dados with the grain or across the grain. • All stock should be jointed or have a square edge on the edge grain before being held against the fence. • The miter gage or crosscut sled is used as a guide in crosscutting.
Table Saw (IV) • When the space between the blade and the fence is 6” or less, a push block should be used to push the stock past. • When cutting stock, the safety margin is 5” away from the saw blade. • Whenever helping to “tail off,” hold the board up even with the table bed and allow the operator to push the stock through. Never pull it through!!!
Jointer Safety (I) • Wear safety glasses. • Make certain all guards are in place. • Make all adjustments with the power off. • Use a push block when jointing stock that is shorter than 5” in height • Shut the power off when done with an operation.
Jointer Safety (II) • The cutter head guard can stick, watch out for this!!! • Stock shorter that 12” in length may not be processed on the jointer. • The depth of cut on our jointer is set at 1/32”. • Fingers should not come closer than 5” to the cutter head. • Always stand to the left of the jointer, never behind it.
Drill Press (I) • Remove Jewelry and eliminate loose clothing. • Wear eye protection. • Be sure the key is removed before turning on the machine. • Turn off the power if work gets caught in the drill. • Adjust the depth stop to avoid drilling into the table.
Drill Press (II) • Select the proper speed, faster for wood and slower for metal. The larger the bit, the slower the speed. • Work should always be secured with a fastening device. • The right hand operates the feed wheel and the left hand should always be in the secure position.
Band Saw • All adjustments should be made with the power off. • Safety glasses should be worn at all times. • The upper guide should be adjusted 1/8” – ¼” above the material being cut. • Relief cuts should be made while making tight turns around a radius.
Band Saw (II) • The doors for the upper and lower wheels should be closed while in operation. • Keep fingers 2” away from the working saw blade. • Clear scraps away using a stick, not your fingers. • Always hold stock flat on the table. • Get the instructor if a problem arises.
For safe operation, all guards should be in place. Never reach to the back of the saw while in operation. Make all adjustments with the power off. Never saw without the kerf plate present. Hold the handle tightly during the sawing operation. Sliding Compound Miter Saw and Miter Box Safety
The safety margin is 6” The piece of stock that you want, is always on the left side. Make sure the blade is not in contact with the stock before turning the saw on. Stock should be held tightly against the fence and never away from the fence. Sliding Compound Miter Saw and Miter Box
Router Table / Shaper (I) • Keep body parts including hands and fingers away from rotating cutters • Do not use awkward hand positions • Keep all guards in placeand in working order. • Keep the work area clean. Cluttered areas and benches invite accidents. • Never stand or lean on the tool.
Do not force the toolTools work better and more safely when they are allowed to work at their own speed. Do not overreach. Keep proper footing and balance at all times. Router Table / Shaper (II)
Make sure the switch is in the “OFF” position before plugging in the cord. Do not leave the tool until it comes to a full stop. IF THERE IS SOMETHING YOU DO NOT KNOW OR UNDERSTAND, DO NOT OPERATE THE MACHINE! Ask the instructor for help first. Router Table / Shaper (III)
Thickness Planer (I) • Check the stock to see that it is clear of any nails, knots and imperfections. • The board to be planed, must be at least 14” long. • Never plane more than one thickness at a time. • Never stand behind the planer: always stand off towards the side.
Thickness Planer (II) • Keep your hands away from the planer bed while in operation. • Never look into the throat of the planer while in operation. • Never reach over the planer, always have help. • Make sure the power is off before cleaning the planer.
Do not handle the plug or dust collector with wet hands. Keep hair, loose clothing, fingers, and all parts of body away from opening and moving parts. Turn off all controls before unplugging. Dust Collector (I)
Do notsand pieces of material that are too small to be safely supported. Don’t leave the machine until it comes to a complete stop. Make sure the switch is in the off position before plugging in. Oscillating Spindle Sander
Don’t force the machine. It will do a better and safer job at the rate it was designed for. Be sure the switch is in the off position before starting. Sand on the left side of the base only. Belt Sander and Disc Sander
Drum Sander (I) • Do not stand directly behind the out feed while the machine is sanding. • Do not jam stock into the machine. This will cause abrasive paper breakage. • Do not sand stock smaller than 1/2” in thickness. • Do not sand stock that is shorter than 9” in length. • Keep all hands and fingers away from the conveyor belt and the sanding drums while in operation.
Never leave the machine unattended while running. Do not operate without dust collection. Do not sand more than one piece at a time. Always unplug the machine while performing maintenance. Never sand more than 1/16” off at a time. Drum Sander (II)