Part One - Space foreground, middleground, background


Part One - Space foreground, middleground, background
E N D
Presentation Transcript
1st gradeTextured Landscape The OBJECTIVES are to:Understand how a composition is generally divided into three planes.Create a composition demonstrating foreground, middleground and background.Learn that scale often correlates to the dominance in an image.Understand the difference between actual and simulated texture.Students create a textured pattern fill landscape drawing using rubbing. Materials9x12 white paperpencils (HB or #2)white eraserscrayons (remove paper)texture platesClass Periods - 2Make sure the students put their name and date on every project!
Part One - Space foreground, middleground, background
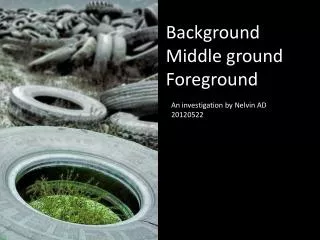
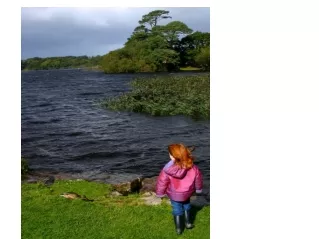
Procedure print this to teach by DISCUSSION of SpaceSpace is the distance or area between, around, above, below, or within things.Looking at the slides, talk about how the picture plane is divided into three parts: foreground, middleground and background. These three planes are a part of the composition. Rocks are in the FOREGROUND Water is the MIDDLEGROUND Sky is the BACKGROUNDDiscuss scale and how images up close in the foreground will appear larger and will have more detail. In the middleground the objects would be smaller then those in the foreground and smaller yet and with much less detail in the background.DRAWING THE LANDSCAPEDraw with a light line - soft like a butterfly. Do not press hard.1. On the left side of the paper, draw a large evergreen tree. (take up about 1/3 of paper)This will make the tree look as if it’s very close to us - FOREGROUND. Base of tree should run off the bottom of paper Top of tree should be close to the top of paper2. At the bottom of the paper - draw a line with a few (maybe 3) curves.3. Around the middle of the paper - draw several (4-5) hillsThe first hills will appear to be closer to us than the second set of hills - MIDDLEGROUND.4. Behind that set of hills, draw one more row of hills - these should be smaller than the last set. (But big enough to fill with texture later.)5. Draw a few wispy clouds and a sun (no too large and on the right side) Erase the pencil lines that went through the tree. ** vocabulary words remind them to draw with light lines
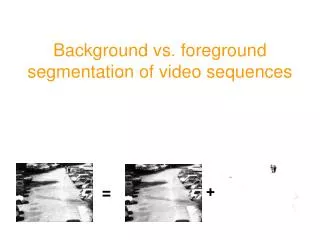
Procedure print this to teach by DISCUSSION of TextureTexture is an element of art. It is the surface “feel” of an object. It can be smooth, rough, soft, etc. Textures can be actual (felt with your fingers) or simulated (created by hand).Looking at the slides, talk about the different textures of the objects. Ask students how they would describe the texture. flat, smooth, furry, sandy, prickly, bumpy, slimy, rusty Show the slide with the example of the crayon texture rubbings. Show them the actual Texture Plates they will use. Demonstrate the rubbing technique. place the texture plate under a piece of practice paper use the side of a crayon - not the tip (remove the paper from the crayon) rub until you see the texture come through Using a practice sheet, have the kids use different texture plates and different color crayons to help understand the technique. CREATING TEXTURE IN THE LANDSCAPERemind them about scale. It’s easier to see detail in objects that are close - FOREGROUND. Therefore, large textures should be used in the FOREGROUND. Smallest textures should be used in the BACKGROUND1. On your landscape drawing, use a different texture plate for each area you drew the large evergreen (large texture) the individual hills (smaller texture) the foreground land the wispy clouds (ask what color are clouds? Not blue, they are white - the sky is blue) sun and sky COLOR OPTIONS You can give them freedom here to choose what they would like or keep it more like colors that would happen in nature.
BACKGROUND MIDDLEGROUND FOREGROUND
BACKGROUND MIDDLEGROUND FOREGROUND
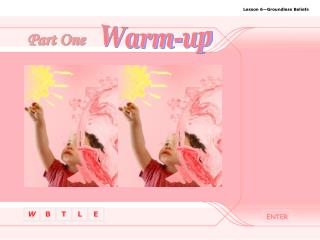
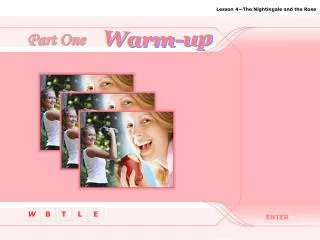
What is the texture? actual created
actual created
actual created
actual created
actual created
TEXTURE PLATES Hold the paper steady Use the side of a crayon
vocabulary • texture - An element of art, texture is the surface "feel" of an object, its smoothness, roughness, softness, etc. Textures may be actual or simulated. • texture rubbing - to use pressure and friction over a piece of paper to capture the texture • space - An element of art that refers to the distance or area between, around, above, below, or within things. simulated. • composition - the placement or arrangement of objects in art. • scale - size variations or differences • picture plane - the canvas or piece of paper you're painting or drawing on