Download
1 / 34
340 likes | 543 Vues
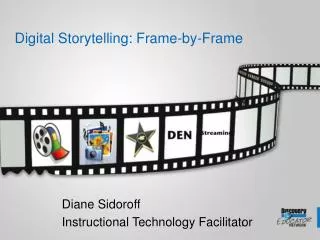
Digital Storytelling: Frame-by-Frame. Diane Sidoroff Instructional Technology Facilitator. 1. Before we tell a story we need to know what makes up a story. Climax. Action. Falling Action. Introduction. Resolution. Or more simply put…. A beginning A middle An end.

E N D
Digital Storytelling: Frame-by-Frame Diane Sidoroff Instructional Technology Facilitator 1
Before we tell a story we need to know what makes up a story Climax Action Falling Action Introduction Resolution
Or more simply put… • A beginning • A middle • An end
Resources to check out… http://www.storycenter.org/index1.html http://digitalstorytelling.coe.uh.edu/ http://electronicportfolios.org/digistory/ http://millie.furman.edu/mll/tutorials/photostory3/index.htm http://movies.atomiclearning.com/k12/home
So what are some things we can use to create a digital story A camera for capturing images/video
We’ll also need content • Images from: • photo sites like flickr, creative commons, etc. http://wiki.creativecommons.org/CcSearch http://flickrcc.bluemountains.net/ • Discovery Education streaming • Video from: • Camcorder, camera • Discovery Education streaming
Finding safe source material • www.discoveryeducation.com (search 20K+ images, sounds effects, video content k-12) • www.archive.org
Pre-Requisites – We need static pictures for our story • Log into Discovery Education streaming and find the images that you want to use • Download those images and save it into a folder on your computer
Now Let’s Make Some Magic • Open up your Photo Story and begin a new story • Click on the Next Button
Importing Images • Click on the Import Button • Then navigate to the images that you want to import • Click on the Next Button
Adding your own Narration • Click on the Red Button to begin narration • Hint! Type in a script of your narration first – then read it after hitting red button Add script here
Add in Music • Either from your computer • Or create your own from Photo Story
Finish your story 11. Choose to save your Story to your computer
Pre-Requisites – We need a movie file to edit! • Log into Discovery Education streaming and find an Editable Clip • Download that clip and save it into a folder on your computer
Now Let’s Make Some Magic • Open up your Windows Movie Maker • From the task bar on the left hand side of the screen choose Import Video
Making Movie Magic continued • Navigate to your movie file – note it must be .asf, .avi, .wmv, or mpeg file. • Click Import
Drag and Edit • Drag the piece that you want to edit into boxes below • Click on the icon that says Show Timeline Note that the video segment is now broken into tiny pieces
Adding your own Narration • On the Audio track line choose a section of audio that you want to Mute and right-click on that section • Choose Mute
Record your Narration • Click on the Microphone Icon in the time line to record your narration • Record your narration and save the file in a folder on your computer
Finish your movie 11. Choose to save your movie to your computer
Movie Making in a Web 2.0 World Justin Karkow
Movie Making with Web 2.0 Tools • Animoto.com – add images and songs to create a music video! • Voicethread.com – add images and video and + voice commentary from you or your students – build a collaborative story! • Vuvox.com – Cut and paste images and video and links to other sites to create an interactive video • Muveemix.com – like animoto but will mix in video + images and very easy
… a global community of educators passionate about teaching with digital media, sharing resources, collaborating and networking.
Using DE streaming Tools to Reach the 21st Century Mind Creating learning centers or labs with DE tools like the Assignment, Quiz, and Writing Prompt Builders Displaying DE streaming videos on TVs and LCD projectors, whiteboards, etc Collaborative Projects using DE streaming editable movies, cell phones and cameras! Projecting DE streaming math or close captioned videos, articles, calendars and images on interactive white boards Making it portable – DE On-The-Go with iPods Tying DE streaming into teacher/class wikis, blogs, websites
Contact Info Diane Sidoroff diane.sidoroff@austinisd.org 512-414-6563 Instructional Technology Facilitator Justin Karkow Justin_Karkow@discovery.com 704-763-0581 www.discoveryeducation.com