Getting to Know The Garmin Etrex “Yellow”
170 likes | 394 Vues
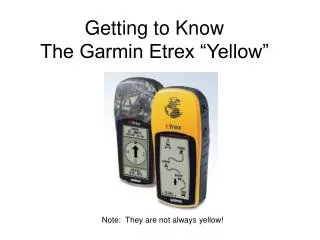
Getting to Know The Garmin Etrex “Yellow”. Note: They are not always yellow!. The buttons on the Garmin Etrex Yellow. The Garmin Etrex Yellow. This is a “durable little GPS receiver”.

Getting to Know The Garmin Etrex “Yellow”
E N D
Presentation Transcript
Getting to Know The Garmin Etrex “Yellow” Note: They are not always yellow!
The Garmin Etrex Yellow • This is a “durable little GPS receiver”. • You can download GPS Waypoints / etc. without installing additional drivers (you do need to install other software). • If you decide you want to ‘upgrade’ to a fancier unit in the future, it will be real easy (pretty much the same format + menus, just additional bells and whistles…)
Warning… • It is water proof, shock proof, and ALMOST kid proof (but it does not float!) • You can not break it by “pushing the wrong button”…do not be afraid to experiment! • Do not store this in your car during the summer! Heat will destroy it. (it is basically a small computer) • If it does break, send it back to Garmin, they’ll usually send you another one.
The buttons on the “right side” Often referred to as the “Panic Button”!!!
TheAdvancedSkyview Page • To access the <Advanced Skyview Page>, simply: • 1. navigate to the Skyview Page • Press the <Enter> button • Use the arrow keys to highlight <Advanced Skyview> • Press the <Enter> button again (to select it)
Deleting all Waypoints • Delete all of the factory pre-set waypoints (the Garmin factory in Taiwan, and Garmin headquarters in Kansas) • Navigate to the Menu Page • Select <WayPoints> • Select <Delete All>
Adding a Waypoint • Press the <ENTER> button and hold it down until the Waypoint Page appears. • You can scroll down and change the symbol, or the Waypoint name by highlighting either (the existing name or symbol), and pressing the <Enter> button. • When you are ready to save the Waypoint, highlight <OK> and press the <Enter> button
Navigating to a destination • “the automatic pilot” function • “Mark a Waypoint then change the coordinates of the waypoint to match the coordinates that you want to navigate towards