Introduction to Arduino
760 likes | 1.12k Vues
With ArduBlock & LilyPad Dev. Introduction to Arduino. Brian Huang Education Engineer brian.huang@sparkfun.com. Pre-Class Survey. http://bit.ly/14Xk3Ek. Resources. This PPT ArduBlock Download & Installation http://www.ardublock.com/. General Rules.

Introduction to Arduino
E N D
Presentation Transcript
With ArduBlock & LilyPadDev Introduction to Arduino Brian Huang Education Engineer brian.huang@sparkfun.com
Pre-Class Survey http://bit.ly/14Xk3Ek
Resources • This PPT • ArduBlock Download & Installation • http://www.ardublock.com/
General Rules • Raise your hand if you have a question. • Be respectful. • When I raise my hand… • Share your findings with the people near you. • Poke around, experiment, and have fun… • Imagine, create, and play!!!
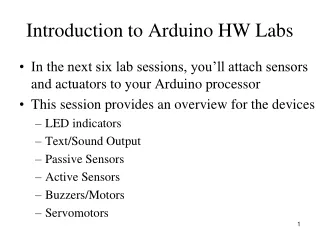
Objectives • Provide a thorough introduction to the Arduino programming environment. • Develop a use of simple functions to interact with the LEDs, light sensor, push button, and buzzer on the Protosnap Pro Mini.
ArduinoLilyPadProtosnapDev What is it? What can it do? Who cares?
What is it? • Heart of it – ATMega328 (a $4 microcontroller) • Open Source • High tolerance for ESD and “bad” electronics practices… • Provides easy way to interact with a computer physically – a.k.a. physical computing
What can it do? • Great for prototyping ideas • Great to teach Intro to Programming Arduino (no assembly required!) • Lots and lots of options! • Large pads can be sew-able
Who cares? • Hackers / Makers • Engineers • Artists • Musicians • Kids! • Teachers!! • You!!!
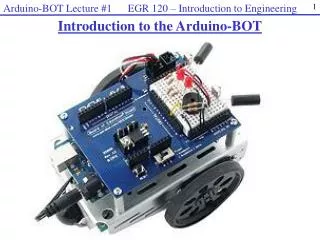
Components, Silk Screen & Pins What is all this??? Vibe Motor the Brain ATmega328 RGB LED Temp. Sensor Switch / Button Light Sensor Light Emitting Diodes (LED) Buzzer / Speaker
ArduBlock • Introduction to Programming • Scratch-like interface • Clear transition to text-based coding
Referenced from the perspective of the microcontroller (electrical board). Understanding Input vs. Output Inputs is a signal / information going into the board. Output is any signal exiting the board. Almost all systems that use physical computing will have some form of output What are some examples of Outputs?
Startup Arduino IDE • Double-click on either the Arduino Icon or wherever you installed (saved) the Arduino program.
Lesson #0 – Configuring Arduino • Setup Board • (LilyPadArduino w/ ATmega328) • Setup COM Port • PC – Highest COM # • Mac – /dev/tty.usbserial-A####xXx
Let’s get to hacking… • Lesson #1 – Blinking an LED • “Hello World” of Physical Computing • Psuedo-code – how should this work?
Let’s get to hacking… • Lesson #1 – Blinking an LED • “Hello World” of Physical Computing
LED Pins 16 18 17
How are Analog Pins really identified? • Digital Pins are numbered 0 to 13. • Analog Input Pins are A0 to A5. • A0 = 14 • A1 = 15 • A2 = 16 • A3 = 17 • A4 = 18 • A5 = 19
Alright? Let’s blink! • Challenge 1a – Blink multiple LEDs • Plan out a pattern – can you make it? • Challenge 1b – Blink to mimic a heartbeat • Challenge 1c – Multiple LEDS – Knight Rider style
Save your Project • Save early, Save often! • Enumerate your iterations – (e.g. blink_10.adp, blink_11.adp, blink_12.adp…)
Concept: Analog vs. Digital • Microcontrollers are digital devices – ON or OFF. • An Analog signal is anything that can be a full range of values. What are some examples? Think of like a ramp or a hill.
Concept: Analog vs. Digital • To create an analog signal, the microcontroller uses a technique called PWM. • Pulse Width Modulation (PWM) • Pins 3, 5, 6, 9, 10, 11 are capable of producing an Analog Output
Color Mixing with 3 LEDsanalogWrite() • Challenge 2a: • How do you turn on the RED LED? • Experiment with different values – what do you observe happens? • How do you turn on the GREEN or the BLUE LED?
Color Mixing with 3 LEDsTri-color LED • The RGB LED is a Common-Anode (means the positive side of the LED is all tied to Vcc). • The signal line is connected to the bottom of each LED. • Don’t worry - it’s just a different method of completing a circuit! 5 V Pin 9 Pin 11 Pin 10
Color Mixing with 3 LEDsanalogWrite() • Challenge 2b: • Experiment with different values of Red, Green, and Blue to create a couple different colors. • Write down the values you used. Check these values with www.colorpicker.com • Challenge 2c: • Create a unique lighting display that integrates a blink, fade, or a switching of colors. Be prepared to have a name for your art piece and show this to the rest of the class.