Download
1 / 88
880 likes | 1.06k Vues
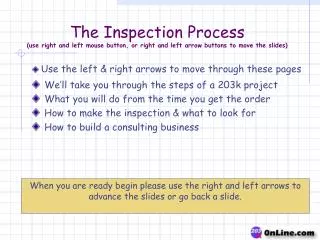
The Inspection Process (use right and left mouse button, or right and left arrow buttons to move the slides). Use the left & right arrows to move through these pages. We’ll take you through the steps of a 203k project What you will do from the time you get the order

E N D
The Inspection Process(use right and left mouse button, or right and left arrow buttons to move the slides) • Use the left & right arrows to move through these pages • We’ll take you through the steps of a 203k project • What you will do from the time you get the order • How to make the inspection & what to look for • How to build a consulting business When you are ready begin please use the right and left arrows to advance the slides or go back a slide.
Step 1 in building your business • The first step is to let your potential clients know that you are in the business • This is the single most important thing you can do. If they don’t know you are out there they can’t order your product. • I actually had a consultant nearly give up on this business as he felt he wasn’t dynamic enough to get business. Six months after he took this course he was sitting there and glanced up at our manual sitting on his shelf. He thought “what if it was as easy as that” and called a lender he knew that did 203k loans and got a job. • By the time he got to their office to pick up the details they had two more for a total of three, the average fee for three jobs totaled $1,800. He had ignored this phase, dreading the outcome, and today continues to make his living as a 203k consultant. • Make the call, send a flyer, go to Real Estate Group or Association meetings and get your cards out there.
203k Procedure (Borrower) 1) Find a lender and get pre-qualified... This is the first step as we need to a certain the loan amount that you may qualify for or the maximum loan amount that keeps you at your comfort level. Your lender should be knowledgeable in the 203k. In this business experience is everything. If they are just doing their first 203k they will love you even more.
203k Procedure (Borrower) 2) Get with one of our 203k real estate professionals to assist you in finding a property suitable to your needs, or as an alternate, you can refinance your existing loan and get the money to rehab it in the same loan.
203k Procedure (Borrower) 3) Call us to set up an appointment for a “Consultation”. We will meet you at the site, go over the contracts and agreements that you will need to sign at the close of escrow (this is the consulting).
203k Procedure (Part 2) • 4) Now go back to the office and create a "Job Specification & Bid Request". This is a list of the repair items that we intend to complete. This "specification" is what will allow all of the contractors who bid this project to bid on the same list. Up till now there is no real need for a contractor to have been to the site because we didn't know what work was to be completed.
203k Procedure (Part 2) • 5) Once the "Job Specification & Bid Request" has been created a copy will be given to the lender and another copy to the buyer or owner who is refinancing the property.
203k Procedure (Part 2) • 6) When the bids come back the home owner will choose the contractor. The lender can close the loan. • 7) The contractor is notified that the loan has closed so he/she can schedule the work to begin. Once the work begins the contractor will require continuing inspections to get progress payments for the completed work. The contractor or the home owner can initiate this draw request. • 8) This procedure will repeat itself until the project is complete.
Make the inspection • You have the order. • Make the appointment • I recommend that you print out the contracts that the buyers will need to sign when they close the loan and provide them to the borrowers at the inspection. Doing so is your “consultation”. • Meet the borrower(s) at the site. I also recommend that you go over these contracts with the borrower(s). This will save you headaches later in the process. • Consultant Agreement – walk through each line item. I've had people tell me that they never consulted with me so now I let them know that “this is the consulting”. Let them know that “this is the walk through”. I always bring two of these so I can get them both signed and bring one back to the office, for my permanent record. • Borrower’s Acceptance of conditions – read the pertinent statements • Borrower’s Acknowledgement – read the pertinent statements • Home Owner/Contractor Agreement – Let them know that the contractor may have his own contract but they should have this one signed also. HUD had this contract drawn up to protect them so it makes sense for them to use it. If the contractor insists they sign a contract, o ahead but sign the contract too.
Borrower’s Acceptance of Conditions • These may seem simple to you but remember you are working with many first time home buyers and it may not be apparent to them. • No rehab work can begin until the loan closes. • Plan approval by HUD is only one step. • If permits are needed then the local jurisdiction must provide them prior to the release of the final draw. Many Lenders now want a copy of the permit with 1st draw. • A clear pest control report (PCR) is a requirement prior to the release of the final draw payment. • All items of work NOT included in the original scope of work must be processed as change orders with additional money being put up to cover the new work. • Contingency funds can only be used for items that affect the health, safety, or are of a necessity to the occupant and not apparent before the project started. • Lender will make all checks jointly to the borrower and the contractor. • Many times I have seen the borrower sit on a check and not give it to the contractor when it came in… let them know that when they get it they are to sign the back and provide it to the contractor. The contractor needs the money to buy more items to finish the job. • All draws will be verified by inspection
Home Owner/Contractor Agreement • Go over each contract item • When the sub contractors complete their work and come to the borrower for payment they should direct them back to the general contractor for payment. • Point out that there is an arbitration clause. If there is a dispute it will be handled in arbitration. I had a lawyer start a lawsuit in small claims court… that way he had representation and we didn’t. He was allowed to present his case. We pointed out the arbitration clause and the judge kicked us out in favor of the arbitration. • Point out the procedure to fire a contractor if that becomes necessary. If they do in incorrectly they may be liable for paying the contractor in addition to the new contractor for the same work.
Lets look at some example projects The next group of slides will show you some of the types of projects or situations you may see and the solutions that were provided.
Very Rough 203k 1 • This is a pile of concrete that was all that existed the day I went out for the site inspection. This clearly doesn’t fit the requirement of having, as a minimum, the foundation to built upon. We did, however, put this to HUD and they gave us the ‘go ahead’ to work with this
Very Rough 203k 2 • This was presented as the existing house foundation by a licensed concrete finishing company executive who was the buyer in this case. What the left arrow appears to be pointing at is a drain system for a milking barn. Existing Foundation
Very Rough 203k 2 • This pile of concrete was all that existed the day I went out for the site inspection. This clearly doesn’t fit the requirement of having, as a minimum, the foundation to built upon. We did, however, put this to HUD and they gave us the ‘go ahead’ to work on this project. HUD will not likely go forward on a project like this today – but let them decide. This was the only piece of the original home’s foundation we found.
Reserved for Dixon finished house • This is the home that now sits on that site. Remember that HUD makes the rules and they can change a rule. Always give them the opportunity to perform… NEVER assume they won’t. The contractor/owner lives here still. The neighborhood is better off for this home being added.
Slide 47 • This is the right rear corner of the last owner tried to fill the cracks without correcting the foundation problem that was causing the problem in the first place.
Berkley Hills Keith photo 1 • Notice the right rear of the home. Can you see the twist? The top of the home at the rear is a good 6” to the left of plumb. Something is going on here. The fireplace is also note worthy. The typical stack should be higher and away from the roof.
Keith Chimney Scene • This is what I saw when we looked down the chimney. The chimney was sealed with concrete but the interior fireplace showed no signs of having been disabled. In fact there was burned papers in the firebox and it appeared functional.
Slide 39 Inspection day, old pieces of foundation concrete left by the last owner had broke weeks after he had installed it… He was sure the home was haunted.
Slide 40 I placed the 2X 6 in the opening left by the last shift in the foundation to show it had lifted about 2” off the mud sill.
Slide 41 • The foundation had cracked after less than six months because the 1st owner never addressed the problem that was carving the movement in the first place he just though concrete at the problem.
Slide 42 • When I crawled into the next cavity of the sub area I found this scene. I was hoping no earthquake would happen while I was under this one.
Slide 44 • As the home shifted the original owners solution was to add another set of piers to catch it. These are “patio” piers and were never intended to carry the weight of a house.
Slide 43 • This is more of the Berkley Hills home. A new furnace was added along with a bolted piece of plywood. This is again an inadequate way to keep the building from twisting.
Keith with the weight off the foundation • The house had the weight off of it, the foundation removed, and the cracked stucco has been removed. They decided to remove the fireplace as well. This home was purchased for $231,000 if I remember correctly with about $60,000 in rehab costs to be completed.
Slide 46 • Inside the home doors and windows wouldn’t function properly. Some doors wouldn’t even open.
Slide 45 • Hardwood floors were separating. It was obvious everywhere that we had to determine the cause in order to correct it. A local engineer was asked to look at the problem. He determined six 18” X 18’ deep piers had to be installed to get below an underground stream and well into the bedrock bellow.
Slide 50 • Then grade beams would be poured from one side of the home across to the other side and the home would then be set on those grade beams. A new concrete pier was then installed more for looks. Ultimately they put in 18 piers then instead of six. This is a grade beam being installed.
Slide 49 • Grade beams were finished and the permanent foundation is being installed. The project is nearing completion.
The original owner tried to dig out a basement without regard to his foundation being undermined. The weight of the home is being distributed at a 45% angle from the base pf these piers and when you intrude into that space they are no longer able to support the weight of the home. Brick Foundation Piers Undermined
Slide 5 3rd Street Project: When I first arrived at the home the agent unlocked the doors and ran out of the area to other appointments…something didn’t feel right can you see it in this photo
Slide 5 Real Concrete 3/8” asbestos hard board
I pulled the hardboard back so you could see it more easily. This particular deal was intended to catch us off guard in hopes we would miss it and complete the project. This home didn’t qualify as their budget wasn’t sufficient to complete the required work. Slide 4 3rd Street Project:
Slide 6 Under the home we found earth to wood contact all around the perimeter.
Slide 8 Napa Project: • Plywood - tar paper - asbestos laden transit setting rag over open drain/sewer line. Kitchen sink merely drains directly to flower bed. The flowers liked it.
Slide 9 • 10” high steps - to install proper steps one would have blocked access to the bathroom door. I contacted HUD engineering and described the problem. The solution was simple. On an existing home when it is feasible to correct a problem like this we can leave it “as is”. HUD has a wonderful engineering department only a phone call away. Use them if you aren’t sure how to handle a problem.
Slide 10 • This composite shingle roof appeared newer as I drove up for the inspection. Inside the home it looked like this roof leaked everywhere. When I went to look at the roof more closely I found the shingles were bad. Though newer in appearance they had a bad latch that allowed water to erode through. A call to the maker would have corrected the problem.
Slide 11 • New roof installed at the direction of the VA allowed rolled roofing over 2”X 2” X4’ square grid - not enough to support a full sized person.
Slide 12 This would have fell in if you try to climb on it.
Slide 13 New Shear wall OBS • New addition had to meet current set back requirements Original home ends here
Slide 14 This is merely a typical laundry room plumbing scene
Slide 15 • I recommend taking lots of photos during your inspections. I missed the problem in this scene until I reviewed the photos. Can you find the problem?
Slide 15 • The jack stud is missing from the from one side of the door. In time it will settle and the door will not open properly. No jack stud Jack Stud
Slide 16 • This was originally to be a simple floor repair - the cabinets were destroyed when they were removed.
Slide 18 • This was a fine gutted home in Oakland, CA. It was raining light the day the inspection was made. A small contractor was buying this home as a self-help project. He obviously was qualified to do the work but the consultant must make a recommendation he was the time and knowledge to get this project completed with his normal workload. Though the self help self help project doesn’t allow the contractor to get paid for his personal work he can get paid for work done by others including his employees but he must be able to prove they are being paid for work on this project.
Slide 19 • The contractor called for a show on the finished roof. When I took the appointment I restated to him that I could only pay for the items that were complete at the time of the draw. He understood and told me to come out. This is what I observed as he asked for $3,000 for the completed roof. He felt that if he got me out to the site he could use his charm and get some money to go buy the materials. Though I couldn’t pay for the roof I was able to provide some help by paying for the demolition & some dump fees.
Slide 20 • Christmas in April - a non profit company who buys homes & fixes them up. Non profit clients can really add to your bottom line while helping the community as well. This was a finished draw and if you look carefully you will see some unfinished work - once you think you have them all all go to the next slide.
Slide 20 Bare board not turned flush Window straps not yet installed. Dishwasher missing Stove missing