HTML Fundamentals: Understanding Markup Languages and Basics
Learn the basics of HTML, a markup language used to structure web pages. Explore open and closed tags, document structure, HTML elements, editors, and attributes. Master the essentials of HTML for creating and formatting web content.

HTML Fundamentals: Understanding Markup Languages and Basics
E N D
Presentation Transcript
Web Programming By: Bnar Faisal A. Daham
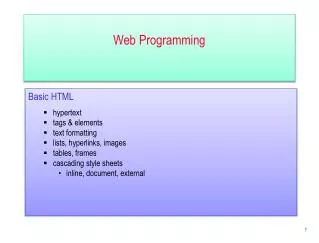
Markup Languages - HTML • Derived from SGML (Standard Generalized Markup Language). • Stand for (HyperTextMarkup Language). • HTML describes the structure of Web pages using markup. • HTML elements are represented by tags. • HTML tags label pieces of content such as "heading", "paragraph", "table", and so on.. • Browsers do not display the HTML tags, but use them to render the content of the page.
HTML - Fundamentals • Open tags • <name attributes/> • <hr/>, <br/> • <imgsrc=“url” width=‘100px’ height=’60px’/> • Closed tags • <name attributes> stuff </name> • <b>text to be bolded</b> • <h1>level 1 heading text</h1> • Comments < ! - - comment text -- >
HTML – FundamentalsDocument Structure < HTML > Header Body < / HTML>
HTML – FundamentalsBasic Structure <html> <head> <title> The title of your html page </title> <meta_tags/> </head> <body> <! - - your web page content and markup - -> </body> </html>
HTML – FundamentalsThe <!DOCTYPE> Declaration • The <!DOCTYPE> declaration represents the document type, and helps browsers to display web pages correctly. • It must only appear once, at the top of the page (before any HTML tags). • The <!DOCTYPE> declaration is not case sensitive. • The <!DOCTYPE> declaration for HTML5 is: <!DOCTYPE html>
HTML – FundamentalsHTML Editors • Web pages can be created and modified by using professional HTML editors. • However, for learning HTML we recommend a simple text editor like Notepad (PC) or TextEdit (Mac). • Also you can use Notepad++, sublime, Aptana Studio 3 , NetBeans, Microsoft Visual Studio Community, Bluefish, and so on…
HTML – FundamentalsHTML Editors • Step 1: Open the editor. • Step 2: Write Some HTML. • Step 3: Save the HTML Page. • Step 4: View the HTML Page in Your Browser.
HTML – FundamentalsHTML Documents • All HTML documents must start with a document type declaration: <!DOCTYPE html>. • The HTML document itself begins with <html> and ends with </html>. • The visible part of the HTML document is between <body> and </body>. • The <head> element is a container for title tag and metadata. HTML metadata is data about the HTML document. Metadata is not displayed.
HTML – FundamentalsHTML Elements • An HTML element usually consists of a start tag and end tag, with the content inserted in between: <tagname>Content goes here...</tagname> • The HTML element is everything from the start tag to the end tag: <p>My first paragraph.</p> • HTML elements can be nested (elements can contain elements).
HTML – FundamentalsHTML Elements • Do Not Forget the End Tag • Some HTML elements will display correctly, even if you forget the end tag. • Never rely on this. It might produce unexpected results and/or errors if you forget the end tag.
HTML – FundamentalsEmpty HTML Elements • HTML elements with no content are called empty elements. • <br> is an empty element without a closing tag (the <br> tag defines a line break). • Empty elements can be "closed" in the opening tag like this: <br />. • HTML5 does not require empty elements to be closed. But if you want stricter validation, or if you need to make your document readable by XML parsers, you must close all HTML elements properly.
HTML – FundamentalsHTML Documents In the body tag you can write text which appears at the web page as: But what if you want to have formatted texts: Separate headers from body format Bold, italic, underline texts Centered, justified and right and left alignments Subscripts and superscripts Moving texts Breaking and not braking lines, etc. <!DOCTYPE html> <HTML> <Head></Head> <Body> This boring Text will appear at your browser </body> </HTML>
HTML – FundamentalsHeader Tags H# There are six special tags for creating headers <H#></H#>, any header text will be bold and has its own paragraph. <!DOCTYPE html> <html> <body> This is normal text. <h1>This is heading 1</h1> <h2>This is heading 2</h2> <h3>This is heading 3</h3> <h4>This is heading 4</h4> <h5>This is heading 5</h5> <h6>This is heading 6</h6> </body> </html>
HTML – FundamentalsLowercase Tags • Use Lowercase Tags. • HTML tags are not case sensitive: <P> means the same as <p>. • The HTML5 standard does not require lowercase tags, but W3C recommends lowercase in HTML, and demands lowercase for stricter document types like XHTML.
HTML – FundamentalsHTML Attributes • All HTML elements can have attributes. • Attributes provide additional information about an element. • Attributes are always specified in the start tag. • Attributes usually come in name/value pairs like: name=“value” • We always use lowercase attribute names. • We always quote attribute values with double quotes.
HTML – FundamentalsHTML Attributes • Here are the list of some attributes: • Document-wide identifiers: id, class • Language information: lang • Text direction :dir (ltr and rtl) • Element title: title • Inline style information: style • Alignment : align • Events: onclick, ondblclick, onmousedown, onmouseup, onmouseover, onmousemove, onmouseout, onkeypress, onkeydown, onkeyup
HTML – FundamentalsView HTML Source • View HTML Source Code: • Right-click in an HTML page and select "View Page Source" (in Chrome) or "View Source" (in IE), or similar in other browsers. This will open a window containing the HTML source code of the page. • Inspect an HTML Element: • Right-click on an element (or a blank area), and choose "Inspect" or "Inspect Element" to see what elements are made up of (you will see both the HTML and the CSS). You can also edit the HTML or CSS on-the-fly in the Elements or Styles panel that opens.
HTML – FundamentalsHTML Display • You cannot be sure how HTML will be displayed. • Large or small screens, and resized windows will create different results. • With HTML, you cannot change the output by adding extra spaces or extra lines in your HTML code. • The browser will remove any extra spaces and extra lines when the page is displayed.
HTML – FundamentalsHTML Tags • The <p> tag defines a paragraph. • <p>This is a paragraph.</p> • The <br> tag Inserts a single line break. • <p>This is<br>a paragraph<br>with line breaks.</p> • The <pre> tag defines pre-formatted text. • The text inside a <pre> element is displayed in a fixed-width font (usually Courier), and it preserves both spaces and line breaks
HTML – FundamentalsHTML Styles • Setting the style of an HTML element, can be done with the style attribute. • <tagname style="property:value;"> • This example sets the background color for a page to blue: <body style="background-color:blue;"> • The color property defines the text color for an HTML element: <h1 style="color:blue;">This is a heading</h1> • <h1 style="font-family:verdana;">This is a heading</h1>
HTML – FundamentalsHTML Text Formatting • <b> - Bold text • <strong> - Important text • <i> - Italic text • <em> - Emphasized text • <mark> - Marked text or highlighted text • <small> - Small text • <del> - Deleted (removed) text • <ins> - Inserted (added) text • <sub> - Subscript text • <sup> - Superscript text
HTML – FundamentalsHTML Quotation and Citation Elements • <abbr> Tag defines an abbreviation or acronym • <p>The <abbr title="World Health Organization">WHO</abbr> was founded in 1948.</p> • <address> Tag defines contact information for the author/owner of a document • <address>Written by John Doe.<br> Visit us at:<br>Example.com<br>USA</address> • <bdo> Tag defines the text direction • <bdo dir="rtl">This text will be written from right to left</bdo>
HTML – FundamentalsHTML Quotation and Citation Elements • <blockquote> tag defines a section that is quoted from another source • <blockquote cite="http://www.worldwildlife.org/who/index.html"> • <q> Tag defines a short inline quotation • <p>WWF's goal is to: <q>Build a future where people live in harmony with nature.</q></p> • <cite> Tag defines the title of a work • <p><cite>The Scream</cite> by Edvard Munch. Painted in 1893.</p>
HTML – FundamentalsHTML Colors • HTML colors are specified using predefined color names, or RGB, HEX, HSL, RGBA, HSLA values. • Color name (red, blue, …) • rgb(red,green, blue) • #rrggbb • hsl(hue, saturation, lightness) • Hue is a degree on the color wheel from 0 to 360. 0 is red, 120 is green, and 240 is blue. • Saturation is a percentage value, 0% means a shade of gray, and 100% is the full color. • Lightness is also a percentage, 0% is black, 50% is neither light or dark, 100% is white
HTML – FundamentalsHTML Colors 5. rgba(red,green, blue, alpha) 6.hsla(hue,saturation, lightness, alpha) • The alpha parameter is a number between 0.0 (fully transparent) and 1.0 (not transparent at all)
HTML – FundamentalsHTML Styles - CSS • CSS stands for Cascading Style Sheets. • CSS describes how HTML elements are to be displayed on screen. • CSS saves a lot of work. It can control the layout of multiple web pages all at once. • CSS can be added to HTML elements in 3 ways: • Inline - by using the style attribute in HTML elements • Internal - by using a <style> element in the <head> section • External - by using an external CSS file • The most common way to add CSS, is to keep the styles in separate CSS files. However, here we will use inline and internal styling, because this is easier to demonstrate, and easier for you to try it yourself.
HTML – FundamentalsHTML Styles - Inline CSS • An inline CSS is used to apply a unique style to a single HTML element. • An inline CSS uses the style attribute of an HTML element. • This example sets the text color of the <h1> element to blue: <h1 style="color:blue;">This is a Blue Heading</h1>
HTML – FundamentalsHTML Styles - Internal CSS • An internal CSS is used to define a style for a single HTML page. • An internal CSS is defined in the <head> section of an HTML page, within a <style> element: <!DOCTYPE html><html><head><style>body {background-color: pink;}h1 {color: blue;}p {color: red;}</style></head><body><h1>This is a heading</h1><p>This is a paragraph.</p></body></html>
HTML – FundamentalsHTML Styles - External CSS • An external style sheet is used to define the style for many HTML pages. • With an external style sheet, you can change the look of an entire web site, by changing one file only. • To use an external style sheet, add a link to it in the <head> section of the HTML page. • An external style sheet can be written in any text editor. The file must not contain any HTML code, and must be saved with a .css extension.
HTML – FundamentalsHTML Styles - External CSS <!DOCTYPE html><html><head> <link rel="stylesheet" href="styles.css"></head><body> <h1>This is a heading</h1><p>This is a paragraph.</p> </body> </html>
HTML – FundamentalsHTML Styles - External CSS • Here is how the "styles.css" looks: body { background-color: powderblue;}h1 { color: blue; }p { color: red; }
HTML – FundamentalsHTML Styles – CSS Fonts • The CSS color property defines the text color to be used. • The CSS font-family property defines the font to be used. • The CSS font-size property defines the text size to be used. • h1 { color: blue; font-family: verdana; font-size: 300%;}
HTML – FundamentalsHTML Styles – CSS Border • The CSS border property defines a border around an HTML element: p { border: 1px solid powderblue;}
HTML – FundamentalsHTML Styles – CSS Padding • The CSS padding property defines a padding (space) between the text and the border: p { border: 1px solid powderblue; padding: 30px;}
HTML – FundamentalsHTML Styles – CSS Margin • The CSS margin property defines a margin (space) outside the border: p { border: 1px solid powderblue; margin: 50px;}
HTML – FundamentalsHTML Styles – CSS ID • To define a specific style for one special element, add an id attribute to the element: <p id=“idname">I am different</p> • Then define a style for the element with the specific id: #idname { color: blue;}
HTML – FundamentalsHTML Styles – CSS Class • To define a style for special types of elements, add a class attribute to the element: <p class="error">I am different</p> • Then define a style for the elements with the specific class: p.error { color: red;}
HTML – FundamentalsHTML Links • HTML links are hyperlinks. • You can click on a link and jump to another document. • A link does not have to be text. It can be an image or any other HTML element. • In HTML, links are defined with the <a> tag: <a href="url">link text</a>
HTML – FundamentalsHTML Links <!DOCTYPE html> <html> <head> <title> Hyperlinks</title></head> <body> <h1 align=“center”><u>My Favorite Links</u></h1> My Homepage <a href=“index.html”>My Homepage</a> <br> World Wide Web < a href =“www.w3.org”> WWW</a> <br> Contact us< a href ="mailto:email@yahoo.com”> bnar@yahoo.com</a> <br> </body> </html>
HTML – FundamentalsHTML Links - The target Attribute • The target attribute specifies where to open the linked document. • The target attribute can have one of the following values: • _blank - Opens the linked document in a new window or tab • _self - Opens the linked document in the same window/tab as it was clicked (this is default) • _parent - Opens the linked document in the parent frame • _top - Opens the linked document in the full body of the window • framename - Opens the linked document in a named frame • Example <a href="https://www.Google.com/" target="_blank">Visit Google</a>
HTML – FundamentalsHTML Link – The Titles Attribute • The title attribute specifies extra information about an element. The information is most often shown as a tooltip text when the mouse moves over the element. • Example <a href="https://www.Google.com/html/" title="Go to Google">Visit Google Search Engin</a>
HTML – FundamentalsHTML Links - Create a Bookmark • HTML bookmarks are used to allow readers to jump to specific parts of a Web page. • Bookmarks can be useful if your webpage is very long. • To make a bookmark, you must first create the bookmark, and then add a link to it. • When the link is clicked, the page will scroll to the location with the bookmark.
HTML – FundamentalsHTML Links - Create a Bookmark <!DOCTYPE html> <html><body> <p><a href="#C4">Jump to Chapter 4</a></p> <h2>Chapter 1</h2> <p>This chapter explains bablabla</p> <h2>Chapter 2</h2> <p>This chapter explains bablabla</p> <h2>Chapter 3</h2> <p>This chapter explains bablabla</p> <h2 id="C4">Chapter 4</h2> <p>This chapter explains bablabla</p> <h2>Chapter 5</h2> <p>This chapter explains bablabla</p> </body></html>
HTML – FundamentalsHTML Images • In HTML, images are defined with the <img> tag. • The <img> tag is empty, it contains attributes only, and does not have a closing tag. • The src attribute specifies the URL (web address) of the image: <imgsrc="url">
HTML – FundamentalsHTML Images – Alt Attribute • The alt attribute provides an alternate text for an image, if the user for some reason cannot view it (because of slow connection, an error in the src attribute, and so on) • The value of the alt attribute should describe the image: <imgsrc=“flowers.jpg" alt="Flowers"> • The alt attribute is required. A web page will not validate correctly without it.
HTML – FundamentalsHTML Images • You can use the style attribute to specify the width and height of an image. • Example: <imgsrc="girl.jpg" alt="Girl" style="width:500px;height:600px;"> • Alternatively, you can use the width and height attributes: • Example: <imgsrc="girl.jpg" alt="Girl" width="500" height="600">
HTML – FundamentalsHTML Images • Images in Another Folder: • <imgsrc="/images/html5.gif" alt=“HTML5Icon" style="width:128px; height:128px;"> • Images on Another Server: • <imgsrc="https://www.google.com/images/green.jpg" alt=“google.com"> • Animated Images: • <imgsrc="programming.gif" alt="ComputerMan" style="width:48px;height:48px;">
HTML – FundamentalsHTML Images • Image as a Link: • <a href="default.asp"><imgsrc="smiley.gif" alt="HTML tutorial" style="width:42px; height:42px; border:0;"></a> • Image Floating: • <p> <imgsrc="smiley.gif" alt="Smiley face" style="float:right; width:42px; height:42px;"> The image will float to the right of the text.</p> • <p> <imgsrc="smiley.gif" alt="Smiley face" style="float:left; width:42px; height:42px;">The image will float to the left of the text.</p>
HTML – FundamentalsHTML Images • Image Maps: • The <map> tag defines an image-map. An image-map is an image with clickable areas. • In the image below, click on the computer, the phone, or the cup of coffee: