A New Way to Multi-task
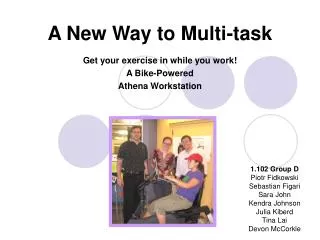
A New Way to Multi-task. Get your exercise in while you work! A Bike-Powered Athena Workstation. 1.102 Group D Piotr Fidkowski Sebastian Figari Sara John Kendra Johnson Julia Kiberd Tina Lai Devon McCorkle. Why?.

A New Way to Multi-task
E N D
Presentation Transcript
A New Way to Multi-task Get your exercise in while you work! A Bike-Powered Athena Workstation 1.102 Group D Piotr Fidkowski Sebastian Figari Sara John Kendra Johnson Julia Kiberd Tina Lai Devon McCorkle
Why? • To create a feasible, interactive, and interesting energy harvesting system • To inform the public of renewable energy possibilities and to raise energy awareness • Something that meets and need an that people can fit into their everyday lives
What? • Bicycle-powered Laptop • Retro-fitted Recumbent Exercise Bike • Generator/Motor • Data Acquisition Device • Laptop
How? • Convert the rotational energy of the exercise bike into electrical energy through a generator or motor • Use that power to run a laptop that will be secured to an adjustable table, fitted to the bicycle • Gearing between the flywheels and the generator to ramp up the RPM
Power Production • Average Person produces 60-100W @ continuous 63rpm • Pedal Power 50% efficiency • Laptop uses 19.5V adapter, 130W max charger • Laptop consumes on order of 30W average
Specifications: Mechanical Components • 52 tooth gear for pedal shaft • 22 tooth freewheel • 6 inch camshaft pulley for flywheel shaft • Retro-fitted tensioner for chain • 2.5 inch camshaft pulley for generator • Bike chain • Adjustable table • IS&T security device
Specifications: Electrical Components • 10 amp DC generator • 12 volt lead acid battery • Xantrex charge controller • Brushless 12 volts DC fan • Resistor • Power monitor • Dell Latitude D820 Laptop • Power cord
Specifications: Fabricated Components • .5 inch plywood (15” by 15”) base for electrical components • 3/4” mfb for electrical housing • Plexiglass for display • Acrylic boxes for housing • 1/4” aluminum for generator plate • 3/16” metal disc for gear mounting
Specifications: Retro-fitting Cut down and bolt on front gear Attach camshaft pulley to drive generator (bolt to flywheel) Remove belt drive system and magnetic resistance mechanism Modify belt pulley to attach 22 freewheel to axis
Specifications: Power Generation • Initial Capacitor • Buck converter • 95% efficiency • Feedback on current to maintain charging rate • PWM sets duty cycle, which sets charging rate, which sets resistance to biker • PWM adjustable • Second Capacitor • 12V Lead-Acid battery
Modifications To Original Design • Mechanical: • Mounting generator • Pulleys instead of gears • Welded table onto bike • Plexiglass cutout in casing • Chain tensioner • Electrical: • LabJack • Circuitry • Housing
Assembly • Remove bike housing, resistance mechanism, drive belt system • Attach 53 tooth gear to pedal shaft by removing plastic belt gear, machining aluminum plate, and bolting gear to plate • Use lathe to modify flywheel drive pulley to receive threaded freewheel • Drill/tap four holes in flywheel to attach 6” camshaft pulley
Assembly (Continued) 5. Attach flywheel with attached components to bicycle and thread camshaft belt and bicycle chain over axis 6. Fabricate generator mounting plate and bolt to bicycle frame 7. Fasten 2.5” camshaft pulley to generator 8. Adjust horizontal location of flywheel axis to obtain proper belt tension 9. Modify scrap derailer to tension chain, attach by bolting to flywheel mount
Design Process • Brainstorm, research, surveys • Initial ideas, broad research, in-field surveys • Calculations and more in depth research • Specific parts • Analysis of similar projects • Fabrication and adjustments • Prototyping and testing merged into fabrication due to time constraints • Deployment and evaluated public response
Public Response • LOTS of interest • Minor lack of use due to embarrassment • Tim Moore (manager of Zesiger Center) expressed interest in permanent installation and display • Public education of sustainable energy (below) Steve, Kendra, Dr. G, and Julia are all really excited about sustainable energy
Evaluation of Main Project • Larger time span would have been optimal • Could make it a two-semester project • Lack of time led to hasty production • Clearer instructions, expectations, and a set timeline • Order parts earlier; led to too much downtime • Good way to experience the design process • Better understanding of sustainability, energy, and energy storage • Great!
Our Group (left to right) Sara, Piotr, Julia, Sebastian, Kendra, Tina and Devon
Evaluation of Class • Fewer electricity labs • Split lab times • Offer Tuesday/Wednesday labs • Rube Goldberg machine was very helpful • Boosted confidence in our building abilities • Better understanding of how parts create a whole • More welding • Helpful and knowledgeable instructors