Day 3: MICROSOFT EXCEL – CHAPTER 1
Day 3: MICROSOFT EXCEL – CHAPTER 1. Akhila Kondai akhila.kondai@mail.wvu.edu August 26, 2013. Attendance . Your attendance starts today. Sign in the attendance system using your MasterID / MyID and record your attendance in the CS 101 website ( Course Tools Record Attendance).


Day 3: MICROSOFT EXCEL – CHAPTER 1
E N D
Presentation Transcript
Day 3:MICROSOFT EXCEL – CHAPTER 1 AkhilaKondai akhila.kondai@mail.wvu.edu August 26, 2013
Attendance • Your attendance starts today. • Sign in the attendance system using your MasterID/MyID and record your attendance in the CS 101 website ( Course Tools Record Attendance)
Entering and editing cell data • Enter text • Enter values • Enter dates • Enter formulas • Edit and clear cell contents
ENTERING TEXT • Make sure the cell is active where you want to enter text. • Enter the text. • Press an arrow key on the keyboard, or click Enter.
Entering dates • Directly enter the date in the desired format • Select the cell, Go to the Home tab Format Format cells Select Date in the category Select the appropriate type • Right click on the cell and select Format cells Select Date in the category Select the appropriate type
Entering Formulas • Formulas are combinations of cell addresses, math operators, values and/or functions • A formula begins with the equal sign = • Examples: =A1+A2 =C2*5
Editing cell content • Choose the cell and click in the formula bar, make changes and then click enter on the left side of the Formula bar. • Double click on the cell ,make changes in the cell and press enter. • Click on the cell and press F2, make changes in the cell and then press enter.
Clearing cell contents • Click the cell and directly press ‘DELETE’ • Double click on the cell and delete using ‘BACKSPACE’/‘DELETE’ button. • Click the cell and click “CLEAR” symbol on top right corner of the home tab and choose what to clear from the various choices available.
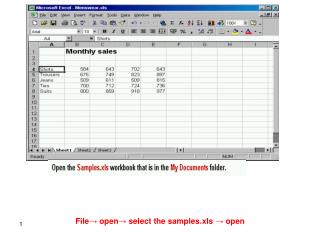
Entering Text-Example • Start Excel. Save the new workbook as Chapter1_YourName • Type OK Office Systems Pricing Information in cell A1, and press Enter. • Click cell A4, type Product, and then press Enter. A5 Computer System A6 Color Laser Printer A7 Filling Cabinet A8 Desk Chair A9 Computer Desk A10 28” Monitor
Entering Text-Example • Click cell B4 to make it active cell. Type Cost and press Tab Markup Rate in Cell C4 Retail Price in cell D4 Percent Off in cell E4 Sale Price in cell F4 Profit Margin in cell G4
Entering Unformatted Values-Example • Click cell B5 to make it active cell. • Type 400 and press Enter. B6 457.7 B7 68.75 B8 75 B9 700 B10 195 C5 0.5 C6 0.75 C7 0.905 C8 1 C9 1.857 C10 0.835 E5 0.15 E6 0.2 E7 0.1 E8 0.25 E9 0.3 E10 0.1
Enter a Date and Clear Cell Contents • Click cell A2, type 9/1/12, and then press Enter. • Click cell A2. Click Clear in the Editing group on the Home tab, and then select Clear All. • Type September 1, 2012 in cell A2, and then press Enter. • Save the Workbook.
Save and Save as.. • Click the File tab(Back Stage view), then select Save or Save As • Use the Save As option if you need to assign a name to the file • Provides the Save As dialog box • Save your file often using CTRL+S to make sure you don’t loose your work.
Mathematics and Formulas • Arithmetic Operators and Symbols
Order of precedence • Order of precedence (operations) controls the sequence in which math operators are computed
Example • Click cell D5, the cell where you will enter the formula to calculate the retail selling price of the first item. • Type =B5*(1+C5) and view the formula and colored cell borders on the screen. • Click Enter to the left of Formula Bar and view the formula. • Similarly click F5, enter formula =D5-D5*E5 and click G5, enter formula =(F5-B5)/F5.
Using Auto Fill • Auto Fill enables you to copy the contents of a cell or cell range or to continue a series using the fill handle • Example: Month names Jan, Feb, Mar form a series • The fill handle is the small black square in the bottom right corner of a cell
Using Auto Fill to copy Formulas • Click cell D5 the cell containing the formula to calculate the retail price for the first item. • Position the mouse pointer on the fill handle in the bottom-right corner of cell D5. When the pointer changes from a white plus sign to a thin black plus sign, double-click the fill handle. • Observe the cell references of copied formulas.
Managing Worksheets • Renaming a Worksheet • Changing the Tab color • Inserting a new Worksheet • Deleting a Worksheet • Moving a Worksheet • Copying a Worksheet
Renaming a worksheet • By default you get three sheets – Sheet1, Sheet2, Sheet3. • Name them to what is relevant to the task, don’t ever leave them at the default names. • 3 ways to rename sheets • Double click on sheet tab and enter new name and press enter. • Click on ‘Format’ option in cell section in home ribbon and select ‘Rename Sheet’ option. • Right click on sheet tab and select ‘Rename’ option.
Changing a tab color • This can be very helpful when trying to locate a sheet in a workbook with multiple sheets. • 2 ways to change tab color • Click on ‘Format’ option in cell section in home ribbon and select ‘Tab Color’ option. • Right click on sheet tab and select ‘Tab Color’ .
Inserting a new worksheet • A new work sheet can be inserted in the following ways • Using Insert Worksheet icon to the right of the last worksheet. • Right click on any worksheet tab and select ‘Insert’ option. • Using the ‘Shift+F11’ shortcut. • On the Home tab Go to Insert in Cells section Select Insert Sheet
Delete, move and copy worksheet • Delete Worksheet • Right click on ‘worksheet tab’ and select ‘Delete’ option. • On the Home tab Go to Delete in Cells section Select Delete Sheet • Move worksheet • Click ‘sheet tab’ and drag to desired position. • Copy worksheet • On the Home tab Go to Format in cells section Select Move or Copy Sheet and give the desired location to move the sheets. .
Reminder • You can now register for MyITLab without any issues. • Course ID: CRSLCN2-2015110 • Lesson A in MyITLab is due on 9/03/13 by 11:59 P.M.