Constructing a Patch Pocket
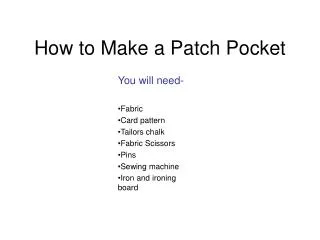
CONSTRUCTING A PATCH POCKET. Constructing a Patch Pocket. Cut one piece of fabric that is 5”x 6 ”.


Constructing a Patch Pocket
E N D
Presentation Transcript
CONSTRUCTING A PATCH POCKET Constructing a Patch Pocket
Cut one piece of fusible interfacing that is 1” by 5”. Then place the bumpy side of the interfacing down on the wrong side of the fabric—that will be the top of your pocket. Press for about 10 seconds with iron. If you leave it on too long or to high of iron setting, you will melt the interfacing. Make sure you check the temperature setting on your iron for your fabric.
Serge across the top edge of the pocket where the interfacing is. After you have serged, fold the top edge to the right side so the interfacing is facing you. Measure 1” (same as interfacing) from the top of the fabric and press for 10 seconds—remember to use a pressing cloth.
Stitch over the fold down and around the three sides of the pocket using 1/2” seam allowance. Do not stitch across the top. Use a standard stitch length. Backstitch at the beginning and the end. Pivot at the corners.
Clip corners diagonally. Make sure you do not clip through the stitching or you will have holes in the corner of your pocket.
Now turn the fold inside out so that the right side of the fabric is now showing and the interfacing is on the inside. Square the corners using a point turner so they form a right angle.
Press the seam allowances down to the wrong side of the fabric at 5/8 “. This will make the stitching not seen from the front of the pocket. Press down the sides first and then the bottom. Press for about 10 seconds.
Then working from the wrong side of the pocket, pull out the lower corners and mark diagonally across making a triangle just outside the stitching line.
Fold the fabric in at the mark. Folding the make a triangle, press the fabric with the iron. Fold over the edges and fold the bottom up to form a diagonal line (right angle) at the corner. Press again. The triangle piece is now underneath. This is a mitered corner. This is the bottom of the pocket.
Stitch at the 7/8” seam allowance across the top of the pocket, the serged edge is underneath the stitching
Pin the pocket onto the 7x7 denim square. Measure to make sure it is centered
Sew at 1/8 inch seam allowance down and around the three sides, not the top. Remember to backstitch at the end and the beginning.
Reinforce the corners at the top of the pocket with a right triangle
Mark and make your button hole. Make the line parallel to the top of the pocket. It should be between your last stitching line and the top of the pocket