Download
1 / 2
50 likes | 111 Vues
Bathroom wall tiles suppliers bring this post to let you know the facts about interlocking floating vinyl tiles and how to install them on the floor.

E N D
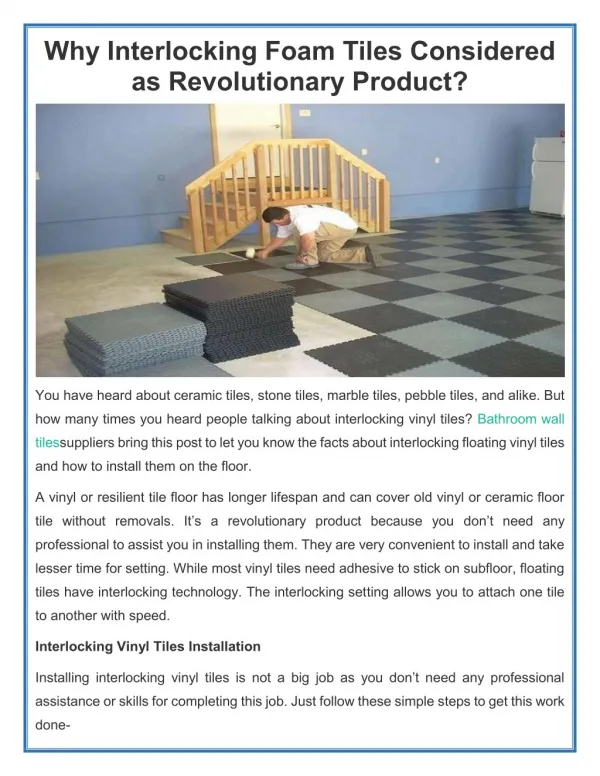
Why Interlocking Foam Tiles Considered as Revolutionary Product? You have heard about ceramic tiles, stone tiles, marble tiles, pebble tiles, and alike. But how many times you heard people talking about interlocking vinyl tiles? Bathroom wall tilessuppliers bring this post to let you know the facts about interlocking floating vinyl tiles and how to install them on the floor. A vinyl or resilient tile floor has longer lifespan and can cover old vinyl or ceramic floor tile without removals. It’s a revolutionary product because you don’t need any professional to assist you in installing them. They are very convenient to install and take lesser time for setting. While most vinyl tiles need adhesive to stick on subfloor, floating tiles have interlocking technology. The interlocking setting allows you to attach one tile to another with speed. Interlocking Vinyl Tiles Installation Installing interlocking vinyl tiles is not a big job as you don’t need any professional assistance or skills for completing this job. Just follow these simple steps to get this work done-
Set the vinyl tiles inside room 48 hours before installation. This step will help them to acclimate to the temperature. Make sure you have cleaned and wiped the surface well and check for smooth and flat surface. Take right measurement of the wall on which you want to install the tile. Draw a chalk line over floor from the center point of the wall to the opposite wall. Lay your vinyl tiles along the walls without connecting them. See and set the tile over the line you drawn and the next tiles evenly outward on each side. Mark the tiles to be cut at the edges with chalk or pencil. Lay a straightedge on the mark and using utility knife, score the tile along the line. Double check the fit on the edge tiles. Start installing the tiles from the left corner. Place 1/8” spacers along both walls as it will keep the tiles slightly off the walls. Lay the first tile against the spacers. Put the next tile at 10-20 degree angle against the first. Slide the tile you are holding into the tile lying on the floor. Lock the tiles together. Continue locking the tiles and use spacers along the wall for straight alignment. You will require measuring tape, chalk line, straightedge, spacers, and utility knife for this DIY glueless vinyl floor tile installation project. The range of vinyl tiles for floor is available at the tile store. You can anytime look forward for products and ask as many wall tiles dealers as you want. This article was shared by Bathroom wall tiles India suppliers to acknowledge you about vinyl floor tiles and its benefits. If you have any question regarding the product, make comments below. Source:Why Interlocking Foam Tiles Considered as Revolutionary Product?