Download
1 / 20
200 likes | 214 Vues
TinyOS Tutorial. TinyOS Tutorial. Practice 5~6 : 온도 및 습도 센서 제어 및 적외선 센서 제어 ( ZigbeX 를 이용한 유비쿼터스 센서 네트워크 시스템 ). Embedded System Lab. 2007. 2. 1. HyounSoo. Kim. Contents. 1. 2. Practice 5 : 온도 및 습도 제어. Practice 6 : 적외선 센서 제어 ( RF 통신 ). ①. ①. ZigbeX 의 적외선 센서. ZigbeX 의 온도 및 습도 센서. ②.

E N D
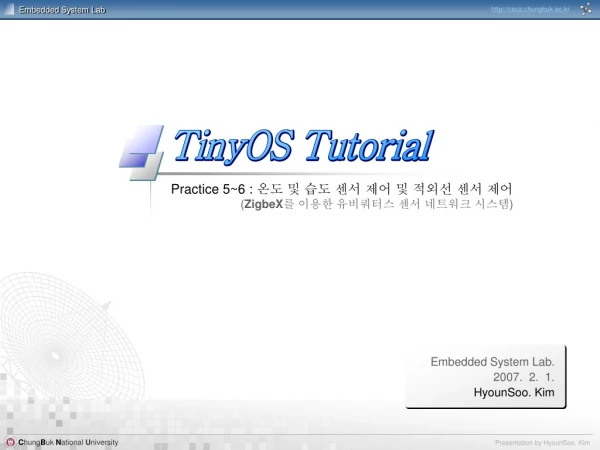
TinyOS Tutorial TinyOS Tutorial Practice 5~6 : 온도 및 습도 센서 제어 및 적외선 센서 제어 (ZigbeX를 이용한 유비쿼터스 센서 네트워크 시스템) Embedded System Lab. 2007. 2. 1. HyounSoo. Kim
Contents 1 2 Practice 5 :온도 및 습도 제어 Practice 6 :적외선 센서 제어(RF통신) ① ① ZigbeX의 적외선 센서 ZigbeX의 온도 및 습도 센서 ② ② 예제를 이용한 습도값 측정 예제릍 통한 적외선 측정 및 RF무선 통신 실습 ③ ③ OscilloscopeSHT11예제 실습 OscilloscopeUltraredRF 예제 실습
① ZigbeX의 온도 및 습도 센서 1. Practice 5 : 온도 및 습도 제어 • 개요 • ZigbeX에서 SHT11 센서를 이용하여 온도 및 습도값을 측정하고,그 결과를 시리얼 통신을 통해 PC로 전달하여 보자 • 온ㆍ습도 센서와 CPU의 인터페이스
① ZigbeX의 온도 및 습도 센서 1. Practice 5 : 온도 및 습도 제어 • 습도값 센싱 과정 ① 전송 시작을 알린다. ② μC가 해야할 명령을 주소와 함께 전송한다. ③ SHT11에서 측정한 값을 μC로 전송한다. ④ 전송된 data와 CRC를 통해 ack 전송 여부 결정(데이터를 읽을 수 없을 경우 SHT11과의 접속을 리셋) 1 2 3 4
① ZigbeX의 온도 및 습도 센서 1. Practice 5 : 온도 및 습도 제어 • 온도 및 습도 제어 컴포넌트 • ADCC 인터페이스에서 제공하는 함수들 함수 및 내용 습도값 얻기 Humidity.getData() – 앞에서 설정된 ADC 포트로부터 측정된 값을얻기 위해 호출된다. event Humidity.dataReday(uint16_t data) – ADC가 측정한 값을event 형태로 반환한다. 온도값 얻기 Temperature.getData() – 앞에서 설정된 ADC 포트로부터 측정된값을 얻기 위해 호출된다. event Temperature.dataReady(uint16_t data) – ADC가 측정한 값을event 형태로 반환한다
1 2 3 ② 예제를 이용한 습도값 측정 1. Practice 5 : 온도 및 습도 제어 • OscilloscopeSHT11 예제 설명 • 8Hz마다 HumidityC 컴포넌트를 통해 습도 센서로부터 값 측정 후,시리얼 케이블을 통해 받은 데이터를 PC로 전달 및 LED Toggle • Oscilloscope.nc • configuration Oscilloscope { • } • Implementation { • components Main, OscilloscopeM, TimerC, LedsC, HumidityC as SHT11, UARTComm as Comm; • Main.StdControl OscilloscopeM;Main.StdControl TimerC; • OscilloscopeM.Timer TimerC.Timer[unique("Timer")];OscilloscopeM.Leds LedsC;OscilloscopeM.SHT11_Humidity SHT11.Humidity;OscilloscopeM.SHT11_Temp SHT11.Temperature;OscilloscopeM.SHT11_Humidity_Error SHT11.HumidityError;OscilloscopeM.SHT11_Temp_Error SHT11.TemperatureError;OscilloscopeM.SplitControl SHT11.SplitControl;OscilloscopeM.CommControl Comm;OscilloscopeM.ResetCounterMsg Comm.ReceiveMsg[AM_OSCOPERESETMSG];OscilloscopeM.DataMsg Comm.SendMsg[AM_OSCOPEMSG]; • } 8Hz Humidity Data UART Send
② 예제를 이용한 습도값 측정 1. Practice 5 : 온도 및 습도 제어 • includes OscopeMsg; • module OscilloscopeM { • provides interface StdControl; • uses { • interface Timer;interface Leds;interface StdControl as SensorControl;interface ADC as SHT11_Humidity;interface ADC as SHT11_Temp;interface ADCError as SHT11_Humidity_Error;interface ADCError as SHT11_Temp_Error;interface StdControl as CommControl;interface SendMsg as DataMsg; interface ReceiveMsg as ResetCounterMsg;interface SplitControl; • } • } • Implementation { • uint8_t TemppacketReadingNumber;uint8_t HumipacketReadingNumber;uint16_t TempreadingNumber;uint16_t HumireadingNumber;TOS_Msg tempmsg[2]; TOS_Msg humimsg[2];uint8_t currentTempMsg;uint8_t currentHumiMsg;uint16_t timetick;uint8_t mytemp, myhumi; • … Implementation • command result_t StdControl.init() { • call Leds.init();call Leds.yellowOff(); call Leds.redOff(); call Leds.greenOff();// turn on the sensors so that they can be read. // call SensorControl.init();call CommControl.init();call SplitControl.init();atomic { • currentTempMsg = 0;currentHumiMsg = 0;TemppacketReadingNumber = 0;HumipacketReadingNumber = 0;TempreadingNumber = 0;HumireadingNumber = 0; • } • dbg(DBG_BOOT, "OSCOPE initialized\n"); return SUCCESS; • } • command result_t StdControl.start() { • // call SensorControl.start();call Timer.start(TIMER_REPEAT, 125);call CommControl.start();call SplitControl.start();return SUCCESS; • }
② 예제를 이용한 습도값 측정 1. Practice 5 : 온도 및 습도 제어 • … Implementation • command result_t StdControl.stop() { • // call SensorControl.stop();call Timer.stop();call CommControl.stop();call SplitControl.stop();return SUCCESS; • } • event result_t Timer.fired() { • timetick++;// return call SHT11_Temp.getData();return call SHT11_Humidity.getData(); • } • event TOS_MsgPtr ResetCounterMsg.receive(TOS_MsgPtr m) { • atomic { • TempreadingNumber = 0;HumireadingNumber = 0; • }return m; • }
② 예제를 이용한 습도값 측정 1. Practice 5 : 온도 및 습도 제어 잘못된 부분currentHumiMsg가 들어가야 하는 부분이렇게 그대로 사용시 currentTempMsg가 0으로 고정되어 있으므로 데이터는 습도가 저장될TOS_Msg 버퍼의 0번째 부분에만 계속 기록되고,1번째 부분의 버퍼에는 기록을 하지 않게 되므로0이라는 값이 오실로스코프에 찍히게 됨 • … Implementation • async event result_t SHT11_Humidity.dataReady(uint16_t data) { • struct OscopeMsg *pack; • atomic { • pack = (struct OscopeMsg *)humimsg[currentTempMsg].data;calc_SHT11(data,data); pack->data[HumipacketReadingNumber++] = myhumi;HumireadingNumber++; dbg(DBG_USR1, "data_event\n");if (HumipacketReadingNumber == BUFFER_SIZE) { post dataTaskHumi(); } • } • if (data > 0x0300) • call Leds.redOn(); • else • call Leds.redOff(); • return SUCCESS; • } • task void dataTaskHumi() { • struct OscopeMsg *pack;atomic { • pack = (struct OscopeMsg *)humimsg[currentHumiMsg].data;HumipacketReadingNumber = 0;packlastSampleNumber = HumireadingNumber; • } • packchannel = 2; packsourceMoteID = TOS_LOCAL_ADDRESS; • if (call DataMsg.send(TOS_UART_ADDR, sizeof(struct OscopeMsg), &humimsg[currentHumiMsg])) { • atomic { currentHumiMsg ^= 0x1; } • call Leds.yellowToggle(); • } • }
② 예제를 이용한 습도값 측정 1. Practice 5 : 온도 및 습도 제어 • … Implementation • void calc_SHT11(uint16_t p_humidity ,uint16_t p_temperature) { • //---------------------------------------------------------------------------------------- • // calculates temperature [℃] and humidity [%RH] • // input : humi [Ticks] (12 bit) • // temp [Ticks] (14 bit) • // output: humi [%RH] • // temp [℃] • const float C1=-4.0; // for 12 Bit • const float C2= 0.0405; // for 12 Bit • const float C3=-0.0000028; // for 12 Bit • const float T1=0.01; // for 14 Bit @ 5V • const float T2=0.00008; // for 14 Bit @ 5V • float rh_lin;// rh_lin: Humidity linear • float rh_true; // rh_true: Temperature compensated humidity • float t_C; // t_C : Temperature [℃] • float rh=(float)p_humidity;// rh: Humidity [Ticks] 12 Bit • float t=(float)p_temperature; // t: Temperature [Ticks] 14 Bit • t_C=t*0.01 - 40; // calc. Temperature from ticks to [℃] • rh_lin=C3*rh*rh + C2*rh + C1;// calc. Humidity from ticks to [%RH] • rh_true=(t_C-25)*(T1+T2*rh)+rh_lin; // calc. Temperature compensated humidity [%RH] • if(rh_true>100)rh_true=100; // cut if the value is outside of • if(rh_true<0.1)rh_true=0.1; // the physical possible range • mytemp=(uint8_t)t_C; // return temperature [℃] • myhumi=(uint8_t)rh_true; // return humidity[%RH] • } • }
③ OscilloscopeSHT11 예제 실습 1. Practice 5 : 온도 및 습도 제어 • Build • cd /opt/tinyos-1.x/contrib/zigbex/OscilloscopeSHT11 • make zigbex • ./build/zigbex/main.exe 포팅(PonyProg - parallel) • Java 어플리케이션 구동(serial) • export MOTECOM=serial@COM1:57600 • cdjava ( cd /opt/tinyos-1.x/tools/java) • java net.tinyos.oscope.oscilloscope 잘못된 부분8페이지에서 언급한 Flag 값을 Humi로 바꿔주면, 정상적으로 이어지는 형태의 곡선을 볼 수 있음.
① ZigbeX의 적외선 센서 2. Practice 6 : 적외선 센서 제어(RF 통신) • 개요 • ZigbeX에서 BS520 적외선 센서를 이용하여 주변의 적외선을측정하고, 그 결과를 RF 무선 통신을 통해 전송해 보자 • ADCC 인터페이스에서 제공하는 함수들 • ADCControl.bindPort(TOS_ADC_Ultrared_PORT, TOSH_ACTUAL_Ultrared_Port)함수를 호출하여 ADC1에 들어오는 적외선 측정값을 받을 수 있도록 설정한다. 함수 및 내용 특정 ADC 포트 지정 ADCControl.bindPort( ) – 원하는 ADC 포트값을 설정한다.(ADC 1번포트는 조도 센서와 연결되어 있음) ADC의 값 얻기 ADC.getData() – 앞에서 설정된 ADC 포트로부터 측정된 값을 얻기위해 호출된다. event ADC.dataReady(uint16_t data) – ADC가 측정한 값을 event형태로 반환한다
② 예제릍 통한 적외선 측정 및 RF 무선 통신 실습 2. Practice 6 : 적외선 센서 제어(RF 통신) • OscilloscopeUltraredRF 예제 설명 • ZegbeX 1번 노드에서는 8Hz마다 적외선 값을 RF 무선 통신을 통해주위로 브로드캐스팅 한다 • 그 측정값을 RF 통신을 통해 받는 ZigbeX 0번 노드는 자신에게프로그램된 TOSBase 프로그램에 의해 값을 시리얼로 연결된PC에게 전송한다. • 구성도 무선통신 ZigbeX 1 ZigbeX 0 시리얼 케이블 OsilloscopeUltraredRF TOSBase
② 예제릍 통한 적외선 측정 및 RF 무선 통신 실습 2. Practice 6 : 적외선 센서 제어(RF 통신) • OscilloscopeUltraredRF configuration • includes OscopeMsg; • configuration Oscilloscope { • } • Implementation { • components Main, OscilloscopeM, TimerC, LedsC, Ultrared as Sensor, UARTComm as Comm; • Main.StdControl OscilloscopeM;Main.StdControl TimerC; • OscilloscopeM.Timer TimerC.Timer[unique("Timer")];OscilloscopeM.Leds LedsC;OscilloscopeM.SensorControl Sensor;OscilloscopeM.ADC Sensor;OscilloscopeM.CommControl Comm;OscilloscopeM.ResetCounterMsg Comm.ReceiveMsg[AM_OSCOPERESETMSG];OscilloscopeM.DataMsg Comm.SendMsg[AM_OSCOPEMSG]; • }
② 예제릍 통한 적외선 측정 및 RF 무선 통신 실습 2. Practice 6 : 적외선 센서 제어(RF 통신) • includes OscopeMsg; • module OscilloscopeM { • provides interface StdControl; • uses { • interface Timer;interface Leds;interface StdControl as SensorControl;interface ADC;interface StdControl as CommControl;interface SendMsg as DataMsg; interface ReceiveMsg as ResetCounterMsg; • } • } • Implementation { • uint8_t packetReadingNumber;uint16_t readingNumber;TOS_Msg msg[2];uint8_t currentMsg; • command result_t StdControl.init() { • call Leds.init(); call Leds.yellowOff(); call Leds.redOff(); call Leds.greenOff(); call SensorControl.init();call CommControl.init();atomic { • currentMsg = 0; packetReadingNumber = 0; readingNumber = 0; • } • dbg(DBG_BOOT, "OSCOPE initialized\n");return SUCCESS; • }
② 예제릍 통한 적외선 측정 및 RF 무선 통신 실습 2. Practice 6 : 적외선 센서 제어(RF 통신) • … Implementation • command result_t StdControl.start() { • call SensorControl.start();call Timer.start(TIMER_REPEAT, 125);call CommControl.start();return SUCCESS; • } • command result_t StdControl.stop() { • call SensorControl.stop();call Timer.stop();call CommControl.stop();return SUCCESS; • } • event result_t Timer.fired() { • return call ADC.getData(); • } • async event result_t ADC.dataReady(uint16_t data) { • struct OscopeMsg *pack;atomic { • pack = (struct OscopeMsg *)msg[currentMsg].data; packdata[packetReadingNumber++] = data;readingNumber++;dbg(DBG_USR1, "data_event\n");if (packetReadingNumber == BUFFER_SIZE) { // BUFFER_SIZE = 10 OscopeMsg.h • post dataTask(); • } • } • if (data > 0x0300) call Leds.redOn();else call Leds.redOff();return SUCCESS; • }
② 예제릍 통한 적외선 측정 및 RF 무선 통신 실습 2. Practice 6 : 적외선 센서 제어(RF 통신) • … Implementation • task void dataTask() { • struct OscopeMsg *pack;atomic { • pack = (struct OscopeMsg *)msg[currentMsg].data;packetReadingNumber = 0;packlastSampleNumber = readingNumber; • } • packchannel = 1;packsourceMoteID = TOS_LOCAL_ADDRESS; • if (call DataMsg.send(TOS_BCAST_ADDR, sizeof(struct OscopeMsg), &msg[currentMsg])) { • atomic { • currentMsg ^= 0x1; • } • call Leds.yellowToggle(); • } • } • event result_t DataMsg.sendDone(TOS_MsgPtr sent, result_t success) { • return SUCCESS; • } • event TOS_MsgPtr ResetCounterMsg.receive(TOS_MsgPtr m) { • atomic { • readingNumber = 0; • } • return m; • }
③ OscilloscopeUltraredRF 예제 실습 2. Practice 6 : 적외선 센서 제어(RF 통신) • ZigbeX mote 1 Build • cd /opt/tinyos-1.x/contrib/zigbex/OscilloscopeUltraredRF • TOSBase와의 통신을 위해서 TOSBase의 그룹 아이디와 통일 • make zigbex ./build/zigbex/main.exe 포팅(PonyProg - parallel) • ZigbeX mote 2 Build • cd /opt/tinyos-1.x/contrib/zigbex/TOSBase • make zigbex ./build/zigbex/main.exe 포팅 • export MOTECOM=serial@COM1:zigbex • cdjava ( cd /opt/tinyos-1.x/tools/java) • java net.tinyos.oscope.oscilloscope COMPONENT=Oscilloscope PFLAGS=-I../Oscilloscope DEFAULT_LOCAL_GROUP=0x7d Include ../../../apps/Makerules
③ OscilloscopeUltraredRF 예제 실습 2. Practice 6 : 적외선 센서 제어(RF 통신) • 결과 외부에서 직접 측정 형광등 측정 창문을 통한적외선량 측정 휴대폰 적외선 감지(포트 호환 X) 적외선감지 시작(건물내부) 한손으로 가림 두손으로 가림