Download
1 / 88
890 likes | 966 Vues
Discover the deeper meanings behind lesson planning for teachers. Learn how to effectively plan, organize, and manage classroom activities. Understand the importance of specific, efficient lesson plans to achieve desired learning outcomes. Avoid common mistakes in lesson planning to enhance teaching skills.

E N D
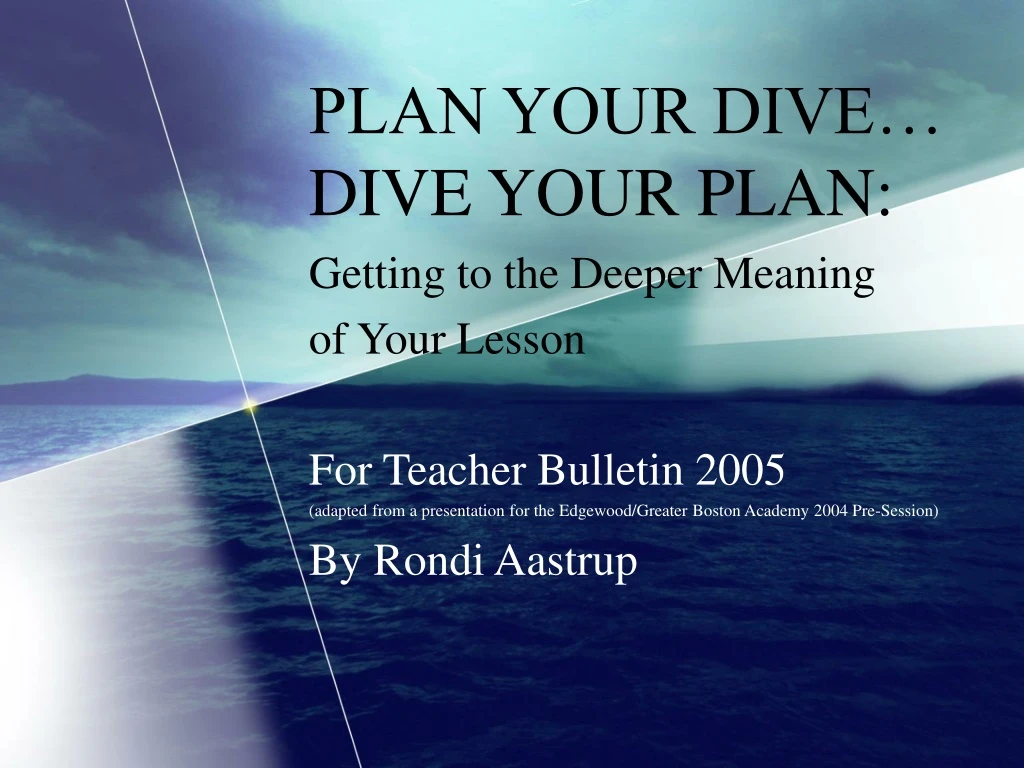
PLAN YOUR DIVE… DIVE YOUR PLAN: Getting to the Deeper Meaning of Your Lesson For Teacher Bulletin 2005 (adapted from a presentation for the Edgewood/Greater Boston Academy 2004 Pre-Session) By Rondi Aastrup
Preparing to Dive into the Depths • Scuba diving lessons are conducted in three easy steps. The first part is a brief induction with your scuba diving instructor; your instructor will run through all the safety requirements and your equipment. Once you have come to grips with your equipment and all the safety precautions, your instructor will move on to the second stage of your scuba diving lessons.
Preparing to Dive into the Depths • For the second part of your scuba diving lessons you will be taken in confined waters, something like a swimming pool where you will learn how to handle your equipment underwater and get to grips with everything. • In the last stage of your scuba diving lessons you will embark on your first underwater experience. Your scuba diving instructor will take you into shallow calm waters, where all your hard work will pay off, and you will truly understand why you have taken scuba diving lessons.
Diving Into the Depths and Beyond • Once you have completed your scuba diving lessons, you won’t be a certified driver, but you will have taken the all-important first steps towards your Open Water Diver certification.
PART I: Plan Your Dive… • Successful teachers, like successful divers, are invariably good planners and thinkers. They didn't get that way overnight. • The road to success requires commitment and practice, especially of those skills involved in planning lessons, activities, and managing classroom behavior.
Plan Your Dive… • Planning lessons is a fundamental skill all teachers must develop and hone, although implementation of this skill in actual teaching can, and usually does, take some time. So let's begin at the beginning.
Purpose of Lesson Plans—1 • The purpose of a lesson plan is really quite simple; it is to communicate. But, you might ask, communicate to whom? The answer, on a practical basis, is YOU! • The lesson plans you develop are to guide you in organizing your material and yourself so you can help your students achieve intended learning outcomes.
Purpose of Lesson Plans—2 • Whether a lesson plan fits a particular format is not as relevant as whether or not it actually describes what you want, and what you have determined is the best means to an end. • Lesson plans are not written for you to read to the class. They are used to structure the lesson and to help with the flow of the class, especially when something has occurred to distract everyone, including you.
Specificity in Lesson Plans—1 • If you write a lesson plan that can be interpreted or implemented in many different ways, it is probably not a very good plan. • This means that a key principle in creating a lesson plan is specificity.
Specificity in Lesson Plans—2 • It is sort of like saying, "almost any series of connecting roads will take you from Key West, Florida to Anchorage, Alaska—eventually." • There is however, one and only one set of connecting roads that represents the shortest and best route. • Best means that, for example, getting to Anchorage by using an unreliable car is a different problem from getting there using a brand new car. • What process you use to get to a destination depends on available resources and time.
Common Lesson Plan Mistakes—1 • If you are serious about improving your skill in planning lessons, you should begin by first thinking carefully about what the lesson is supposed to accomplish. There is no substitute for this. • Following are mistakes teachers make most often with their lesson plans:
Common Lesson Plan Mistakes—2 • The objective of the lesson does not specify what the student will actually do that can be observed. Remember, an objective is a description of what a student does that forms the basis for making an inference about learning. Poorly written objectives lead to faulty inferences.
Common Lesson Plan Mistakes—2 2. The lesson assessment is disconnected from the behavior indicated in the objective. An assessment in a lesson plan is simply a description of how the teacher will determine whether the objective has been accomplished. It must be based on the same behavior that is incorporated in the objective. Anything else is flawed.
Common Lesson Plan Mistakes—3 3. The materials specified in the lesson are extraneous to the actual described learning activities. This means keep the list of materials in line with what you actually plan to do. Overkill with materials is not a virtue! 4. The instruction in which the teacher will engage is not efficient for the level of intended student learning. Efficiency is a measure that means getting more done with the same amount of effort, or the same amount with less effort. With so much to be learned, it should be obvious that instructional efficiency is paramount.
Common Lesson Plan Mistakes—4 5. The student activities described in the lesson plan do not contribute in a direct and effective way to the lesson objective. Don't have your students engaged in activities just to keep them busy. Whatever you have your students do should contribute in a direct way to their accomplishing the lesson objective. A lesson plan that contains one or more of these mistakes needs rethinking and revision.
First Things First • The first thing to consider, obviously, is what concept you want to teach. This should be developed based on state and SDA standards. Most denominational Curriculum Guides list both now. • You also need to be aware of what grade level you are developing the lesson plan for—or, more to the point, what level(s) your class works at, and how far you need to push it. • You should have in mind the estimated time you want to spend on each lesson. Refer to your Scope and Sequence to make sure you have enough time for each lesson.
Thinking Parts of Lesson Plans Lesson plans are primarily a thinking process. This thinking process basically is completed in four parts. • First, determine the concept; that is, what the children will learn, what they will be able to do upon completing the activities or work of the lesson.
Thinking parts of Lesson Plans • Second, determine what the students already know, before beginning the lesson, that can lead into the new concept of the day. • Third, determine at least one way to assist the students in learning the new concept. • Fourth, determine at least one way to evaluate the learning outcomes of the students.
Specific Standards for each Lesson • Once you have your concept, you can begin determining how you want to teach the concept. If you didn't use the state and denominational standards to help in developing your topic, refer to them now to see what specific standards your lesson plan can fulfill. • Having your lesson plan correctly aligned with state and SDA standards helps to prove its worthiness and necessity. It also helps in assuring that your students are being taught what is required.
Objectives • To make sure your lesson plan will teach exactly what you want it to; you need to develop clear and specific objectives. Objectives should not be activities that will be used in the lesson plan. They should instead be the learning outcomes of those activities. • As an example, if you wanted to teach your class how to add 2 + 3, your objective may be that "the students will know how to add 2 + 3," or more specifically "the students will demonstrate how to add 2 + 3." • Objectives should also be directly measurable. In other words, make sure you will be able to tell whether these objectives were met or not.
Objectives You can certainly have more than one objective for a lesson plan. To make objectives more meaningful, you may want to include both broad and narrow objectives. • The broad objectives would be more like goals and include the overall goal of the lesson plan, i.e. to gain familiarity with adding two numbers. • The specific objectives would be more like the one listed above, i.e. "the students will demonstrate how to add the numbers 2 and 3."
Materials Needed • You would probably find out exactly what materials you are going to use later, but they should be shown early in your lesson plan. This way if someone else were going to use your lesson plan, they would know in advance what materials are required. • Be specific here to make sure you will have everything you need. For the addition lesson, you should make sure you have 10 or so unifix cubes per student, paper, and pencils.
Motivation for Students • It is a good idea to use a motivational activity which leads into the lesson plan and develops the students' interest in learning what is about to be taught. • An example deals with a lesson on fractions: • Start by asking the students how they would divide up a pizza to make sure each of their 5 friends got an equal amount of pizza. • Then you tell them that they can do this if they know how to work with fractions.
PART II: …Dive Your Plan • There are many different formats that can be used to write daily lesson plans. • Formats that are most useful are very simple to follow and are well structured. • Following are a number of lesson plan formats, as well as a few sample lesson plans:
Dr. Madeline Hunter’s Elements of a Lesson Plan • Dr. Madeline Hunter's research shows that effective teachers have a methodology when planning and presenting a lesson. • Hunter found that no matter what the teacher's style, grade level, subject matter, or economic background of the students, a properly taught lesson contains specific elements that enhance and maximize learning.
Dr. Madeline Hunter’s Elements of a Lesson Plan • She labeled the elements and began two decades of teacher training. The elements—referred to as Lesson Design, Target Teaching, or Clinical Teaching—have stood the test of time. They are still used today in most teacher colleges and as reference for judging teacher effectiveness in many school districts.
Writing Lesson Plans the Madeline Hunter way • There are only three essential elements of a lesson plan: • Objectives--what students will be able to do as a result of the lesson • Procedures--what the teacher will do to get the students there • Evaluation opportunities--what the teacher can do to see if the lesson was taught effectively: watching students work, assigning application activities, getting feedback, etc.
Writing Lesson Plans the Madeline Hunter way • Additionally, many lesson plans also include: • Materials and any special equipment needed • Time estimates, and of course • Procedural Subpoints.
A Starting Point--Madeline Hunter lesson plan format: • Anticipatory Set (setting the stage)—attention-getter and focuser • Statement of Objectives—tell students what they'll be able to do as a result of the lesson • Instructional Input—lecture, but not necessarily lecture: demo, explanation, instructions • Modeling—demonstrate, show what you tell
A Starting Point--Madeline Hunter lesson plan format: • Check for Understanding—watch faces, ask questions • Guided Practice—help students start practicing new skills, applying new knowledge • Independent Practice—turn them loose to work on their own, homework assignment, etc. • Closure—review key points, wrap up lesson
Dr Hunter’s Lesson Design—1 • Anticipatory Set (focus) - A short activity or prompt that focuses the students' attention before the actual lesson begins. Used when students enter the room or in a transition. A hand-out given to students at the door, review question written on the board, "two problems" on the overhead are examples of AS. • Purpose (objective) - The purpose of today's lesson, why the students need to learn it, what they will be able to "do", and how they will show learning as a result are made clear.
Dr Hunter’s Lesson Design—2 • Input - The vocabulary, skills, and concepts the teacher will impart to the students - the "stuff" the kids need to know in order to be successful. • Modeling (show) - The teacher shows in graphic form or demonstrates what the finished product looks like - a picture worth a thousand words.
Dr Hunter’s Lesson Design—3 • Guided Practice (follow me) - The teacher leads the students through the steps necessary to perform the skill using the trimodal approach - hear/see/do. • Checking For Understanding (CFU) - The teacher uses a variety of questioning strategies to determine "Got it yet?" and to pace the lesson - move forward?/back up?
Dr Hunter’s Lesson Design—4 • Independent Practice - The teacher releases students to practice on their own based on #3-#6. • Closure - A review or wrap-up of the lesson - "Tell me/show me what you have learned today".
Dr. Hunter’s Performance Models • Performance Models (Fred Jones, Positive Classroom Instruction ) can be divided into three categories: 1) Illustrated Performance Sequences, 2) Performance Outlines, 3) Conceptual Maps. • They are visual representations, written or in graphic form, that show the steps to complete a skill or clarify a concept. • When used in conjunction with verbal (hear) and kinetic (do) input during a formal lesson, performance models help to insure outcome-based performance.
Dr. Hunter’s Performance Models • A Performance Model should be introduced before students are released for independent practice. It tends to work best when introducing a critical skill that other skills will build upon, or a skill that has many steps which can cause cognitive overload.
Dr. Hunter’s Performance Model: Task Analysis—1 • During the planning of a formal lesson, consider putting yourself in the place of the learner and perform the skill or attain the concept while asking yourself, "What exactly are the steps necessary to complete this skill or understand this concept?" • Approaching task analysis from the learner's perspective—say a confused student—will help you to analyze the subtle steps that may seem obvious to one who already understands but leave gaps for someone in need of clarity.
Dr. Hunter’s Performance Model: Task Analysis—2 • A Performance Model, then, becomes an illustration of each step helping the clarify for the student, “Oh, this is what this step looks like.” • Someteachers will teach a skill from start to finish while the students watch and listen. • Modeling a "finished product" is an element of lesson design that is commonplace in formal instruction.
Dr. Hunter’s Performance Model: Task Analysis—3 • If the finished product is the only model for reference, students may ask during independent seatwork, “I forgot step four. Can you show me again?” • The teacher is then drawn into individual helping interactions to clarify steps which the students have forgotten. • On the other hand, if a Performance Model is used to illustrate each step which the students copy and keep at their desks, the teacher can merely point to step three (the last step the student did correctly) and say, "You did step three correctly (praise). You're on step four (point). Do that and I'll come back and check it (prompt-leave)". The student has a "visual" reminder of what the steps look like versus trying to reproduce the steps from memory.
Lesson Design: A New Element • Dr. Fred Jones has tacked on a new element to Lesson Design that helps to ensure greater learning. Students may be able to "do" many skills, but optimum learning has not taken place until they can self-correct and discriminate error. If a student can process the steps to perform a skill, teach these steps to someone else while recognizing errors, then more cognitive thinking and understanding have taken place.
Teach Your Partner—1 • After guided practice and before independent practice, the element—Teach Your Partner—can be added to Lesson Design to increase understanding. 1) Count off the class by ones and twos - partners. 2) Using a Performance Model (which the students should have in hand), the ones teach the twos Step 1, then the twos teach the ones the same step.
Teach Your Partner—2 3) You model the teaching method first with a volunteer, keeping instruction (hear) to a minimum while pointing (see and do) to the Step on the Model. The student, then, repeats the EXACT words while pointing and teaches the teacher. This continues until the student has it exactly right. 4) You then choose two student volunteers (partners) to model, again using the exact words while pointing to Step 1 until they get it right.
Teach Your Partner—3 5) Tell the ones to "teach" the twos Step 1. • Circulate among the groups, stopping to monitor and correct—the whole class should have it. • If they don’t seem to grasp the process, stop and re-teach. Next, the twos teach the ones. • The volunteer group can help to monitor other groups. 6) This procedure continues for each Step of the Model.
Teach Your Partner—4 • Teach Your Partner is best used for "critical lessons" – those which students must understand in order to move on to other lessons in the same area—say the steps involved in long division or the pre-writing steps in composition. • Students can save The Models as a reference and take them home for help with homework.
Step-by-Step Format • If you are teaching a complicated process, or if you are conducting a lab, it is a good idea to use the step-by-step process. • This helps with preparing for the lesson and assures that you don’t forget any important steps in the presentation. • This is also good if a substitute is conducting the lesson.
Step-by-Step: Procedures A-B • Write the step-by-step procedures that will be performed to reach the objectives. These don't have to involve every little thing you will say and do, but they should list the relevant actions you need to perform. • For the “Adding 2 + 2 lesson,” you could have procedures such as these: A. Give each child 2 unifix cubes B. Ask the students to write down how many unifix cubes they have on paper (2).
Step-by-Step: Procedures C-E C. Tell the students to write a + sign below the number 2 like this: 2 + D. Then pass out 3 more unifix cubes to each student. E. Then ask the students to write down how many unifix cubes they were just given below the number 2 that they just wrote, so that it looks like this: 2 +3
Step-by-Step: Procedures F-H F. Tell students to draw a line under their 3. G. Now have the students count how many unifix cubes they have together and write this number just below the 3, like this: 2 +3 ---- 5 H. Ask students how many unifix cubes they had to start, how many they were given to add to that, and how many they had total after the teacher gave them the 3 unifix cubes.
Step-by-Step: Practice the Concept • After the procedures have been completed, you may want to provide time for independent practice. For the example of above, students could be given time to add different numbers of unifix cubes together that a partner would provide them with.
Step-by-Step: Closure • Just before moving on to the assessment phase you should have some sort of closure for the lesson plan. • A good idea for this is to return to your anticipatory set, i.e. ask students how they would divide up that pizza now that they know how to work with fractions.