Download
1 / 16
160 likes | 192 Vues
Create a unique plastic molding tray to neatly store small items. Learn the design process using acrylic sheet, chipboard, and plywood. Enhance creativity and craftsmanship in each step.

E N D
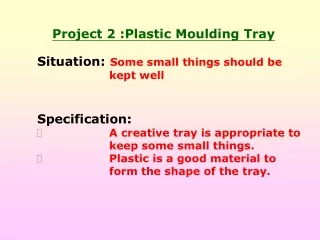
Project 2:Plastic Moulding Tray Situation:Some small things should be kept well Specification: • A creative tray is appropriate to keep some small things. • Plastic is a good material to form the shape of the tray.
Project 2:Plastic Moulding Tray • Material provided: • Acrylic sheet, 160 x 160 x 3mm • Chip Board, 150 x 150 x 12mm • Plywood, 160 x 160 x 12mm Duration:5 cycles
Project 2:Plastic Moulding Tray Suggested Procedures 1.Information Collection Collect information from magazines, department stores, internet, etc. Record the data by drawings, photos or print out.
Information Symbolic shape? Capacity Sharp edges? Project 2:Plastic Moulding Tray 2.Design Consideration Solution Artistry
Project 2:Plastic Moulding Tray Final Idea Initial Ideas 3. Solution 4. Working Process a) Design the shape and draw it into the chipboard. b) Cut all the components from the chipboard by coping saw. c) Attach the components on the backing board with white glue and nails. d) Soften the acrylic sheet by the oven.
Project 2:Plastic Moulding Tray e) Place the acrylic sheet into the mould and clip it in the bench vice firmly until it cools down. f) Trim the edge of the acrylic tray by the coping saw. g) Refine the edge of the tray by hand file. h) Polish the edge by wet water-proof glass paper and Brasso.
Project 2:Plastic Moulding Tray 5. Assessment criteria Product: Appearance – 70% Creativity – 30% Folio: Full steps – 50% Show ideas clearly – 30% Drawing quality – 20% 6. Evaluation
Wooden Mould (chipboard) Wooden Mould Soften the acrylic sheet by oven (~170oC) Project 2:Plastic Moulding Tray Reference
Project 2:Plastic Moulding Tray Press Clip the acrylic sheet in the vice until it cools Press