Plastics
Design and manufacture. Plastics. Name: ………………………………………………………… Class:……………… Teacher:…………………………………………. Plastics.

Plastics
E N D
Presentation Transcript
Design and manufacture Plastics Name: ………………………………………………………… Class:……………… Teacher:…………………………………………..
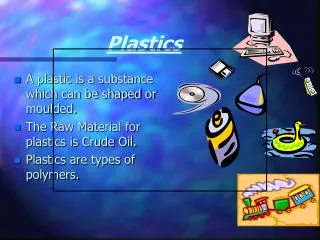
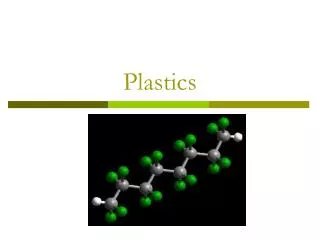
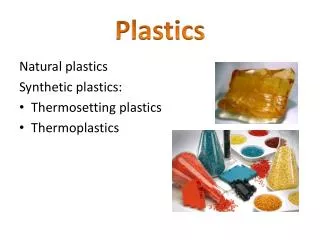
Plastics The basic raw materials used in the manufacture of plastics are oil, natural gas and coal, but contrary to popular belief, plastics are not a new ”space age” material. Natural plastics such as shellac, wax horn, pitch and bitumen have been known for thousands of years. Plastics are classified into two main groups; Thermoplastics and Thermosetting plastics. • Plastics are ideal for mass production of quality products, and can duplicate or better the properties of most other materials, including aluminium, glass, rubber and steel. • Properties • General properties of plastics include: • Light weight • Resistance to corrosion • Electrical resistant • Easily formed • recyclable Thermosetting Plastics As the name implies thermosetting plastics (or thermosets) set or solidify, when heated and cannot be returned to their original state by further heating.
Thermoplastics Thermoplastics soften when heated, can then be shaped, and then harden as they cool. With this type of plastic the softening and hardening can be repeated many times over. When a thermoplastic has been re-heated it will return to it’s original shape unless it has been permanently damaged by excessive heat or deformation. This characteristic of thermoplastics of re-heating is known as Plastic Memory (i.e. it remembers what its original shape was).
Tools for use with Plastics (saws) In the school workshop the most common method of cutting acrylic is by sawing. Fine toothed saws like the coping saw, hacksaw and junior hacksaw are the most suitable. Sawing must be done carefully and steadily to avoid chipping and splintering the material. The band saw can also be used but is only to be used by the teacher. Hacksaw The hacksaw is used for general cutting of metal bar, tubes, etc. The blade is easily removed by slackening or tightening of the front wing nut. Junior Hacksaw This type of saw is also used for cutting metal but is used for light work or where a hacksaw is too clumsy. Coping Saw The coping saw is used to cut curves and other awkward cuts in plastic or wood. It is also unique as it is one of only a few saws which has its teeth facing backwards. In normal sawing the cut is made in the forward stroke but with the coping saw the cut is made on the backward stroke.
Tools for use with Plastics (filing) Files are used to shape metal or plastic. They are available in a number of different shapes and degrees of roughness. Stages in finishing an edge of acrylic When acrylic plastics are cut they tend to have very rough edges, this is due to the fact that it is a very brittle material. Brittle means that although it is very hard, it tends to break easily especially when sawing. To ensure the plastic is finished with a clean smooth edge it is essential that the edges are finished in the following sequence. 1 Cross file the edges to remove the majority of blemishes. 2Draw file the edges to remove the marks left from cross filing. 3Use wet and dry paper to get an overall smooth finish. 4Use acrylic or metal polish(Brasso) to achieve the final finish. Cross filing In this type of filing the file is moved across the work piece using the full length of the blade. This method of filing is used for removal of a lot of material with every stroke applied. Draw filing In this method of filing, the file is moved sideways along the work piece and is used to obtain a smooth finish after cross filing.This method does not remove much material.
Tools for use with Plastics (drilling) • Holes can be drilled or cut in acrylic using standard drilling equipment, twist drills or hole saws. Prior to drilling it is very important to ensure the bottom of the acrylic is supported with a piece of wood. If it is not the most likely result will be the cracking of the acrylic. It is also essential that you drill into the acrylic slowly. Twist Drill Twist drills are generally made from a carbon steel and are used for drilling circular holes in metal, plastic or wood. Twist drills have three basic parts, a point, a parallel body and a shank which can be either parallel or tapered. Hole Saw This tool is used to drill big holes in wood or plastic and is generally fitted to an electric drill. The hole saw has a centre drill attached which is called the PILOT drill. It is called the pilot drill as it pilots the larger diameter cutter to exactly the right location. Shank Point
Processes for shaping plastic Bending Acrylic becomes soft and pliable when heated to approximately 150 ºC. In this state it can be easily bent and formed to shape. On cooling to room temperature the formed shape is retained. The most convenient method of heating, prior to bending and forming, is to use the oven or strip heater. The Strip Heater The purpose of the strip heater is to heat only a narrow strip of acrylic to allow local bending. Before bending the acrylic the protective coating is removed and then area to be bent is marked with a pen. After heating it sufficiently the acrylic can be shaped, preferably using a suitable former or jig. The Oven Where more complex shaping of acrylic is required it is necessary to use an oven for heating. For a 3mm thick sheet of acrylic the oven should be set to a maximum temperature of 170˚C and the sheet heated for about 15 - 20 minutes before forming to the required shape. Stage 1The first stage is to mark the line where the bending will take place. Stage 2 The second stage is to place the acrylic over the heating element, turning regularly to avoid burning. Stage 3The third stage is to remove the soft heated acrylic and place it on a suitable JIG or FORMER. Stage 4The last stage is to bend the acrylic to the desired shape.
Industrial Processes for shaping/forming plastic Injection moulding Injection Moulding is a process which allows large quantities of plastic components to be made quickly. Thermoplastic granules are heated until they soften. Then the material is forced under pressure into a mould. When cooled, the mould is opened and a component, which is the exact shape of the cavity is taken out. Injection Moulding is one of the most important industrial processes in the mass production of plastic goods. The cost of producing the moulds can be very high, therefore it is necessary to manufacture and sell large quantities of the product being manufactured to recover costs. The Process A fee hopper if filled with thermoplastic granules. A rotational screw mechanism passes the granules through a heater. The heater causes the granules to plasticise. The soft plastic is injected into the mould where it is cooled. The mould is opened automatically. The finished component is ejected. No further finishing is required. The quality of the product is identical to the surface of the mould. Uses Components produced by injection moulding vary from golf tees, spoons, wash basins, buckets, airfix models to product casings. Identifying Features A way of telling if a product has been injection moulded is to look for ejection pin marks on the surface of the product. These are normally circular marks left when the pins force the product out of the mould.
Industrial Processes for shaping/forming plastic Vacuum Forming In Vacuum Forming, a sheet of thermoplastic is held in a clamp and is heated until it is soft and flexible. Air is sucked out from underneath the sheet so that air pressure pulls the sheet down onto a specially made mould. This process enables thermoplastics to be formed into complicated shapes such as packaging, storage trays and seed trays. Stage 1The first stage of vacuum forming is to clamp the sheet across the top of the machine and heat it until the plastic is soft and flexible. This can be judged by watching the material, which will start to sag under its own weight when soft. If touched with a stick it will feel soft and rubbery. Stage 2The pattern is then raised up to meet the hot soft plastic. Stage 3At this stage the air has been sucked out from beneath the plastic pulling it onto the pattern. Stage 4The final stage is to remove the pattern from the plastic leaving the finished article. http://www.youtube.com/watch?v=1t39xX6fjt0 platform raised air sucked out formed plastic
Industrial Processes for shaping/forming plastic Rotational Moulding Rotational moulding is a method of creating medium to large sized hollow components from plastics. It involves melting plastic inside a closed mould which is rotated so the plastic coats the inside of mould. The plastic is then cooled and solidifies in the shape of the mould. Stage 1At this stage the liquid plastic is poured into the mould. The mould is then sealed and the process of rotating it begins. Stage 2This stage shows the plastic being heated as it is rotated around the mould. The heated plastic coats the inside wall of the mould. liquid plastic Stage 3The completed plastic mould is now cooled before ejection from the mould. Stage 4The moulded shape is ejected from the mould. The picture here shows a hollow sphere. mould http://www.youtube.com/watch?v=CcGSKJxLfj8
Joining Plastics (permanent) The main method of a permanent joining for plasticis adhesives. Adhesives Adhesives, or glues, are designed to bond material together. As there are many different types of material to be bonded, a wide range of adhesives have been developed. The strength of a glued joint depends on three things: the area to be bonded; the strength of the glue when set; and the bond between the material and the glue. To achieve a strong glued joint the area to be glued should be as large as possible, the correct glue should be used and the surfaces to be glued should be as clean as possible. Here are some adhesives commonly used with plastics: Epoxy resin(Araldite) – comprises two parts, a resin and a hardener. They are mixed in equal amounts and can be used on most materials. Acrylic cement(Tensol) – thick clear liquid with unpleasant fumes, specially made for acrylic. Contact adhesive– thick brown rubbery glue commonly used to stick down plastic laminates. when brought together the surfaces cannot be moved for adjustment. Super glue– bonds on contact and is used on small surface areas.
The outer casings of the two products shown below have been injection moulded. (a) (i) State three features which would confirm that injection moulding is the manufacturing process used for the outer casings. (ii) State two advantages to the manufacturer of using injection moulding to produce the outer casings. (b) State how the designer could find out the correct sizes for the handles of the two products without referring to anthropometric data tables. Both products were designed with planned obsolescence. (c) (i) State an advantage of planned obsolescence to the manufacturer. (ii) State two reasons why planned obsolescence is harmful to the environment.