FotoGazmic Software Project Definition
210 likes | 317 Vues
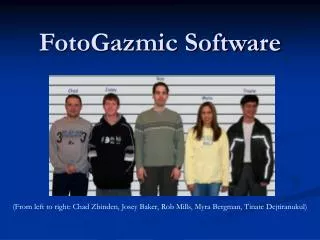
FotoGazmic Software Project Definition. Senior Project: CS 425 Spring 2003. Client & End User. Professor Bernard Waxman. Upper Management. Professor Xudong Yu. Our Team. (From left to right: Chad Zbinden, Josey Baker, Rob Mills, Myra Bergman, Tinate Dejtiranukul). Purpose of the System.

FotoGazmic Software Project Definition
E N D
Presentation Transcript
FotoGazmic SoftwareProject Definition Senior Project: CS 425 Spring 2003
Client & End User Professor Bernard Waxman
Upper Management Professor Xudong Yu
Our Team (From left to right: Chad Zbinden, Josey Baker, Rob Mills, Myra Bergman, Tinate Dejtiranukul)
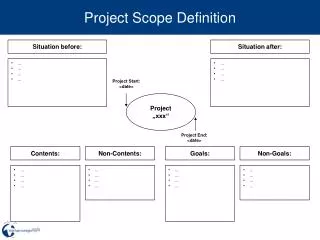
Purpose of the System • Develop a Software Package for Image Enhancement • Color and Density Correction • Read, Open, Display, and Save TIFF Images • Automatically Detect a 20% Gray Card • Select Portions of the Image and Identify • Automatically Adjust the Color • Allow the User to Save the Corrected Version
Objectives and Success Criteria • Document, Design, Implement, and Produce • Simplify the Task of Color and Density Correction • Software can Run on any PC that meets the Hardware Requirements • Enhance the Overall Quality of Digital Image
Functional Requirements • Graphical Interface • Load Function • Save and Save As function • Preview Function • One Level Undo Feature • Auto Correct Feature • Correction • Full Amount or Percentage of Suggested Correction
Functional cont. • Selection Tool • Pixel Group, Circle, or Square • Identify the Area • Predetermined List of Object Types • Suggested Correction • Stored Values of Color and Density • Entire Image or Selected Portion • Options • Correct only within a Certain RGB Range • Correct only by a percentage
Functional cont. • Image Display • Default—Full Resolution • Display options • Zoom Capability • Scroll Bars
Nonfunctional Requirements • User Interface and Human Factors • Simple, User-friendly Graphical Interface • Tool Selection Palette • Integrated Help System • Documentation • Hardware Consideration • IBM compatible • 1 Ghz Pentium IV, 256 MB Ram • 24-bit true color, 1280x1024 - graphics card
Nonfunctional cont. • Performance Characteristics • Perform Corrections in a Timely Manner • Error Handling and Extreme Conditions • Program Should NOT Crash • Appropriate Error Message
Nonfunctional cont. • Quality Issues • High Quality Corrected Images • Minimal Distortion • Aesthetically Correct • Density and Color • System Modifications • Well documented and Easy to Modify
Pseudo Requirements • User Interface • May be done in Visual Basic • Underlying system • C++ • C# • Similar Language in Order to meet Performance Criteria.
Use Cases Use Case Name SelectPortion Participating actor EndUser Entry condition 1. The EndUser selects one of the selection style tools. Flow of Events 2. The EndUser selects a part of the image with the selection tool. 3. The EndUser identifies the selected portion from a predetermined list of object types. Exit condition A portion of the image is selected and identified. Special Requirements An image must be open.
Use Cases (cont.) Use Case Name AutoEnhancement(gray card found) Participating actor EndUser Entry condition 1. The EndUser selects the button marked AutoEnhance. Flow of Events 2. A preview window opens displaying the corrected image with detected gray card highlighted. 3. If the detected gray card is incorrect, the EndUser will be allowed to select the preferred gray card in the image using a provided selection tool. 4. The EndUser selects the correction percentage to be made. 5. The EndUser selects the correction range to be applied. 6. The EndUser selects the Enhance button. Exit condition 7. The newly enhanced image is displayed. Special Requirements The image must contain a gray card in the lower left hand corner.
Use Cases (cont.) Use Case Name AutoEnhancement(gray card not found) Participating actor EndUser Entry condition 1. The EndUser selects the button marked AutoEnhance. Flow of Events 2. A preview window opens and displays a message telling the EndUser that a gray card has not been found. 3. The EndUser will be allowed to select the preferred gray card in the image using a provided selection tool. 4. The EndUser selects the correction percentage to be made. 5. The EndUser selects the correction range to be applied. 6. The EndUser selects the Enhance button. Exit condition 7. The newly enhanced image is displayed. Special Requirements The image must contain a gray card in the lower left hand corner.
Use Cases (cont.) Use Case Name ManualEnhancement Participating actor EndUser Entry condition 1. The EndUser selects the Manual Enhance button Flow of events 2. A preview window opens displaying the corrected image. 3. The EndUser selects a global or local correction. 4. The EndUser selects the correction percentage to be made. 5. The EndUser selects the correction range to be applied. 6. The EndUser selects the Enhance button Exit condition 7. The newly enhanced image is displayed. Special Requirements An image must be open and a portion of the image must be selected and identified.