Download

1 / 32
610 likes | 1.56k Vues
RAPPELLING & Ascending Review. PCSO MRT Training Guidelines. RAPPELLING. Overview Rappelling Safety Review Rappel Commands Munter Hitch Rescue-8 Pass the knot Change Over. RAPPELLING. Safety Backups and Safety Checks.

E N D
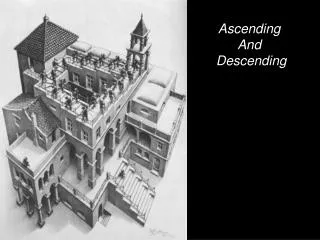
RAPPELLING&AscendingReview PCSO MRT Training Guidelines
RAPPELLING Overview • Rappelling • Safety Review • Rappel Commands • Munter Hitch • Rescue-8 • Pass the knot • Change Over
RAPPELLING Safety Backups and Safety Checks • Tie a double overhand or figure-8 knot in the end of your rope to prevent rappelling off the end. • Apply weight to anchors and rappelling equipment slowly. • Bounding Rappels are prohibited. • Only walk down rappels are to be used.
RAPPELLING Rope Management Throwing The Rope Tie a knot in the opposite end to prevent rappelling off the end of the rope.
RAPPELLING Edge Transition • Have your anchor checked by the safety. • Have yourself safety checked. • Weight your anchor before you reach the safety line. • Begin with your feet shoulder width apart. • Look for footholds before you transition the edge. • Check for edge pro that may be needed.
RAPPELLING • Commands • At the Top • “On Belay” (”Belay On“) if independent belay is used** • “On Rappel” (“Rappel On”) • ** For self-belay, response will be from safety officer • At the Ground • “Off Rappel” (“Rappel Off”) • “Off Belay” (“Belay Off”)
RAPPELLING Rappel Devices
RAPPELLING Rappel Devices Rescue-8 with ears
RAPPELLING Rigging the Rescue-8
RAPPELLING Rescue-8 Friction Methods Single wrap Double wrap
RAPPELLING Rescue-8 Friction
RAPPELLING How to avoid dropping your rescue-8 .
RAPPELLING Tie off the Rescue-8
RAPPELLING Rappel Devices Munter Hitch Incorrect Correct Why?
RAPPELLING Munter Hitch Brake must be opposite the gate
RAPPELLING Rappel Devices Tie Off Overhand Half-hitch
RAPPELLING Safety Backups and Safety Checks Self-belay Active Independent belay
RAPPELLING Safety Backups and Safety Checks Trainee Support and Rescue
RAPPELLING Safety Backups and Safety Checks Mission
RAPPELLING Passing the Knot Rig Rescue-8 below knot and Second prusik Set prusik, tie off Add second prusik
RAPPELLING Passing the Knot Tie off Rescue-8, remove upper prusik Step on rope, Ascender, or Prusik with sling Stuck Prusik
RAPPELLING Passing the Knot Stuck Prusik Stuck Prusik
ASCENDING PCSO MRT Training Guidelines
ASCENDING Overview • Ascending • Safety Review • Ascending Commands • Ascender Setup • Edge Transition • Pass the knot • Change Over
ASCENDING • Safety The Safety Line is independent of the Main Line. The safety line will not be used for rigging. Trainees will have a third line with an active belayer. Ascenders will be connected to the climber with cowstails. Maintain two (2) points of contact. Each ascender counts as ½ point of contact. An additional prusik will be applied to maintain two points before ascenders are removed.
ASCENDING • Equipment Safety Line with Microcender or prusik as Self-belay Right Ascender Triangular or Half-moon Screw-link Cow’s Tail Right Stirrup
ASCENDING • Equipment Left Ascender Cow’s Tail Safety Line Left Stirrup
ASCENDING • Cows Tail Left Ascender Belay Loop Right Ascender
ASCENDING • Equipment • Approach the Rope at the Ground • Adjust each ascender so that you can walk up as smoothly • Attach the self-belay, “On Belay” followed by “Climbing” • Start climbing with short steps and steady pace • At Edge • Slide self-belay over the edge as far up as possible, by standing on the top and bottom stirrups • Move up edge toward anchor as far as possible. • Move to the safe location away from the edge. • Remove equipment. • There may be a minor change in sequence due to the rock face. At top • Remove the top and bottom ascender from the main line. • “Off Rope” • Remove the self belay • “Off belay”
ASCENDING • Commands • At the Ground • “On Belay” (”Belay On"), if independent belay is used • “Climbing” (“Climb On”) • At the Top • “Off Rope” (“Rope Off”) • “Off Belay” (“Belay Off”)