Download
1 / 22
340 likes | 864 Vues
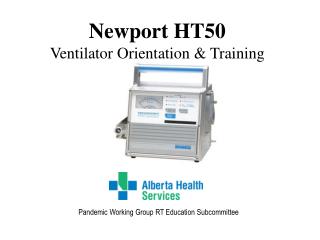
Newport HT50 Ventilator Orientation & Training. Pandemic Working Group RT Education Subcommittee. Newport HT50. Easy to operate Capable of ventilating patients >10 kg Able to operate without a compressed gas source Long lasting internal battery (8-10 hrs) Delivers pressure or volume breaths

E N D
Newport HT50Ventilator Orientation & Training Pandemic Working Group RT Education Subcommittee
Newport HT50 • Easy to operate • Capable of ventilating patients >10 kg • Able to operate without a compressed gas source • Long lasting internal battery (8-10 hrs) • Delivers pressure or volume breaths • Public Works and Government Services Canada has purchased HT50 ventilators to be used in a pandemic.
Overview • To change any value/ setting, push blue soft key associated with value/ setting until the value flashes. Use up/ down arrows to adjust. • To lock in new value, push soft key again to confirm before selecting another value to adjust. If left alone for approx. 3 seconds, the ventilator will accept the new value automatically • If changing between modes of ventilation, the blue soft key needs to be pushed twice. The ventilator will prompt you to “Press again” in message display window. (If not pressed twice, it will revert back to previous setting)
Front Panel • The green values displayed (Ptrigger, PEEP, Psupport, f, ti, pressure control or volume control) are settings that can be manipulated using the blue soft keys.
“Blue Soft Keys” Manual Inflation / Calibration Rate Trigger sensitivity Ti PEEP/ CPAP Mode selections: CMV/ SIMV/ Spont Pressure Support Up/ down adjustments On/ Standby Volume (Vt) / Pressure (PIP) controls
The displayed red values (High and low airway pressures) are alarm settings that can be manipulated by using the grey soft keys. • The displayed orange values are calculated values based on settings (with the exception of high & low minute volume alarms which are set values) and cannot be changed unless other settings are changed. These values are also selected using the grey soft keys.
“Grey Keys” Alarm Silence/ Reset Internal Battery Flowrate- calculated based on f and Vt I : E ratio High airway pressure Low airway pressure High minute volume Low minute volume
Indicators Pressure gauge Alarms Message display window
Fresh Gas Intake & filter-Filter should be changed when dirty or contaminated Oxygen Blender/ FiO2 adjustment-No O2 analyzer built in therefore, an inline oxygen analyzer must be used. A/C connection- should be plugged in at all times to charge internal battery. Fully charged the battery offers 10 hrs of operation. Low battery alarm will sound when battery life is down to approx. 20%.
Humidification/ Oxygenation • The HT50 ventilators purchased by Public Works and Government Services Canada will not come with a heated humidifier. We will need to use a HMEF with these ventilators. • The HT50 ventilators will have an oxygen blender attached to the fresh air intake that will be used to set FiO2. We will need to use an external oxygen analyzer with these ventilators as there is no internal analyzer.
Ventilator Set-up Gas Output/ circuit connection Proximalairway pressure line connection Exhalation Drive line connection
Calibrate the exhalation valve prior to use as follows: • Press On/Standby once to turn on ventilator • Occlude end of circuit or attach circuit to an adult test lung • Press Manual inflation TWICE within 3 seconds to begin Calibration procedure - ventilator will perform calibration and display ‘cal completed’ when finished. • If calibration fails ( ‘cal failed’), press silence/reset and check circuit & test lung for leaks then press manual inflation twice to perform calibration again. You can now set desired ventilation parameters.
Breath type… volume or pressure? To choose Volume controlled ventilation : • Select Mode (A/CMV or SIMV) • Press volume control soft key • Use arrows to set desired Vt • Press volume control soft key again to confirm. To choose Pressure controlled ventilation: • Select Mode (A/CMV or SIMV) • Press pressure control soft key • Use arrows to set desired Pressure control level • Press pressure control soft key again to confirm. *Pressure set is above ambient (atmospheric) in PC*
Modes… A/CMV • Can be used with pressure or volume ventilation Set: • A/CMV • PEEP • f • Ti • Vt or PIP (above ambient P) • Alarms • Press On/Standby to start ventilator then attach circuit to patient.
SIMV • Can be used with pressure or volume ventilation Set: • SIMV mode • Vtor PIP • f • Ti • Ptrig • PEEP • Psupport (above PEEP) • Alarms (Vi and Paw Press On/Standby to start ventilator then attach circuit to patient .
Spont • Can be used to deliver CPAP or BiPAP (invasive or noninvasively) Set: • Spont • Ptrig • PEEP/CPAP • Psupport • Alarms • Press On/Standby to start ventilator then attach circuit to patient
Message Display Window Displays alarm details as well as measured patient parameters When ventilator is ventilating: • press the Up arrow once to display Vt, Vi, f • Press the Up arrow twice to display airway pressures (p- peak, m- mean, b- base (PEEP) *Measurements are updated breath by breath (Pressing the up arrow a third time will display total ventilator hours) • If there is an alarm condition displayed, it will need to be fixed and reset before pt. measurements can be displayed. .
Alarms • When an alarm is active there will be a flashing light in the alarm panel and further info printed in the display window. • Pressing silence/reset soft key will silence the audible alarm for 60 seconds. • The alarm indicator and displayed message will remain when the alarm condition no longer exists. • Press silence/reset to clear the alarm panel and message display.
Minute volume alarms • Set using Grey softkeys • Press appropriate grey softkey, use arrows to adjust and then press softkey again. • Alarm will be indicated in alarm panel and on message display window • If Low Vi alarm is activated and not immediately corrected, back up ventilation will start. Therefore… Ensure low Vi alarm is set appropriately . . .
Back Up Ventilation . • If minute volume falls below Vi alarm limit, back up ventilation will begin and ventilator will continue to alarm. • In A/CMV or SIMV mode: all settings will remain the same with the exception of f. • fwill increase to 1.5 times the set f, or a minimum of 15 • In Spont mode: ventilator will begin in SIMV mode with a Psupport of 25 and f of 15 with other settings unchanged • The ventilator will revert back to previous mode/ settings once the back up ventilation has achieved minute ventilation above the alarm limit.
Testing Internal Battery • Unplug ventilator to activate internal battery (Internal battery indicator will light and alarm will sound). Silence alarm. • Press and hold Int. Battery softkey • Battery strength will be displayed on pressure gauge. Battery strength gauge Press to test internal battery