Download
1 / 58
580 likes | 687 Vues
50 Ways to Integrate Discovery Education streaming. Brad Fountain Discovery Educator Network. Professional Development > Trainer’s Toolkit > Integration Ideas. www.DENblogs.com. 1. Multimedia Presentations: Hyperlink, Embed and Really Embed. PowerPoint and Multi-Media Presentations.

E N D
50 Ways to IntegrateDiscovery Education streaming Brad FountainDiscovery Educator Network
Professional Development > Trainer’s Toolkit > Integration Ideas
1 Multimedia Presentations: Hyperlink, Embed and Really Embed
PowerPoint and Multi-Media Presentations A few key terms Hyperlinking = linking to a website, video, document or slide that is different or outside of your current presentation Advantage – fast forward/rewind control Disadvantage – opens a different window, you leave your presentation Embedding = placing a document, video, sound, image, etc within the framework of your slide Advantage – looks pretty, you stay within your presentation Disadvantage – lose ability to fast forward and rewind
Instructions for Hyperlinking and Embedding • Hyperlinking to a Video • Embedding a Video • Really Embedding a Video • Images + Songs
Steps for Hyperlinking • Log into Discovery Education streaming • Download a video, segment, image, song, etc. • Type some text • Highlight the text “Some Text” • Go to Insert (located in your tool bar) • Go to bottom and select Hyperlink • Find the file that you downloaded and select it (note it can be within the same Power Point!)
Steps for Embedding • Go up to Insert • Go to Movies and Sounds • Select Movie from File • Navigate to the file that you downloaded
Example of Video + Power Point • Working with three of your classmates, draw a map of your school – without leaving your classroom! • During your exploration of your school and its grounds, draw at least 10 items/areas that you find along your route • When you get back draw a time line of your adventure- make sure that you include significant events that you encountered along the way
Now for something really cool Really Embedding – PC ONLY 1. Go to your tool bar and click on the word “View” 2. Click on Toolbars and then Control Tool Box This will bring up a box that looks like this:
Really Embedding Continued 3. Click on the Hammer And Wrench Icon 4. Scroll down and choose Windows Media Player This will change your cursor to a + symbol –Giving you the ability to draw a box
Really Embedding Continued 5. Draw a box and then right-click on the box and choose Properties
Almost there… 6. Click inside the blank box next to the box titled (Custom) and then click on the three little dots
Finding the video 7. Click on the Browse button to find the video that you want to embed, then check the Stretch to fit button and then click on the OK button
Voila! You have now embedded a video with controls like fast forward, rewind, pause, etc – play your PPT to see the video
Discovery Education streaming Audio – Song + Power Point DE Streaming has close to 400 elementary school songs on the site. To find them change the Within Drop Down box to Songs and click on the “Go” button Download the song (right-click, “save target as” on PC or ctl + click on Mac) and insert it into your Powerpoint Then add in DE streaming Images or create your own and add!
3 Journaling
4 Reading Support(Close Captioning)
Why use Close Captioning in the classroom? • To help students who are hearing impaired • To help ELL students • To help struggling readers • To emphasize a grammar or vocabulary lesson • To use in combination with a writing exercise • To reinforce a concept
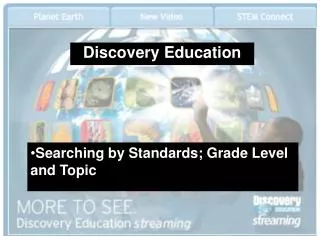
Finding CC files Log into Discovery Education streaming.com and click on the Advanced Search link Scroll down and click in the box next to “Include only Closed Captioned Titles”
Downloading a Closed Captioned Movie • First right-click on the blue download icon, choose “Save Target As” and then place it in a folder on your computer • Then repeat the process, this time right-clicking on the “CC” icon • Adjust the CC settings within your Windows Media Player – CC settings
Closed Captioning Trick Font Size Open the CC file in a text editing program like Wordpad or Notepad Locate the line of code that indicates “font size” Increase the font size from 10 to 30 (or whatever you prefer) Save the CC file CC
CC 30 pt 10 pt
6 Today is Your Birthday(Calendar) Located in the Teacher Center
8 Build Interest with Video Segments
10 Graphic Organizers
14 Encyclopedia
25 Ongoing Assessment
29 Digital Storytelling
http://youngscientist.discoveryeducation.com Make a short video about one of the following… • Newton’s Laws of Motion • Acceleration • The first A in NASA: Aeronautics • Centrifugal and Centripetal Force • Scope and Scale
34 Green Screen
35 Learning Stations
38 Professional Development
http://community.discoveryeducation.com/about/webinar_archiveshttp://community.discoveryeducation.com/about/webinar_archives
39 Virtual Field Trips
44 Film Festival
47 Mini-Units
50 Mega VCR
Mega VCR Media on your Video iPod Videos PowerPoints Music Photos Animations
DE streaming Videos Download a video or segment Make sure that you have QuickTime selected in your media settings Open iTunes and import your video (File > Import > Find your video) Right click on the video and select “Convert Selection for iPod” Copy the video to your iPod