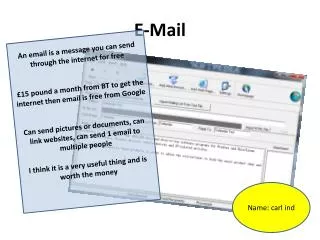
E-Mail. Try to be a good e-mailer AND NOT A PEST!!. Use the left mouse button to advance through the slides. Tips, Tricks, Do’s and Do Not’s.

E N D
Presentation Transcript
E-Mail Try to be a good e-mailer AND NOT A PEST!! Use the left mouse button to advance through the slides
Tips, Tricks, Do’s and Do Not’s • Spend a little time to do it properly, according to the appropriate “netiquette” – think of those you are e-mailing to, and those that sent e-mail to you. • If you pass on the e-mail addresses of those that sent e-mail to you, you may be responsible if their name eventually finishes up on a “spammers” e-mail list.
A Lazy Person Sent This E-Mail • Look at the next slide, how often have you had to scroll to the bottom of the page to read a two word message, past all of the “Forwarded From” addresses, and past heaps and heaps of those little “>>” carats. • The extra addresses waste an awful lot of space • The carats make it hard to read
What is BAD!!! Heaps of unwanted addresses Enough carats to feed an army of rabbits
How to Fix It! • It is important you understand that an e-mail belongs to the sender, until you, in turn, send it on, or reply to it. Basically, this means that the e-mail, when it’s in your “Inbox”, cannot be altered by you, other than to highlight (select) and copy. The whole e-mail can be deleted, but not any parts of it. • Now, when you “forward”, “reply”, or “create” a new e-mail, in it’s own window, it’s yours, and you can add, edit, attach or delete to your hearts content. • The next slide shows you this new e-mail window – you can recognise it because it has the address area at the top.
The New E-Mail – Yours! See, here’s the Address area, so, you can now claim this e-mail as yours, and you can add, edit and delete what you want
Consider The Addresses • “To” – if you only have one address to send to, use “To” • “Cc” – if you only have one “extra” address to send to you may use “Carbon Copy” - Total of two addresses only though • “Bcc” – Blind Carbon Copy is what we use if we want to send to multiple addresses – the addresses will be displayed on your computer, but the addresses will not be displayed on the recipients e-mail – If you send the same e-mail to 50 people, you’ll see 50 addresses, but the recipient will only see “undisclosed recipient” or senders name Make this one of your “Rules”
Helpful Hint! • If you don’t see the “Bcc” field in your new e-mail “Header” – (no place to put the Bcc addresses) • Go to the “View” drop down menu • Click on “Show All Headers” • Viola!!!!
The Subject Line – So Important!! The Subject Line MUST contain a brief of information about the content of the e-mail to make the recipient interested enough to open the e-mail and read it, and not just hit the “Delete” button – when your e-mail arrives in someone's “Inbox”, all that is shown is the “Subject” and the “Sender”
Now, A “Forwarded” E-Mail “Fw” for “Forward Surplus addresses
This is a “Reply” E-mail This time, “RE:” indicates a reply
Cleaning Up The Body Of The E-Mail • When you click on “Forward”, a new e-mail will open up, with the same subject, but led by the abbreviation “FW” or “Fwd”. • The contents of the “Forwarded” e-mail will then be displayed in the “Body” of the new e-mail, along with that e-mails “Header” information. • This is now “your” e-mail, and you can highlight (select) any part of the body of the e-mail, and delete it – such as all those addresses that the e-mail accumulated on it’s way to you. • Don’t forget to delete all of those “disclaimers” and “Virus-Free” certificates that tend to build up at the end of the e-mail – your recipient doesn’t need to get this “space junk”
Now For The Carats • A lot of e-mail programs, including Outlook and Outlook Express, have an option to show the forwarded or replied to sections of e-mails with a carat “>” to indicate the portion that is forwarded, and then add an additional carat each time that forwarded section is re-forwarded, thus, it is not unusual to see a row of 5 or 6 carats at the beginning of each line, making the e-mail very hard to read. • You can turn on/off carats from “Tools” – “Options” – “Preferences” and look for “When replying. . . “ or “When Forwarding . . .” and you will find the option. That’s for adding carats, but when they are already there, we have to use a different strategy to remove them.
Removing Carats • This is an easy process, however, you will need to go on-line and download a little programme called “emailstripper” from this URL: http://www.papercut.biz/emailStripper.htm (Copy and then paste this address into your web-browser to access the programme) This will download a small .exe programme, which you can simply run, and it will install on to your computer. • Right – lets go. Look at emailstripper on the next slide
This is EmailStripper • Instructions should make it easy to follow • Just four steps • All mouse clicks.
Step One Put the cursor into the body of the e-mail, in the “Edit” menu, click on “Select All”, and all the text in the body will be highlighted (selected). Now, with the text “selected”, click on “Cut” from the “Edit” menu and the contents of the “Body” will be moved to the “Clipboard”
Step Two • Open Email Stripper. • Click on the “Paste” button • The “Body” text will now be pasted into EmailStripper
Step Three • Click on the “Strip It” button • Your text will now have all of the carats removed, and be ready to be used again. • Click on the “Copy” Button
Step Four - Clean With the cursor in the “body” of the e-mail, click on “Edit” and “Paste” and the cleaned text is back in the body of the e-mail
A Couple of Other Things • Don’t use just UPPER CASE when writing e-mails – it’s is considered to be shouting, and thus inappropriate. • DON’T (R) DON’T pass on “Warning’s” that others may send to you – Irrespective of what the “Warning” is, more than 99.99% of the time they are hoaxes. If in doubt, simply get the name of the problem and type the name into Google – you will soon see the details of the hoax. The person who started it is probably sitting back laughing themselves silly at all the poor dills sending their hoax round and round the world – over and over again. • Remember too, unless you e-mail is encrypted, it’s not private – anyone could read what you write – you have no idea of who can get your e-mail, and who will pass it on.