0 likes | 3 Vues
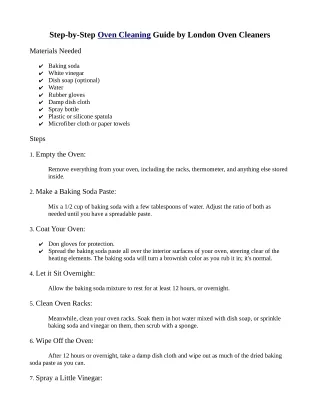
Discover a hassle-free way to clean your toaster oven with our step-by-step guide. Achieve cleanliness effortlessly with a pristine kitchen appliance. Keep your appliance in top shape with this reliable, easy-to-follow cleaning routine from the team at HnK Parts.<br><br>https://www.hnkparts.com/blog/post/how-to-clean-toaster-oven-a-step-by-step-guide <br><br><br>
E N D
Why Cleaning Matters Prevent Fire Hazards Extend Lifespan Crumbs and grease buildup can ignite and cause serious safety issues. Regular cleaning maintains efficiency and prolongs your appliance's life. Better Food Quality A clean toaster oven enhances the taste and safety of your meals.
Key Cleaning Frequency Weekly For light, regular use to maintain basic cleanliness. After Greasy Foods Clean immediately after cooking oily or messy foods. Daily Crumb Tray Empty the crumb tray after each use to prevent fire risks.
Tools You Will Need Maintaining a clean toaster oven is crucial for optimal performance and longevity. Gather the following tools and materials to simplify the cleaning process: • Soft brush or toothbrush • Sponge or cloth • Mild cleaning solution • Baking soda • Vinegar • Razor blade or scraper • Water and towel • Disposable wipes or paper towels • Toothpick or cotton swab • Dish rack or towel Gather a pastry brush, sponge, microfiber cloth, dishwashing liquid, vinegar, and baking soda. Keep a trash can nearby for easy crumb disposal.
Toaster Preparation Steps Unplug & Cool Always unplug the toaster oven and allow it to cool completely before cleaning. Remove Parts Take out all detachable components including racks and the crumb tray. Initial Crumb Removal Shake out loose crumbs into a trash can or sink to simplify cleaning.
Safety First Avoid Harsh Chemicals Protect Heating Elements Never use bleach, ammonia, or abrasive cleaners that can damage surfaces and create toxic fumes when heated. Do not apply soap or water directly to heating elements. Wipe gently with a dry cloth if necessary. Cool Completely Ensure the appliance is cool to prevent burns and avoid damage from temperature shock.
Step 1: Clean Removable Parts Soak & Clean Wash racks and trays in warm, soapy water. For stubborn stains, soak them overnight. Use a non-abrasive scrubbing pad to gently remove baked-on residue without scratching.
Step 2: Interior Cleaning Walls & Ceiling Tough Residue Wipe down with a damp sponge using mild soap solution. Apply baking soda paste to baked-on food. Let sit before wiping. Oven Floor Heating Elements Clean thoroughly as this area collects the most grease. Avoid touching. Gently brush away crumbs when cool.
Step 3: The Glass Door Apply Vinegar Tackle Stubborn Grime Wipe Thoroughly Use full-strength white vinegar for a streak-free shine. Spray directly on glass. Use a melamine sponge (Magic Eraser) for baked-on splatter. Use microfiber cloth in circular motions for best results.
Step 4: Exterior Cleaning Prepare Solution Mix equal parts vinegar and water in a spray bottle. Wipe Surfaces Clean all outer surfaces with dampened microfiber cloth. Clean Controls Wipe knobs and buttons with slightly damp cloth. Never spray directly. Polish Finish Buff stainless steel with dry microfiber cloth for shine.
Reassemble and Final Checks 1 2 Dry Completely Replace Components Ensure all parts are thoroughly dry before reassembling. Return racks, trays, and other removable parts to their correct positions. 3 Test Functionality Plug in and run empty for 5 minutes to ensure everything works properly.
Quick Maintenance Tips Use Oven Liners Wipe After Use Regular Inspection Non-stick, heat-resistant liners catch spills and simplify cleanup. A quick wipe after cooking greasy foods prevents hard buildup. Check seals and hinges monthly for proper functioning and cleanliness. Avoid Foil Shortcuts Don't line with aluminum foil – it can cause electrical hazards.
Common Mistakes to Avoid Steel Wool Scratches surfaces permanently Commercial Oven Cleaners Damage aluminum interiors and leave harmful residues Cleaning While Hot Causes burns and can damage the appliance
Benefits of Regular Cleaning Improved PerformanceA clean toaster oven heats more evenly and works more efficiently. Fire Hazard PreventionRegular cleaning removes crumbs and grease buildup that could ignite. Longer Appliance LifespanRemoving grime and buildup prevents internal damage, helping your oven last longer. Better-Tasting FoodLeftover residue can affect the flavor of your food — a clean oven means fresher taste. Hygiene and SafetyCleaning eliminates bacteria, mold, or burnt-on food that could pose health risks. Reduced Smoke and OdorsRegularly removing debris prevents smoke, burnt smells, and unpleasant odors while cooking.
Start Cleaning Today! Small Effort Just 15-20 minutes weekly Big Rewards Years of safe, efficient operation HNK Parts Your partner for appliance care products Visit HNK Parts today for reliable appliance care products. Small maintenance efforts lead to significant rewards in safety and durability.