Computer Basics
Dayton Metro Library. Place photo here. Computer Basics. March 11, 2014. Today’s session we will review:. Hardware/Software Managing Windows Opening & Closing Programs Parts of the computer Startup/Shutdown. What is a Computer?. What is a Computer?.

Computer Basics
E N D
Presentation Transcript
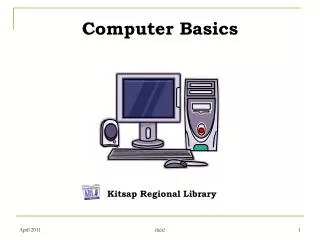
Dayton Metro Library Place photo here Computer Basics March 11, 2014
Today’s session we will review: • Hardware/Software • Managing Windows • Opening & Closing Programs • Parts of the computer • Startup/Shutdown
What is a Computer? • A general-purpose machine that processes data according to a set of instructions that are stored internally either temporarily or permanently.
Basic Parts? • The computer and all equipment attached to it are called hardware. The instructions that tell it what to do are called software.
Hardware • The hardware is the part of the computer you can touch and see.
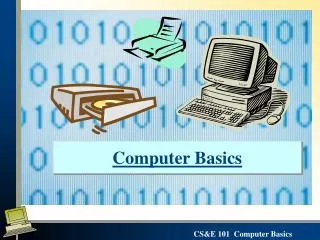
Hardware • TheMonitor is the display screen, similar to a television screen. • TheComputer, tower or case is the heart of the system. This is a box that contains all the parts that make the computer work. • TheKeyboardis what you type on, similar to a typewriter. • TheMouseis the small hand held device that attaches to the computer. It may have two or three buttons. The mouse is used to move the cursor (pointer) on the computer screen.
Hardware • ThePrinteris a device that puts what you have created on to paper. • TheScannersimilar to a color photocopier is a device that captures pictures or documents, so that they can be seen or used on the computer. • TheLaptop also known as a notebook computer is a small personal computer designed for mobile use. A laptop integrates all of the typical components of a desktop computer, including a display, a keyboard, a pointing device (a touchpad, also known as a track pad, or a pointing stick) and a battery into a single portable unit.
Hardware • A Floppy Disk(sometimes just called a “disk”) looks like a plastic card that can be put into a slot in the front of the computer. These disks hold information and can be used to exchange information between computers. This type of data storage is archaic and obsolete. • A CD-ROM is very similar to a stereo’s CD player. It not only plays music but can also retrieve information stored on CD's. It is also available in other formats such as DVD-ROM.
Software • Software is a part of the computer you cannot touch. • Software consist of computer programs and procedures that perform some tasks on your computer. • Computer software is divided into three basic types.
Software • System software • Operating Systemis the base program on a computer is considered system software. It tells the computer how to work or operate. The operating system also allows you to load other programs that do specialized tasks on to your computer. (ex. Windows XP and Vista)
Software • Application software • Application softwareallows you to accomplish one or more specific (non-computer related) tasks. Such as computer games for entertainment or Microsoft Word for typing.
Software • Programming software • Programming softwareprovides tools to assist a computer programmer in writing programs and software.
How to start? • Power Up • Turning on your Computer • Universal Power Symbol – most electronic devices such as computers, printers and scanners will have a button that displays this symbol. Simply, press the corresponding button to power up your computer. • Turning off your Computer • When powering down your computer, check to make sure all programs are closed and files are saved. Properly remove any connected devices, such as Mp3 players and USB Flash Drives. • Click “Start” then “Shutdown” to power off your computer.
Operating System • is the operating system used for this class. As an operating system Windows XP manages all that the computer does. The main screen is called the "Desktop" you can get to everything your computer can do.
Icons • On the desktop screen you will see several small pictures. These pictures are called "Icons." Double clicking the left mouse button on an Icon will start the programs it represents. Another way to start programs is by using the “Start” button can do.
“Start” • The "Start" button is probably the most used part of the Windows Desktop. The start button is where you access all the programs on the computer. When you click on the "Start" button you will be shown a menu of the major computer headings. These headings provide access to the major programs on your computer. “Start”
Menus • When you click on the "Start" button a menu with options will appear. Moving the mouse over the items in the menu causes them to highlight. Clicking on a highlighted item will open that program. To close the "Start" menu click on the screen anywhere other then the menu.
Selecting a program • Moving the mouse over a menu item marked with an arrow as shown below will open another list with more options.
Selecting a program • To see all the programs available for you to use on your computer click on the Start button and in the menu that appears, highlight the item named “Programs.” A new list will appear that holds more selections. Explore these lists to see all the programs available to you. When you have found the program that you want to use click on its icon. “Programs” List
Taskbar • The taskbar can be recognized by the "Start" button located on its left hand side and the clock on its right. To switch between programs that are running at the same time, click on the program buttons shown on the taskbar. This is demonstrated below. Windows has the ability to run several programs at once and to easily switch back and forth between running programs. All programs currently running are shown on the windows "taskbar." The taskbar is a bar with pictures on in it that runs across the very bottom of the screen. “Taskbar”
What is a “Window”? • A Window is one of many basic feature of the Microsoft Windows Operating System Software. Windows allow you perform multiple tasks by running multiple programs simultaneously.
“Colored Bar” Moving your program window. • Clickand hold down the mouse button on the colored bar at the top of any program window. While holding down the mouse button drag the window to where you would like it on the screen. This cannot be done when a window is open to full screen.
Moving your program window. • Close -- Click on the button marked with an “x.” Clicking on this button stops the program you are using. • Restore -- This button will restore a program's window to its original size. The original size of a window is a little bit smaller then full screen. • Maximize -- This button opens a program's window so that it fills the screen as much as it can. • Minimize -- This button puts a program on hold and places it on the taskbar at the bottom of your screen. To re-open a program that is on the taskbar click on the box which represents the program you want to open.
Moving your program window. • Resizing -- When the mouse (cursor) is positioned over this part of the program window, a set of arrows appears. When these arrows appear click and hold the mouse button down. You will now be able to stretch the program window in any direction. Resizing”
Blackarrows appear when pointing to any edge of a Window, left click and hold to resize.
Dayton Metro Library Place photo here Computer Basics