1 / 5
50 likes | 87 Vues
In this article, we will know the steps on How to Enroll a Printer in HP Instant Ink. For more details call our contact number 1-855-233-5515...<br>https://inkservicecenter.com/how-to-enroll-printer-in-hp-instant-ink/<br>

E N D
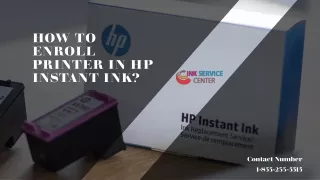
How To Enroll Printer In HP Instant Ink? Contact Number 1-855-233-5515
How To Enroll Printer In HP Instant Ink? HP Instant Ink is a subscription-based service that offers a convenient and cost-effective way to keep your printer supplied with ink. By enrolling in the program, you can avoid running out of ink and save money on replacement cartridges. In this comprehensive guide, we will take you through the step-by-step process of enrolling your printer in HP Instant Ink. Section 1: Checking Printer Eligibility Before enrolling in HP Instant Ink, it's essential to verify whether your printer is eligible for the program. Not all HP printers are compatible with Instant Ink. To check eligibility, follow these steps: 1.1. Find your printer's model number, which is usually located on the front or top of the device. 1.2. Visit the HP Instant Ink website (www.instantink.hpconnected.com) and click on "Check Eligibility.“ 1.3. Enter your printer's model number and follow the on-screen instructions. 1.4. If your printer is eligible, proceed to the next section. If not, consider upgrading to a compatible HP printer. Section 2: Creating an HP Instant Ink Account To enroll your printer in HP Instant Ink, you need to create an HP Instant Ink account. Follow these steps to create your account:
2.1. Go to the HP Instant Ink website (www.instantink.hpconnected.com) and click on "Sign Up" or "Get Started." 2.2. Enter your email address and create a password for your account. 2.3. Provide your personal details, such as name, address, and phone number. 2.4. Review and accept the terms and conditions of the service. 2.5. Verify your email address by clicking on the link sent to your inbox. 2.6. Once your account is verified, log in to your HP Instant Ink account. Section 3: Selecting an Instant Ink Plan HP Instant Ink offers various subscription plans based on the number of pages you print each month. Choose the plan that best suits your printing needs: 3.1. Log in to your HP Instant Ink account. 3.2. Click on "Enroll a Printer" and select your printer model from the list. 3.3. Select the plan that matches your monthly printing requirements. HP offers plans for 50, 100, 300, or 700 pages per month. 3.4. Review the plan details, including the monthly cost, rollover page benefits, and additional fees if you exceed your monthly page limit. 3.5. Click on "Enroll" to proceed.
Section 4: Installing the Instant Ink Cartridges To start receiving ink automatically, you need to install the provided Instant Ink cartridges in your printer: 4.1. Ensure your printer is powered on and connected to the internet. 4.2. Open the printer's cartridge access door. 4.3. Remove the old cartridges (if any) and install the Instant Ink cartridges provided in your enrollment kit. 4.4. Close the cartridge access door, and your printer will automatically recognize the new cartridges. 4.5. Wait for your printer to initialize and calibrate the cartridges. Section 5: Connecting Printer to the Internet To enable your printer to communicate with HP and monitor ink levels, connect it to the internet: 5.1. On your printer's control panel, navigate to the "Setup" or "Settings" menu. 5.2. Select "Network" or "Wireless Setup" and choose your Wi-Fi network. 5.3. Enter your Wi-Fi password if prompted, and the printer will connect to the internet. Section 6: Finalizing Enrollment Now that your printer is connected and the Instant Ink cartridges are installed, it's time to finalize the enrollment process:
6.1. Go to your HP Instant Ink account and log in. 6.2. Click on "My Printers" and select the enrolled printer. 6.3. Verify that your printer is listed correctly, and the Instant Ink cartridges are recognized. 6.4. Review the enrollment details and the selected plan. 6.5. Click on "Accept" or "Submit" to complete the enrollment.