Download
1 / 6
60 likes | 85 Vues
Learn how to build an egg lander for a landing simulation project using simple materials. Follow the steps to create and test your lander with maximum velocity charts.

E N D
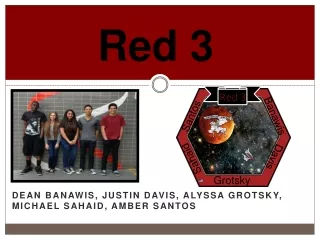
Red 3 Dean Banawis, Justin Davis, Alyssa Grotsky, Michael Sahaid, Amber sAntoS Santos Banawis Davis Sahaid Grotsky
Step 1: Place the Styrofoam ball in front of you. Using a marker, draw a line down the middle of the ball vertically. Step 2: Using a sharp edged object, cut the ball in half, following the line you drew (make sure you follow your line precisely and cut the ball in equal halves). Step 3: Once you have the two pieces, begin carving an egg shape in the middle of each piece using the sharp edged object. Step 4: Cut out two individual egg holders from the crate Step 5: Then use the top and bottom one and tape them to create one grouped structure. Step 6: Place your egg structure into the carve sections and put your two pieces of ball together. Adjust to make your egg fit properly. How to Build Your Lander Materials: You will need one Styrofoam ball, a sharp edged object, a 20 cm by 20 cm box without a lid, paint, paint brushes, one egg an egg carton, cotton balls, bubble wrap, scotch tape, and memory foam.
How to Build Your Lander Continuation… Step 7: Paint your ball the desired color. When the ball has finished drying, get rid of your grouped egg structure and replace it with the real egg. Step 8: Once youplace your real egg into the ball, tape your Styrofoam ball closed using scotch tape. Make sure the ball is closed completely and your egg fits comfortably inside along with a few cotton balls. Step 9: Tape the bubble wrap around your closed ball, then take your box and put memory foam on the bottom inside of your box. Step 10: Put your ball inside the box: remember the box should have no lid. Fill the sides of the box with great amounts of cotton balls. Step 11: Enjoy your lander!
Maximum Velocity Chart and LoggerPro On this page, you should include the chart of your three landers vs. their maximum velocities. Be sure you have labeled everything on your graph correctly. You should also include a screen shot of the lander falling in LoggerPro.
Landing Site Our group chose this landing site, because it looked safe enough for our lander to enter Mars unharmed. The terrain only has a few small craters, and can be a soft landing for the group and the lander. Image ID I14878045
Analysis of Lander Data • On this slide include an analysis on how the weight of the lander affects its maximum velocity. • Refer to your graph to conduct this analysis.