Basic Maneuvers
Master the LMP process for safe lane changes & turning maneuvers, including visual processes and key concepts of adjusting speed and signaling. Learn parallel parking techniques and U-turn skills for road tests.

Basic Maneuvers
E N D
Presentation Transcript
Lateral Movement Process • Before moving left or right whether turning, changing lanes, or pulling from the curb an operator must ascertain that the intended path is available, the right of way clear, and communicate his movement to other users. • The LMP consists of checking intended path, checking rearview mirror, activating turn indicator in direction of move, checking side mirror in direction of move, and a head check in direction of the move. • Make the LMP a habit.
Lane Change • Have a reason! • Slow traffic • Improve visibility • Lane ends • Preparation for turn • Maintain space cushion • Merging traffic • Avoid • In an intersection • Approaching hillcrest
Lane Change: Visual Process 1 3 2 5 4 1. Path of travel 2. Intended path 3. Rear view mirror 4. Side mirror 5. Blind spot (head check)
Lane Change: The Maneuver Perform visual process Signal Recheck blind spots in direction of move Increase speed slightly Move on diagonal: do not swerve sharply Adjust speed Cancel signal
Lane Change: Adequate Gap In Front Okay to re-enter lane! When you can see the tires of the car in the center of the mirror 3 to 4 sec Behind
TURNING: Key Concepts • Better too slow than too fast (not exceed 10-15 MPH) • Slow before making the turn • Sharper the turn slower the speed required • Turn from lane closest to intended path into lane closest to where you turn from • Signal 100ft before turn (Ky law) Turning corners too wide is common. This is caused by turning too late, or failing to reduce speed properly. In a controlled turn the rear wheels always follow a path inside the front wheels – the sharper the turn the greater the difference in tracking between front and rear wheels.
Turning: Visual Process 2 • Approach • 1 traffic controls • 2 oncoming traffic • 3 cross traffic • 4 non motorized users • 5 blind spot • During the turn • Travel path 1 3 4 4 5 If sight line blocked, slow down!
Right Turns Adjust speed to 10 –15 MPH before turn Coast in turn(no brake), turn wheels at tangent offset Accelerate out of turn
Left Turns • Must yield to oncoming traffic and traffic turning right • In heavy traffic enter intersection on green, keep wheels turned straight ahead, complete when light changes. • Begin turn when front wheels are in center of right lane
Turnabout 1 Check traffic to rear Signal at middle of intersection Approach 2ft from & parallel to curb line Stop when rear tires about 2 - 3ft beyond orthogonal road edge Shift to reverse Visual process (1, 2, 3) Turn steering wheel all the way to right Ease foot from brake When 90º from original turn wheel 1 1/2 turns to left [do not come to a stop in the turn] Continue backing until clearing the stop sign Stop, shift into drive, signal, check traffic, reenter roadway in opposite direction. 3 2 Road Test Required Skill
U-Turns 1. Check traffic front & rear 2. Signal, reduce speed, move to right 3. Head check 4. Signal and turn wheels hard left 5. Adjust lane position and resume speed Be aware of conditions when U-turn is not permitted
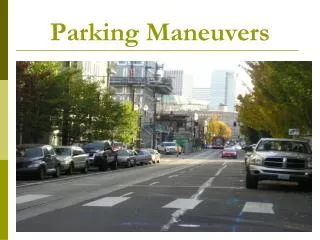
Perpendicular Parking • Identify the space • Signal • Position in lane • Targeting on space/line of sight • Speed control • Steering control • Position in space
Parallel Parking • Identifying parking space (car + 4 ft) • Communicating your intentions • Approach parallel to and 2-3 ft from parked vehicle Road Test Required Skill
Parallel Parking • Stop when right rear tire is even with left rear of parked vehicle • foot on brake • shift to reverse • turn wheels all the way to right • release pressure on brake • let vehicle move back until at 45º (left rear of parked car is centered in passenger window) • stop (foot on brake) Road Test Required Skill
Parallel Parking • Turn wheel all the way to the left • Ease off brake • Let vehicle creep back until parallel to and 8 to 12 inches from curb Road Test Required Skill
Parallel Parking Road Test Required Skill
Backing(1) • Check mirrors and blind spot • Signal intended move • Place foot on brake pedal • Shift to reverse • Position hand firmly on wheel at 12 o’clock • Brake to complete stop before looking to front and shifting to Drive Road Test Required Skill
Backing(2) • Visually target reference point • Control speed with light pressure on brake pedal - GO SLOW!!!! • Gentle pressure on accelerator if needed • Steer to reference point • Check movement of front of vehicle (front moves opposite direction of if turning)
Backing(3) • Turning left/right • Car moves in direction top of wheel is turned • Be aware that front of vehicle will swing wide in opposite direction from rear of vehicle