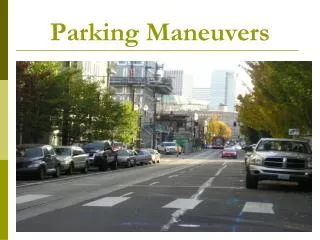
Basic maneuvers
Basic maneuvers. Steering – Hand Positioning. Hand over hand steering Push-pull feed steering “9 and 3” or “8 and 4” “Thumbs up”. Steering In A Straight Line. Steer to a point in the center of your path of travel, looking well ahead, not down.

Basic maneuvers
E N D
Presentation Transcript
Steering – Hand Positioning • Hand over hand steering • Push-pull feed steering • “9 and 3” or “8 and 4” • “Thumbs up”
Steering In A Straight Line • Steer to a point in the center of your path of travel, looking well ahead, not down. • Make slight, constant corrections with the steering wheel, don’t “oversteer” or wander in your lane.
Steering In Reverse • Turn your head and your shoulders so that you can look back in the direction you want to move. • When moving backward, the rear of your vehicle moves in the direction that you want to turn the steering wheel, while the front moves in the opposite direction. • When backing, do not uses the mirrors very often, look in the direction you are moving.
Right Turns • Check the roadway. • Choose the correct lane. • Communicate your intentions. • Position the vehicle correctly. • As you turn, follow the general curve of the curb as you turn. • Complete the turn by reversing your steering as you accelerate. • Cancel turn signal after turn is complete.
Left Turns • Make sure you have a clear path of travel. • Proceed in the intersection until you are about one lane width away from its center. • Keep your wheel straight until path is clear. • When clear and after your front tires pass the curb follow the path of travel so that you arrive in the lane just to the right of the center line. • Complete the turn by reversing your steering as you accelerate.
Turnabouts • Are there signs that prohibit the turnabout? • Are there laws that prohibit the turnabout when there are no signs? • Is there at least 500 ft. if visibility in each direction? • Are you near hills, curves, or within 200 ft. of an intersection? • Is there heavy traffic? • Do you have enough space to complete the maneuver? • Are there traffic or pedestrians in your path?
Braking Systems – Anti-lock Brakes (ABS) • Are designed to keep the wheels on the vehicle from locking when the driver presses too hard on the brake pedal in an emergency. • Since the wheels do not lock, the driver can continue to steer the vehicle.
Braking Systems – Disc Brakes • Pressure squeezes the brake pad against flat metal wheel disc, producing the friction needed to stop the wheel. • All vehicles now have disc brakes on the front wheels. • Many vehicles have the disc brakes on the back wheels as well.
Braking Systems – Drum Brakes • The fluid pressure causes the brake shoes to push against the brake lining. • The lining the presses against the round hollow metal drum inside the wheel. • Friction slows and stops the wheel’s turning motion.
Braking Systems – Parking Brakes • A parking brake is a mechanically operated brake that is separated from the hydraulic brake system. • Attached by a cable to the rear wheels, it is used to prevent parked vehicles from rolling. • It can also be used in the case of brake failure.
Mechanical Turn Signals • Your turn signal, also called a blinker, shows that you plan to turn or change lanes. • To operate the signal, move the turn indicator arm up for right turns and down for left turns. • Signal at least 100 ft. before making a turn. • Signal before you start to brake. • If the signal doesn’t stop flashing after the turn, move the lever back by hand.
Hand Turn Signals • Stopping – hand and arm extended downward. • Right turn – hand and arm extended upward. • Left Turn – hand and arm extended straight out.
Lane Changing Procedures • Check rearview and side mirror. • Signal Intention. • Check rearview and side mirror again. • Check blind spot (quick glance over the shoulder in the direction you are moving). • Adjust speed as needed. • Move smoothly when time and space permits. • Cancel signal, if needed.
Parking Uphill With A Curb • Check traffic. • Signal. • Bring vehicle to a stop in a normal parallel parked position. • Turn wheels away from the curb and slowly let the tires roll back until they touch the curb. • Set the parking brake and shift to park.
Parking Uphill Without A Curb • Check traffic. • Signal. • Bring vehicle to a stop in a normal parallel parked position. • Turn the wheels toward the side of the road (to the right). • Set the parking brake and shift to park.
Parking Downhill With A Curb • Check traffic. • Signal. • Bring vehicle to a stop in a normal parallel parked position. • Turn the wheels towards the curb (to the right) and slowly roll forward until the wheel touches the curb. • Set the parking brake a shift to park.
Parking Downhill Without A Curb • Check traffic. • Signal. • Bring vehicle to a stop in a normal parallel parked position. • Turn the wheels toward the side of the road (to the right) • Set the parking brake and shift to park.