Earth Science Unit 1
770 likes | 983 Vues
Earth Science Unit 1. Ms. Moynihan. Unit 1 1) The Nature of Science What is science? What is Earth Science? Scientific Methods of Inquiry Designing an Experiment Marshmallow Challenge Lab Using Scientific Tools Graph Analysis Lab. Unit 1 2) Earth as a System The Earths’ 4 Sphere

Earth Science Unit 1
E N D
Presentation Transcript
Earth ScienceUnit 1 Ms. Moynihan
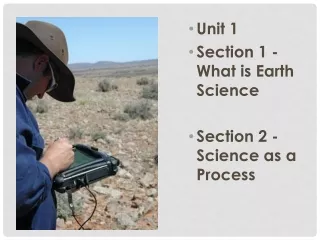
Unit 1 • 1) The Nature of Science • What is science? • What is Earth Science? • Scientific Methods of Inquiry • Designing an Experiment • Marshmallow Challenge Lab • Using Scientific Tools • Graph Analysis Lab
Unit 1 2) Earth as a System • The Earths’ 4 Sphere 3) Models of Earth • Modeling the Planet • Mapmaking • Topographical Maps • Contour Lines
Vocabulary • Rate of Change • Direct relationship • Indirect relationship • Dynamic Equilibrium • Density • Lithosphere • Topography • Elevation • Contour Lines • Contour interval • Gradient
International Date Line CANADA USA Australia
Astrolabe • Measures the angle between the horizon and an object in the sky.
Definitions Altitude – the angular distance of an object above the horizon. Celestial Sphere – A model of the nighttime sky that appears like a large dome with the highest point directly overhead called the zenith and the edge the horizon.
Topographic Map • What does a topographic map show you? A topographic map shows you elevation of the landscape including natural and man made features. Examples: mountains, plateaus, river valleys, wells, plains, etc.
Video Introduction to Topographic Maps http://www.youtube.com/watch?v=zqPMYGDxCr0
Constructing A Field Map From RegentsEarth.com
How to draw Isolines • An isoline is a line connecting points of equal value.
Rules for Drawing Isolines: Example # 1: 1. Isolines connect points of equal value. 5 5 10 10 10 10 15 15
2. Isolines are gentle, curving lines- no sharp corners. 5 5 10 10 10 10 15 15
3. Isolines are always closed curves even though the map might only show part of it.
REVIEW ISOLINE:A line on a map connecting all points of equal value 980 980 976 980 976 Contour NTERVAL: The numerical distance between isolines. 972 976 972 972 976 972 980 The interval is 4mb. 976 976 980 ! 980 980
Rate of Change A student released a balloon and recorded data on the graph (left). According to the graph at what rate did the balloon rise from time 5 minutes to time 10 minutes? a) 5000 m/min c) 200 m/min b) 1000 m/min d) 50 m/min Review Determine Rate of Change between 5 & 10 min! 2000-1000m 1000 m ------------------ --------- = ____ m/min 10-5 min 5 min.
Definitions Topography – An area’s natural and man-made surfaces. Contour Lines – Represents relief, elevation and slope. Elevation – height above sea level Contour Interval – The change in elevation from one contour line to the next.
Definitions Gradient – The distance between one contour line and the next shows its gradient. The gradient is the steepness of a slope. Gradient = change in elevation (meters) distance covered (km or miles)
Calculating Gradient • http://www.youtube.com/watch?v=KxeBAxUd4OU
Here we have another contour map. Your job is to construct a profile along a straight line from points A to B. A slightly different situation: The problem is that the grid on which the profile is to be constructed is in the answer booklet on a completely different page. To make matters worse, the line A-B on this map is on a slant. What to do?
Gradient Gradient of line x-y a) Gradient = change in field value distance covered (m) • ___310-115__meters = 195 m ? miles 15 mi. c) _13__m/miles
Gradient Gradient of line x-y a) Gradient = change in field value distance covered (m) • ___550-520__feet = 30 ft. ? miles 9 mi. c) _3.3__feet/miles
How To Draw Map PROFILES From RegentsEarth.com
This topographic map shows a region of space (a field) as it would appear if you were directly above it. convert this ‘above’ view into a side-ways view, a graph or profile of the region from point A to point B. You will need a pencil and a ruler. First: draw a line from point A to point B. At every point where line A-B crosses a contour line you will have to draw a line straight down to the corresponding line on the grid below.
Make a small mark at each point where you will draw a line. By counting these marks, there are 16 of them, you will know that you must draw 16 lines. The first mark you made was at point A. Notice that point A is on the 200m contour line. You must now draw a vertical line from point A to the 200m line on the grid below. The next mark is on the 300m contour line. Draw a vertical line from that mark to the 300m line on the grid below.
Now continue to draw straight, vertical lines from each mark to the appropriate line on the grid below. Using a pencil, connect the bottoms of the lines. Try to connect them with one smooth, curving line rather than a series of short, straight ones. Please notice that here the line went above 500m but well below 600m. That’s because this area of the map is above 500m but less than 600m. We know this because there is no 600m contour line here.
The same principle applies here. Your line must go below the 300m line and above the 200m line. That’s because if you were standing here you would be between the 200m and the 300m contour lines. And again, if you were here your altitude would be more than 600m but less than 800m (there is no 800m contour line on this map). Therefore you must be careful to make your line here go above 600m and below 800m. Make it OBVIOUS! Make your lines go in the middle between the grid lines so anyone scoring your profile will understand.
OK. Final check. You were supposed to draw 16 lines. Did you? Are the lines you drew straight, parallel and vertical? Are all the lines drawn to the proper grid line? Do your peaks and valleys go obviously between grid lines? Why bother checking? Because most students lose points not because they don’t know how to do this................. but because they’re NOT CAREFUL!
Here we have acontour map. Construct a profile along a straight line from points A to B. Contour Map
Using the contour interval below the map, carefully label each contour line crossed by line A-B with its elevation. STEP ONE 520 530 510 530 520 520 540 510 530 Make sure you don’t label this line........ It’s not a contour line. It’s Colden Creek.
Place a blank piece of paper (here shaded blue) over the map just under line A-B. STEP TWO 520 530 510 530 Make a small mark on the paper by each contour line. 520 520 540 510 530 A 550 Now label each mark with the value of the contour line it represents. B and label A and B so you’ll know which end is which. Reminder: The number 533 is the maximum elevation of Aurora Hill and the triangle marks that spot. It is NOT a contour line and should be ignored.
This is the grid as it appears in the answer booklet provided with the regents. You are to construct your profile on this grid. STEP THREE Take the paper you marked with the contour line values and line it up below the grid so that the ‘A’ mark on the paper is below ‘A’ on the grid and the ‘B’ mark on the paper is below ‘B’ on the grid. Now, just as you did in the first example, take a straight edge and carefully make an X on the grid correspond- ing to each value on the paper below. The X for points A and B have been made for you.
STEP THREE Many students prefer to draw the lines but you do not have to. You can just put in the X’s Now connect the X’s using a single, smooth, curving line. Be sure your ‘peaks’ and ‘valleys’ go above and below grid lines just as in the first example. x x x x x x One last check. You were supposed to have marked 10 points on this grid. Are they all there? x x YES! Counting the points marked for you (A and B) there are 10 X’s. WELL DONE!
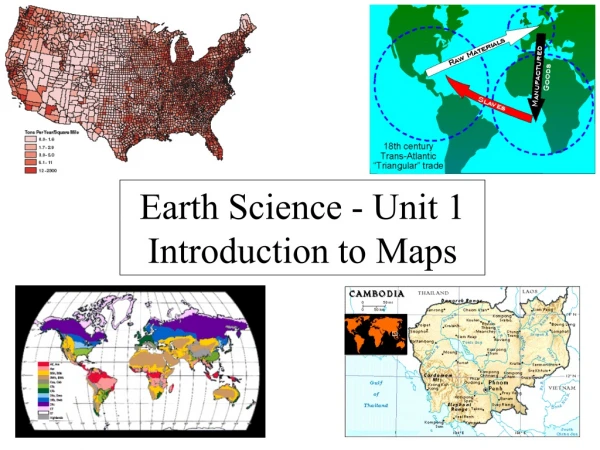
Question: What is the distance, in miles between Ithaca and Watertown, NY? Earth Science Reference Table Page 3 Generalized bedrock of NY State
Using an index card or blank piece of paper, line up one edge between the two cities. Be accurate!
Make a small, straight mark on the card at the location of each city (red lines).
Move the card to the key. Be sure to use the “miles” side since that’s what the question is asking for. Place one of the red marks on the 0.
With one of your red marks at the 0, make a mark at the end of the key at 50 miles (see blue line).
Now slide the card along until the blue mark is at 0. Make a note that the distance between your first red mark and the blue mark is 50 miles.
Make another mark at the end of the key (second blue mark) and note that the distance between the two blue marks is another 50 miles.
Slide the card over until the second blue mark is on the 0. Note that the distance between the blue mark and your second red mark is another 10 miles.
Now just add up the miles. Ithaca is 110 miles from Watertown.
Things to remember....................... 1) Read the question carefully. Be sure you know whether you’re measuring miles or kilometers. 2) When making the marks at the cities or mountains be sure your line is on the dot representing that city or the triangle representing the mountain. 3) Be accurate. Make small straight marks and keep track of distances measured at the key. 4) Go back and double check your work!
Vocabulary Quantitative Observation – Observation involving or relating to measurement or count. Qualitative Observation – Observation involving distinctions based on qualities such as color, texture, size.