
Uploaded by
jenis
0 SLIDES
245 VUES
0LIKES
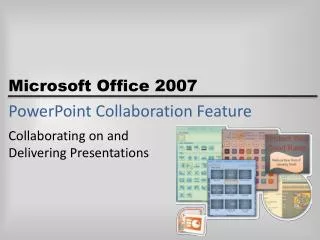
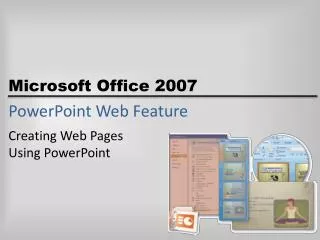
PowerPoint Online Feature
DESCRIPTION
PowerPoint Online Feature . Importing Files from the Microsoft Office Online Web Site. Objectives. Locate and download templates from the Microsoft Office Online Web site Save slides as images Add images to tables Select presentation resolution Change presentation orientation
Download

1 / 0
Download Presentation

Télécharger la présentation
PowerPoint Online Feature
An Image/Link below is provided (as is) to download presentation
Download Policy: Content on the Website is provided to you AS IS for your information and personal use and may not be sold / licensed / shared on other websites without getting consent from its author.
Content is provided to you AS IS for your information and personal use only.
Download presentation by click this link.
While downloading, if for some reason you are not able to download a presentation, the publisher may have deleted the file from their server.
During download, if you can't get a presentation, the file might be deleted by the publisher.
E N D
Presentation Transcript
-
PowerPoint Online Feature
Importing Files from the Microsoft Office Online Web Site - Objectives Locate and download templates from the Microsoft Office Online Web site Save slides as images Add images to tables Select presentation resolution Change presentation orientation Write VBA code to create a unique presentation Microsoft Office 2007: Comprehensive Concepts and Techniques - Windows Vista Edition
- Plan Ahead Use a hierarchy chart to depict relationships Determine the screen show ratio Desk check the application code before entering it into the Visual Basic Editor Microsoft Office 2007: Comprehensive Concepts and Techniques - Windows Vista Edition
- Starting PowerPoint, Open a Presentation, and Rename the Presentation Start PowerPoint and then open the presentation, Arbor Day, from the Data Files for Students Maximize the PowerPoint window, if necessary Save the presentation as Arbor Day Revised Save the document on your USB flash drive Microsoft Office 2007: Comprehensive Concepts and Techniques - Windows Vista Edition
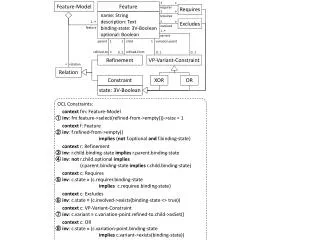
- Locating and Downloading a Relationship Diagram Template Click the Office Button and then click New to display the New Presentation dialog box Type relationship in the search text box and then click the Start searching button to search for and display all templates having the keyword, relationship If necessary, click the Relationship diagram thumbnail to display a preview of and information about this diagram With the Relationship diagram pictured in Figure 3 selected, click the Download button to download this template If the Microsoft Office Genuine Advantage dialog box is displayed, click the Continue button to download the template Save the Relationship diagram on your USB flash drive with the file name, Tree Relationship Microsoft Office 2007: Comprehensive Concepts and Techniques - Windows Vista Edition
- Locating and Downloading a Relationship Diagram Template Microsoft Office 2007: Comprehensive Concepts and Techniques - Windows Vista Edition
- Locating and Downloading a Timeline Template Click the Office Button, click New, and then type timeline in the search text box in the New Presentation dialog box Click the Start searching button to search for and display all templates having the keyword, timeline Click the Three-month timeline thumbnail shown in Figure 5 to select this template Click the Download button to download this template. If the Microsoft Office Genuine Advantage dialog box is displayed, click the Continue button to download the template Save the Three-month timeline diagram on your USB flash drive with the file name, Planting Timeline Microsoft Office 2007: Comprehensive Concepts and Techniques - Windows Vista Edition
- Locating and Downloading a Timeline Template Microsoft Office 2007: Comprehensive Concepts and Techniques - Windows Vista Edition
- Locating and Downloading a Hierarchy Template Display the New Presentation dialog box, type hierarchy in the search text box, and then click the Start searching button to search for and display all templates having the keyword, hierarchy If necessary, click the Hierarchy diagram thumbnail shown in Figure 6 to select this template Click the Download button to download this template. If the Microsoft Office Genuine Advantage dialog box is displayed, click the Continue button to download the template. Save the Hierarchy diagram on your USB flash drive with the file name, Beautification Committee Microsoft Office 2007: Comprehensive Concepts and Techniques - Windows Vista Edition
- Locating and Downloading a Hierarchy Template Microsoft Office 2007: Comprehensive Concepts and Techniques - Windows Vista Edition
- Inserting Templates into a Presentation Click the Arbor Day Revised button on the Windows Vista taskbar to display this presentation Display Slide 2. With the Home tab displayed and your USB fl ash drive connected to one of the computer’s USB ports, click the New Slide button arrow and then click Reuse Slides to display the Reuse Slides task pane Click the Browse button and then click Browse File to display the Browse dialog box. If necessary, double-click UDISK 2.0 (E:) to select the USB flash drive, Drive E in this case, as the device that contains the three templates Click Tree Relationship in the Browse dialog box to select the file and then click the Open button to display the template in the Reuse Slides dialog box Click the Tree Relationship preview to insert this slide into the Arbor Day Revised presentation Repeat Steps 3 through 5 to insert the Planting Timeline and the Beautification Committee templates in the Arbor Day Revised presentation Click the Close button in the Reuse Slides task pane so that it no longer is displayed Microsoft Office 2007: Comprehensive Concepts and Techniques - Windows Vista Edition
- Inserting Templates into a Presentation Microsoft Office 2007: Comprehensive Concepts and Techniques - Windows Vista Edition
- Setting Text Box Margins Display Slide 1, click the text box, and then right-click the text box to display the shortcut menu and the Mini toolbar Click Format Shape on the shortcut menu to display the Format Shape dialog box Click Text Box in the left pane and then click the Left up arrow in the Internal margin area repeatedly until 0.5" is displayed Click the Right up arrow in the Internal margin area repeatedly until 0.5" is displayed Click the Top down arrow to display a measurement of 0" Click the Bottom down arrow to display a measurement of 0“ Click the Close button in the Format Shape dialog box Microsoft Office 2007: Comprehensive Concepts and Techniques - Windows Vista Edition
- Setting Text Box Margins Microsoft Office 2007: Comprehensive Concepts and Techniques - Windows Vista Edition
- Ordering a Text Box on a Slide Drag the text box to the center of the tan root ball sack in the tree clip Right-click the root ball to display the shortcut menu and then point to Send to Back to display the Send to Back submenu Click Send to Back in the submenu to display the text box on top of the tan area of the tree clip With the Home tab displayed, select the text box and then click the Shape Outline button in the Drawing group to display the Shape Outline gallery Click No Outline to remove the border from the text box If necessary, drag the text box to position it in the center of the tan area Microsoft Office 2007: Comprehensive Concepts and Techniques - Windows Vista Edition
- Ordering a Text Box on a Slide Microsoft Office 2007: Comprehensive Concepts and Techniques - Windows Vista Edition
- Changing Table Text Alignment Display Slide 2, click a table cell, and then display the Layout tab Click the Select button in the Table group to display the Select menu Click Select Table in the Select menu to select the entire table Click the Center Vertically button in the Alignment group to center the text in the middle of each cell in the table Microsoft Office 2007: Comprehensive Concepts and Techniques - Windows Vista Edition
- Changing Table Text Alignment Microsoft Office 2007: Comprehensive Concepts and Techniques - Windows Vista Edition
- Changing Table Text Orientation With the Layout tab displayed, click the Shade cell and then drag down to select both the Shade and Evergreen table cells Click the Text Direction button in the Alignment group to display the Text Direction gallery Click ‘Rotate all text 270°’ to rotate the text in the two cells Click the Center button in the Alignment group to center the Evergreen and Shade text Microsoft Office 2007: Comprehensive Concepts and Techniques - Windows Vista Edition
- Changing Table Text Orientation Microsoft Office 2007: Comprehensive Concepts and Techniques - Windows Vista Edition
- Adding an Image to a Table Right-click the upper-left table cell to display the shortcut menu and Mini toolbar Click Format Shape to display the Format Shape dialog box and then click Picture or texture fill Click the Insert from File button to display the Insert Picture dialog box Select the Foliage picture on the Data Files for Students and then click the Insert button in the Insert Picture dialog box to insert the picture into the table cell Click the Close button in the Format Shape dialog box Microsoft Office 2007: Comprehensive Concepts and Techniques - Windows Vista Edition
- Adding an Image to a Table Microsoft Office 2007: Comprehensive Concepts and Techniques - Windows Vista Edition
- Entering Text in a Relationship Diagram Display Slide 3 and then click the Relationship diagram to select it and display the Text pane, if necessary, by clicking the Text pane control on the left side of the diagram Select the Department 1 text in the Text pane and then type Control soil erosion in the first bullet line Select the Department 2 text and then type Remove carbon dioxide from air in the second bullet line Select the Department 3 text and then type Increase property values in the third bullet line Select the Department 4 text and then press the DELETE key to eliminate this shape from the diagram Select the Relationship Diagram slide title and then type Benefits of Planting Trees as the new title text Microsoft Office 2007: Comprehensive Concepts and Techniques - Windows Vista Edition
- Entering Text in a Relationship Diagram Microsoft Office 2007: Comprehensive Concepts and Techniques - Windows Vista Edition
- Zooming a Slide Display Slide 5 Click the Zoom In button as many times as necessary until the Zoom level button displays 110% on its face Microsoft Office 2007: Comprehensive Concepts and Techniques - Windows Vista Edition
- Zooming a Slide Microsoft Office 2007: Comprehensive Concepts and Techniques - Windows Vista Edition
- Entering Text in a Hierarchy Diagram Click the Hierarchy diagram to select it and display the Text pane Type Jim DeYoungas the first bulleted Name text and type President as the new Title text Continue replacing the default text in the Text pane with the names and titles Type Beautification Committee Members as the new Hierarchy Diagram title text Microsoft Office 2007: Comprehensive Concepts and Techniques - Windows Vista Edition
- Entering Text in a Hierarchy Diagram Microsoft Office 2007: Comprehensive Concepts and Techniques - Windows Vista Edition
- Modifying Timeline Diagram Text Display Slide 4. Click the Zoom Out button as many times as necessary until the Zoom level button displays 80% on its face Select the Timeline Title slide title and then type Tree Care Schedule as the new title text. Select the first column heading, JAN, and then type April as the new column title text Type May as the new second column title and June as the new third column title Select the first row title, Line 1, and then type Prune as the new text Microsoft Office 2007: Comprehensive Concepts and Techniques - Windows Vista Edition
- Modifying Timeline Diagram Text Type Plant as the new second row title and Water as the new third row title Select the Line 4 and Line 5 row titles and then press the DELETE key to delete this text Select the numbers 8, 15, and 22 under the April heading and then press the DELETE key to delete this text Delete the numbers12 and 19 under the May and June headings Microsoft Office 2007: Comprehensive Concepts and Techniques - Windows Vista Edition
- Modifying Timeline Diagram Text Change the first April date, 1, to 16 and the second April date, 29, to 30 Change the first May date, 5, to 10 and the second May date, 26, to 31 Change the first June date, 5, to 15 and the second June date, 26, to 30 Microsoft Office 2007: Comprehensive Concepts and Techniques - Windows Vista Edition
- Modifying Timeline Diagram Text Microsoft Office 2007: Comprehensive Concepts and Techniques - Windows Vista Edition
- Modifying Timeline Graphics Select the line between the two diamonds under the April heading and drag it down to align with the diamond in the Prune row Select the diamond shape in the April 16 column and drag it down to align with the Prune line Select the top diamond shape in the April 30 column Press the DELETE key to delete this diamond Click the Edit text box border under the June heading to select this object Microsoft Office 2007: Comprehensive Concepts and Techniques - Windows Vista Edition
- Modifying Timeline Graphics Press the DELETE key to delete the text box Select the On time! text in the bottom-right corner of the diagram and then type Plant a tree on Arbor Day! As the new text box text Drag this text box and the diamond shape to the left so that they are positioned under the April column heading Click the Plant right diamond shape and then drag it under the May 31 heading Click the Water right diamond shape and then drag it under the June 30 heading Click the Water left diamond shape and then drag it under the June 15 heading Microsoft Office 2007: Comprehensive Concepts and Techniques - Windows Vista Edition
- Modifying Timeline Graphics Microsoft Office 2007: Comprehensive Concepts and Techniques - Windows Vista Edition
- Adding Line Shapes to a Timeline Display the Format tab and then click the Line shape in the Insert Shapes gallery Position the mouse pointer to the right of the number 16 under the April heading. Click and then drag the line to the left of the number 30 Repeat Steps 1 and 2 to insert a line between the May 10 and 31 headings and the June 15 and 30 headings. Microsoft Office 2007: Comprehensive Concepts and Techniques - Windows Vista Edition
- Adding Line Shapes to a Timeline Microsoft Office 2007: Comprehensive Concepts and Techniques - Windows Vista Edition
- Changing a Line Shape Color With the Format tab displayed and June line selected, click the Shape Outline button in the Shape Styles group to display the Shape Outline color palette Click Red (column 2) in the Standard Colors area to apply this color to the line Select the May line and then click the Shape Outline button to apply the Red color to the line Apply the Red color to the April line Microsoft Office 2007: Comprehensive Concepts and Techniques - Windows Vista Edition
- Changing a Line Shape Color Microsoft Office 2007: Comprehensive Concepts and Techniques - Windows Vista Edition
- Copying a Formatted Table to the Title Slide Display Slide 2. With the Home tab displayed, click a gray area of the slide other than the table or the title text placeholder and then click the Select button in the Editing group to display the Select menu Click Select All in the Select menu and then click the Copy button in the Clipboard group Display Slide 1 and then click the Paste button arrow in the Clipboard group to display the Paste menu Click Paste Special and then click Picture (PNG) in the Paste Special dialog box to select this picture type Click the OK button to paste the table in the title slide Display the Format tab and then click the Shape Height down arrow in the Size group to reduce the table height to 2.0“ Drag the table to the upper-left corner of the slide Microsoft Office 2007: Comprehensive Concepts and Techniques - Windows Vista Edition
- Copying a Formatted Table to the Title Slide Microsoft Office 2007: Comprehensive Concepts and Techniques - Windows Vista Edition
- Copying Formatted Templates to the Title Slide Display Slide 3. With the Home tab displayed, click a gray area of the slide, click the Select button in the Editing group to display the Select menu, and then click Select All Click the Copy button in the Clipboard group, display Slide 1, click the Paste button arrow in the Clipboard group, and then click Paste Special in the Paste menu Click Picture (PNG) in the Paste Special dialog box to select this picture type and then click the OK button to paste the Relationship diagram in the title slide Size the diagram so its height is 2.0". Drag the diagram to the upper-right corner of the slide Repeat Steps 1 through 4 for the Hierarchy diagram on Slide 4 and the Timelines diagram on Slide 5. Position these objects as shown in Figure 43 Microsoft Office 2007: Comprehensive Concepts and Techniques - Windows Vista Edition
- Copying Formatted Templates to the Title Slide Microsoft Office 2007: Comprehensive Concepts and Techniques - Windows Vista Edition
- Animating the Slide 1 Objects Click the Zoom Out button as many times as necessary until the Zoom level button displays 70% on its face. Display the Animations tab and then click the Custom Animation button in the Animations group to display the Custom Animation task pane. Select the Trees table object, click the Add Effect button, point to Entrance in the Add Effect menu, and then click More Effects Click Dissolve In in the Basic category and then click the OK button to close the Add Entrance Effect dialog box Click the Start box arrow and then click After Previous. Click the Speed box arrow and then click Slow Click the Add Effect button, point to Exit in the Add Effect menu, and then click More Effects Click Box in the Basic category and then click the OK button to close the Add Exit Effect dialog box. Change the Speed to Slow Repeat Steps 1 through 5 above for the Tree Relationship, the Planting Timeline, and the Beautification Committee objects Click the Close button in the Custom Animation task pane so that it no longer is displayed Microsoft Office 2007: Comprehensive Concepts and Techniques - Windows Vista Edition
- Animating the Slide 1 Objects Microsoft Office 2007: Comprehensive Concepts and Techniques - Windows Vista Edition
- Setting Slide Size Display the Design tab and then click the Page Setup button in the Page Setup group to display the Page Setup dialog box Click the ‘Slides sized for’ arrow to display the size list Click ‘On-screen Show (16:10)’ to change the slide size setting Click the OK button to change the slide size in the presentation Microsoft Office 2007: Comprehensive Concepts and Techniques - Windows Vista Edition
- Setting Slide Size Microsoft Office 2007: Comprehensive Concepts and Techniques - Windows Vista Edition
- Selecting Presentation Resolution Display the Slide Show tab and then click the Set Up Slide Show button in the Set Up group to display the Set Up Show dialog box Click the ‘Slide show resolution’ arrow in the Performance area to display the resolution list Click 800 600 to change the slide show resolution setting Click the OK button to change the presentation resolution Microsoft Office 2007: Comprehensive Concepts and Techniques - Windows Vista Edition
- Selecting Presentation Resolution Microsoft Office 2007: Comprehensive Concepts and Techniques - Windows Vista Edition
- Saving a Slide as an Image Display Slide 2, click the Office Button, and then point to Save As to display the Save As submenu Click Other Formats on the Save As submenu to display the Save As dialog box Type Regional Trees in the File name text box and then click the ‘Save as type’ arrow to display the Save as type list Click JPEG File Interchange Format in the Save as type list to change the file type Click the Save button in the Save As dialog box Click the Current Slide Only button in the Microsoft Office PowerPoint dialog box to save only Slide 2 as a file in .jpeg format Microsoft Office 2007: Comprehensive Concepts and Techniques - Windows Vista Edition
- Saving a Slide as an Image Microsoft Office 2007: Comprehensive Concepts and Techniques - Windows Vista Edition
- Adding a Transition between Slides Display the Animations tab and then display the Transitions gallery. Click the Uncover Up transition (row 2, column 3) in the Wipes category Change the Transition Speed to Slow and then apply this transition and speed to all slides Microsoft Office 2007: Comprehensive Concepts and Techniques - Windows Vista Edition
- Changing Document Properties and Saving the Presentation Display the Document Information Panel and then type your name as the Author property Type your course and section as the Subject property Type Arbor Day, regional trees, Beautification Committee as the Keywords property Close the Document Information Panel and then save the presentation on the USB flash drive Microsoft Office 2007: Comprehensive Concepts and Techniques - Windows Vista Edition
- Closing the Downloaded Template Right-click the Tree Relationship button on the Windows Vista taskbar and then click Close Repeat Step 1 for the Planting Timeline and the Beautification Committee files Microsoft Office 2007: Comprehensive Concepts and Techniques - Windows Vista Edition
- Inserting a Slide and then Adding and Formatting a Shape Insert a new slide at the end of the Arbor Day Revised presentation and apply the Title Only slide layout With the Home tab displayed, click the Shapes button in the Drawing group and then click the Regular Pentagon shape (row 1, column 8 in the Basic Shapes area) Click Slide 6 anywhere below the title text placeholder to insert the shape and then size the Regular Pentagon shape to a height of 2.5" and a width of 2.7". Apply the Intense Effect – Accent 1 Shape Style (row 6, column 2) to the shape Microsoft Office 2007: Comprehensive Concepts and Techniques - Windows Vista Edition
- Inserting a Slide and then Adding and Formatting a Shape Microsoft Office 2007: Comprehensive Concepts and Techniques - Windows Vista Edition
- Copying a Shape Display the Home tab and then click the Copy button in the Clipboard group Click the Paste button in the Clipboard group twice to insert two Regular Pentagon shapes on Slide 6 Microsoft Office 2007: Comprehensive Concepts and Techniques - Windows Vista Edition
- Copying a Shape Microsoft Office 2007: Comprehensive Concepts and Techniques - Windows Vista Edition
- Displaying the Gridlines and Aligning the Shapes Right-click Slide 6 anywhere except the title text and shapes to display the shortcut menu Click Grid and Guides on the shortcut menu to display the Grid and Guides dialog box and then click the ‘Display grid on screen’ check box in the Grid settings area Click the OK button to display the grids Drag each shape to the locations Microsoft Office 2007: Comprehensive Concepts and Techniques - Windows Vista Edition
- Displaying the Gridlines and Aligning the Shapes Microsoft Office 2007: Comprehensive Concepts and Techniques - Windows Vista Edition
- Duplicate a Slide With Slide 6 and the Home tab displayed, click the New Slide button arrow to display the Apex layout gallery Click Duplicate Selected Slides to insert a new Slide 7, which is identical to Slide 6 Microsoft Office 2007: Comprehensive Concepts and Techniques - Windows Vista Edition
- Adding Text to Shapes and the Title Text Placeholders Display Slide 6 and then type What tree type is best for blocking winter winds? in the title text placeholder If necessary, select the title text placeholder, click the Shape Fill button arrow in the Drawing group, and then click Red (column 2 in the Standard Colors area) to add a fill color to the title text placeholder Select the left Regular Pentagon shape and then type Evergreen in the shape Select the middle shape and then type Shade in the shape. Select the right shape and then type Palm in the shape Change the font color of these three answers to Red and the font size to 20 point Microsoft Office 2007: Comprehensive Concepts and Techniques - Windows Vista Edition
- Adding Text to Shapes and the Title Text Placeholders Display Slide 7 and then type Why are trees beneficial to the environment? In the title text placeholder Select the title text placeholder, if necessary, and then click the Shape Fill button to add a Red fill color to the title text placeholder. Type They reduce oxygen in the air in the left shape, type They contribute to erosion in the center shape, and then type They increase property values in the right shape Change the font color of these three answers to Red and the font size to 20 point Microsoft Office 2007: Comprehensive Concepts and Techniques - Windows Vista Edition
- Adding Text to Shapes and the Title Text Placeholders Microsoft Office 2007: Comprehensive Concepts and Techniques - Windows Vista Edition
- Inserting and Ordering a Picture on a Slide Display Slide 6, display the Insert tab, and then click the Picture button to display the Insert Picture dialog box Select the Evergreens picture on the Data Files for Students and then click the Insert button in the Insert Picture dialog box to insert the picture on Slide 6 Drag the Evergreens sizing handles so the picture covers the entire slide Click the Send to Back button in the Arrange group to move the Evergreens picture under the Slide 6 content Display Slide 7, display the Insert tab, and then insert the Forest picture on the Data Files for Students Drag the Forest sizing handles so the picture covers the entire slide Click the Send to Back button in the Arrange group to move the Forest picture under the Slide 7 content Microsoft Office 2007: Comprehensive Concepts and Techniques - Windows Vista Edition
- Inserting and Ordering a Picture on a Slide Microsoft Office 2007: Comprehensive Concepts and Techniques - Windows Vista Edition
- Hiding Gridlines Display the View tab and then click Gridlines Microsoft Office 2007: Comprehensive Concepts and Techniques - Windows Vista Edition
- Entering the Create Quiz Procedures Click the Office Button and then click the PowerPoint Options button to display the PowerPoint Options dialog box Click the Show Developer tab in the Ribbon check box Click the OK button to close the PowerPoint Options dialog box Click Developer to display the Developer tab Click the Visual Basic button in the Code group to open the Microsoft Visual Basic Editor Microsoft Office 2007: Comprehensive Concepts and Techniques - Windows Vista Edition
- Entering the Create Quiz Procedures Click the Insert UserForm button arrow on the Standard toolbar to display the Insert UserForm list Click Module in the Insert UserForm list to display the Visual Basic Editor If necessary, click the Maximize button in the Arbor Day Revised – [Module1 (Code)] window to maximize the window Type the nine comment statements (lines 1 through 9) shown in Table 1. Be certain to enter an apostrophe at the beginning of each comment line Press the ENTER key to position the insertion point on the next line Enter lines 10 through 18 shown in Table 1 Click the Microsoft PowerPoint button on the Standard toolbar to return to Slide 7 Microsoft Office 2007: Comprehensive Concepts and Techniques - Windows Vista Edition
- Entering the Create Quiz Procedures Microsoft Office 2007: Comprehensive Concepts and Techniques - Windows Vista Edition
- Assigning a Macro to the First Quiz Question Shapes Display Slide 6, click the Evergreen shape anywhere but the text, and then display the Insert tab Click the Action button in the Links group to display the Action Settings dialog box With the Mouse Click tab displayed, click Run macro, and then verify that CorrectAnswer is the macro name displayed in the Run macro box Click the OK button to apply the CorrectAnswer macro to the Evergreen shape. Click the Shade shape anywhere but the text and then, if necessary, display the Insert tab Microsoft Office 2007: Comprehensive Concepts and Techniques - Windows Vista Edition
- Assigning a Macro to the First Quiz Question Shapes Click the Action button in the Links group, click Run macro in the Action Settings dialog box, click the Run macro arrow, and then click WrongAnswer in the macro list Click the OK button to apply the WrongAnswer macro to the Shade shape Click the Palm shape anywhere but the text, click the Action button in the Links group on the Insert tab, click Run macro, and then select WrongAnswer in the macro list Click the OK button to apply the WrongAnswer macro to the Palm shape Microsoft Office 2007: Comprehensive Concepts and Techniques - Windows Vista Edition
- Assigning a Macro to the First Quiz Question Shapes Microsoft Office 2007: Comprehensive Concepts and Techniques - Windows Vista Edition
- Assigning a Macro to the Final Quiz Questions Shapes Display Slide 7. With the Insert tab displayed, click the right shape, which displays the text, They increase property values Display the Action Settings dialog box, click Run macro, and then display the macro list. Click LastCorrect to select this macro Click the OK button to apply the LastCorrect macro to the right shape Click the left shape, click the Action button, click Run macro in the Action Settings dialog box, select WrongAnswer in the macro list, and then click the OK button Apply the Wrong Answer macro to the middle shape and then click the OK button Microsoft Office 2007: Comprehensive Concepts and Techniques - Windows Vista Edition
- Assigning a Macro to the Final Quiz Questions Shapes Microsoft Office 2007: Comprehensive Concepts and Techniques - Windows Vista Edition
- Saving the Presentation with a Macro Display the Save As dialog box, click the Save as type arrow, and then click PowerPoint Macro- Enabled Presentation in the Save as type list Type Arbor Day Revised Macro in the File name text box Click the Save button to save the presentation with a macro Microsoft Office 2007: Comprehensive Concepts and Techniques - Windows Vista Edition
- Saving the Presentation with a Macro Microsoft Office 2007: Comprehensive Concepts and Techniques - Windows Vista Edition
- Testing Macro Settings Click the Office Button, click the PowerPoint Options button, and then click the Trust Center link in the left pane Click the Trust Center Settings button in the Microsoft Office PowerPoint Trust Center area to view the Macro Settings If is it not already selected, click the ‘Enable all macros’ option Click the OK button to apply this macro setting and to close the Trust Center dialog box Click the OK button to close the PowerPoint Options dialog box Microsoft Office 2007: Comprehensive Concepts and Techniques - Windows Vista Edition
- Testing Macro Settings Microsoft Office 2007: Comprehensive Concepts and Techniques - Windows Vista Edition
- Running a Slide Show with Macros Click Slide 1 on the Slides tab. Click the Slide Show button to run the slide show and display Slide 1. Click to display the template images that are pasted on the slide Display Slides 2, 3, 4, and 5 Display Slide 6. Click a shape with an incorrect answer and view the message box indicating that your choice was wrong. Click the OK button in this message box to close it. Click the other incorrect answer, view the message box, and then click the OK button in this message box Click the correct answer and view the message box. Click the OK button to close this message box Display Slide 7. Repeat Steps 3 and 4 to view the message boxes for the incorrect and correct answers. Click the OK button in the message box Click Slide 7 so that the black slide appears announcing the end of the slide show Microsoft Office 2007: Comprehensive Concepts and Techniques - Windows Vista Edition
- Previewing and Printing Handouts Use Print Preview to preview the Arbor Day Revised Macro presentation Click Handouts (4 Slides Per Page) in the Print What list Click the Page Orientation button in the Page Setup group and then click Landscape in the Orientation list Click the Options button in the Print group and then Header and Footer in the Options list Click Header and then type Celebrate Arbor Day in the Header text box. Click the Apply to All button in the Header and Footer dialog box Print the handouts Close Print Preview and return to Normal view Microsoft Office 2007: Comprehensive Concepts and Techniques - Windows Vista Edition
- Reset Settings and Quitting PowerPoint On the Slide Show tab, click the Resolution arrow in the Monitors group. Click Use Current Resolution or the original setting you changed On the Design tab, click the Page Setup button. Click the ‘Slides sized for’ arrow and then scroll up and click On-Screen Show (4:3). Click the OK button to close the dialog box Display the Office Button menu, click the PowerPoint Options button, click Trust Center in the left pane, click the Trust Center Settings button, and then click ‘Disable all macros with notification’ or the original setting you changed to run the macro in this project Click the OK button to close the Trust Center dialog box and then click the OK button to close the PowerPoint Options dialog box Display the Office Button menu and then click the Exit PowerPoint button to close all open documents and quit PowerPoint If a Microsoft Office PowerPoint dialog box is displayed, click the Yes button to save the changes Microsoft Office 2007: Comprehensive Concepts and Techniques - Windows Vista Edition
- Summary Locate and download templates from the Microsoft Office Online Web site Save slides as images Add images to tables Select presentation resolution Change presentation orientation Write VBA code to create a unique presentation Microsoft Office 2007: Comprehensive Concepts and Techniques - Windows Vista Edition
-
PowerPoint Special Feature 3 Complete


More Related
Audio
Live Player