Updating your iPad to iOS7
120 likes | 268 Vues
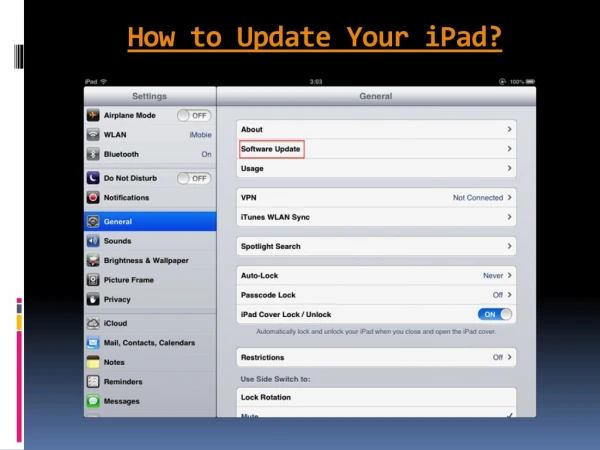
Updating your iPad to iOS7. iOS 6. iOS 7. Tap the SETTINGS Icon. Tap “General” then “Software Update”. Tap “Install Now”. Agree to Terms and Conditions. If you get an error, “Unable to check for update” … Tap Wi-Fi. Tap the blue arrow. Delete all proxy info. Tap OFF under HTTP PROXY.

Updating your iPad to iOS7
E N D
Presentation Transcript
Updating your iPad to iOS7 iOS 6 iOS 7
If you get an error, “Unable to check for update” …Tap Wi-Fi. Tap the blue arrow. Delete all proxy info.Tap OFF under HTTP PROXY. When you look under HTTP PROXY, you likely have the server, port, username, password filled out. Due to changes to the network, you should delete these and switch HTTP Proxy to OFF. Then open Safari, login with network ID, and try steps on previous slide again.
Your iPad will take some time to update.Once complete, “Slide to unlock” and “Continue”.
Disable Location Services.Tap “OK” to confirm Disabled Location Services. Note: if your students are using Twitter, taking pictures, etc on the iPad, these items will be tagged with the location. This is why we generally default Location Services as Disabled.
Sign in with your Apple ID (see next slide) OR Skip This Step then confirm “Skip”. If you don’t have an Apple ID (iTunes account), skip this step. If you do, feel free to sign in at this point.
Create a Passcode (required initially).Then “Get Started”. • If you want to remove the Passcode later, go to: • Settings • General • Passcode • Enter your Passcode • Turn Passcode Off
Tap the “Settings” icon. Tap “iTunes & App Store”.Turn automatic App Updates ON.
Removing Proxy Settings (if you didn’t do this earlier).Tap Wi-Fi. Tap the “i”. Delete all proxy info.Tap OFF under HTTP PROXY. When you look under HTTP PROXY, you likely have the server, port, username, password filled out. Due to changes to the network, you should delete these and switch HTTP Proxy to OFF. Now when you open Safari, you’ll be asked to sign in.