Download
1 / 2
20 likes | 83 Vues
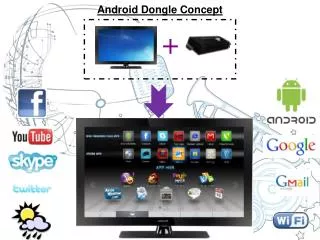
Our Website gives more information about jio

E N D
Jiofi Local Html Mifi Dongle 2 Settings Configuration of the Jiofi MiFi Dongle in Jiofi.local.html Our can show the login process into your Jio MiFi Device. Then Logon into the official website of Jiofi.local.Html After logon into the link you can see the right side corner of your screen “Login” button will be present. Then Click on that enter the Username as admin and Password. Then Click on Login button. You can also change the login details in the settings tab. Enable the Mac Address Filter Then again logon into the jiofi.local.html click on login button. Login with your respective Username and Password. After Click on “Setting” tab. Then Select the “Network”. Then it Enable the MAC Address Filter. After Add the respective MAC ID’s that would like to allow or deny access. Click on Submit Button. Change the Wi-Fi Settings in Jio Dongle 2 After again Logon into the Jiofi Device. Click on setting button. It will display the Jiofi Wi-Fi Settings now you can change your Broadcasting SSID and Security Key. Write the SSID which one you want to display in Wi-Fi. Then choose your Security Key its nothing but your Password. Select the Channel mode as Manual. Finally click on apply button. Steps to Access the Storage in Jiofi 2 MiFi
It is as usual process as mentioned above i.e. Login into your Jiofi link. Come to Setting option Select the Storage Button. Then it will enable the Storage Account. After this set the Storage Username and Password. Click on Apply Button. Now you can access your Storage Slot in Jiofi MiFi by entering into jiofi.local.html. You can see your Files available in the Data Card. Change the Login Details in Jiofi Wi-Fi Device Re-logon into the jiofi.local.html Click on Login button. Enter the Username and Password Then go to Setting Tab choose the User Management Button. Then choose your Respective Username and Password by entering New Password. Our site can suggest not to change any details other than these. Because if you disturb the other settings our site cannot responsible for those mistakes. Finally you can check the Battery Status in the “Device Details” tab. See the Battery level.