Download

1 / 7
70 likes | 92 Vues
Comprehensive guide for diaphragm valve maintenance with detailed installation and torque procedures to ensure proper functioning and prevent premature failure. Follow step-by-step instructions to maintain valve integrity.

E N D
Diaphragm Valve Maintenance Instructions Prepared November, 8th, 2006 for: Tel – 905-677-9000 Contact – Marilyn Walden Doug Perkins Gemu Regional Manager Tel – 248-393-3950
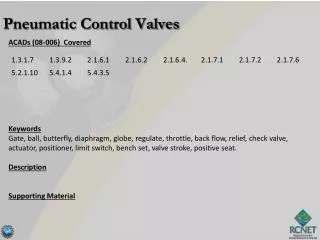
PROCESS DIAPHRAGM INSTALLATION Threaded Types – Image 1 Screw the diaphragm clockwise into the adapter manually so that the diaphragm boss fits closely in the recess of the compressor. When resistance is felt turn the diaphragm anti-clockwise until the bolt holes are in correct alignment with the bolt of the actuator. Do not over tighten the diaphragm into the compressor as this causes the spindle to keep traveling into the compressor, but the boss has run out of travel distance. This is turn does not allow the center of the diaphragm to compress onto the center of the weir and may allow the valve to leak and/or may cause premature failure. Push Fit Types (601, 602, 605) – Image 2 Place the fastening spigot of the diaphragm in an inclined position at the hole of the compressor. Push and twist slightly and the spigot will pop into place in the compressor. Do a visual check that the spigot is sitting clean in the compressor. Images on next page:
If you over tighten the diaphragm into the compressor. The spindle continues into the compressor, diaphragm boss has no where to travel. Compressor Spindle Diaphragm Boss This in turn can cause the spindle to separate from the diaphragm, stiffen the center of the diaphragm causing leakage and/or premature failure Prepared 03-29-05 Subject to change without notice.
Torque Procedure It is important to tighten the screws in a cross pattern order to avoid one-sided deformity of the diaphragm. It is very important not to tighten one side all or most of the way down. Tighten each screw a little bit at a time drawing the bonnet down towards the body in a level manner. Attainment of the maximum values guide is recommended. In the event there is insufficient space for the utilization of a torque wrench. The actual compression of the diaphragm should range between 15-20%of its original thickness. Diaphragm compression greater than this will result in reduced life or/and failure. When torturing the bonnet down by optical sight lines, snug the screws so that bonnet flange is parallel with the body flange. Tighten each screw a little at a time in an axis pattern till 15% - 20% compression of original thickness achieved. Keep watch along the sight lines that one corner is not pulling down farther than the rest. Always, ensure that the diaphragm is in the open position when tightening down the bonnet.
If this corner were tightened too far, when the opposite corner tightened down so that the bonnet and body flanges are parallel, this corner of the diaphragm could be crushed. Installing bonnet with diaphragm in the close position causes the diaphragm to impact into the weir, crushing the center portion of the diaphragm face. Over-tightening one corner causes the body to twist out of profile. This could cause the valve to leak and/or damage the diaphragm. Bonnet Flange Sightline Body Flange Sightline Prepared 03-28-05 Subject to change without notice.